Your rooftop tent is only 20% of the equation. We’ve all been there, right? Fumbling with zippers in the dark, waking up to a damp mattress from condensation, or tripping over a chaotic mess of gear just to find a head torch. It’s frustrating when your dream rig doesn’t quite live up to the hype, especially after a long day on the tracks. The promise of a quick, comfortable camp can quickly fade when you’re battling clutter and a slow pack-down.
These conversations often branch out from gear to destinations, from the best tracks in the High Country to epic water adventures. For inspiration, you can discover more about Shoshone Rapids Rafting to see how water-based thrills can be added to overland journeys.
This modular philosophy doesn’t just apply to vehicles; for adventurers dreaming of a more permanent basecamp, companies like Ready Nest are taking the concept of flexible, adventure-ready living to the next level with premium portable homes.
But what if you could finally nail the other 80%? We’re here to show you exactly how! Get ready to discover 15 game-changing roof top tent setup ideas that will transform your 4WD into the ultimate off-grid basecamp for 2026. We’re talking about a high-performance, ridiculously comfortable, and completely sustainable home on wheels. From genius power and lighting solutions to seamless awning and kitchen integrations, this guide is your ticket to a faster, smarter, and more epic camping experience.
Key Takeaways
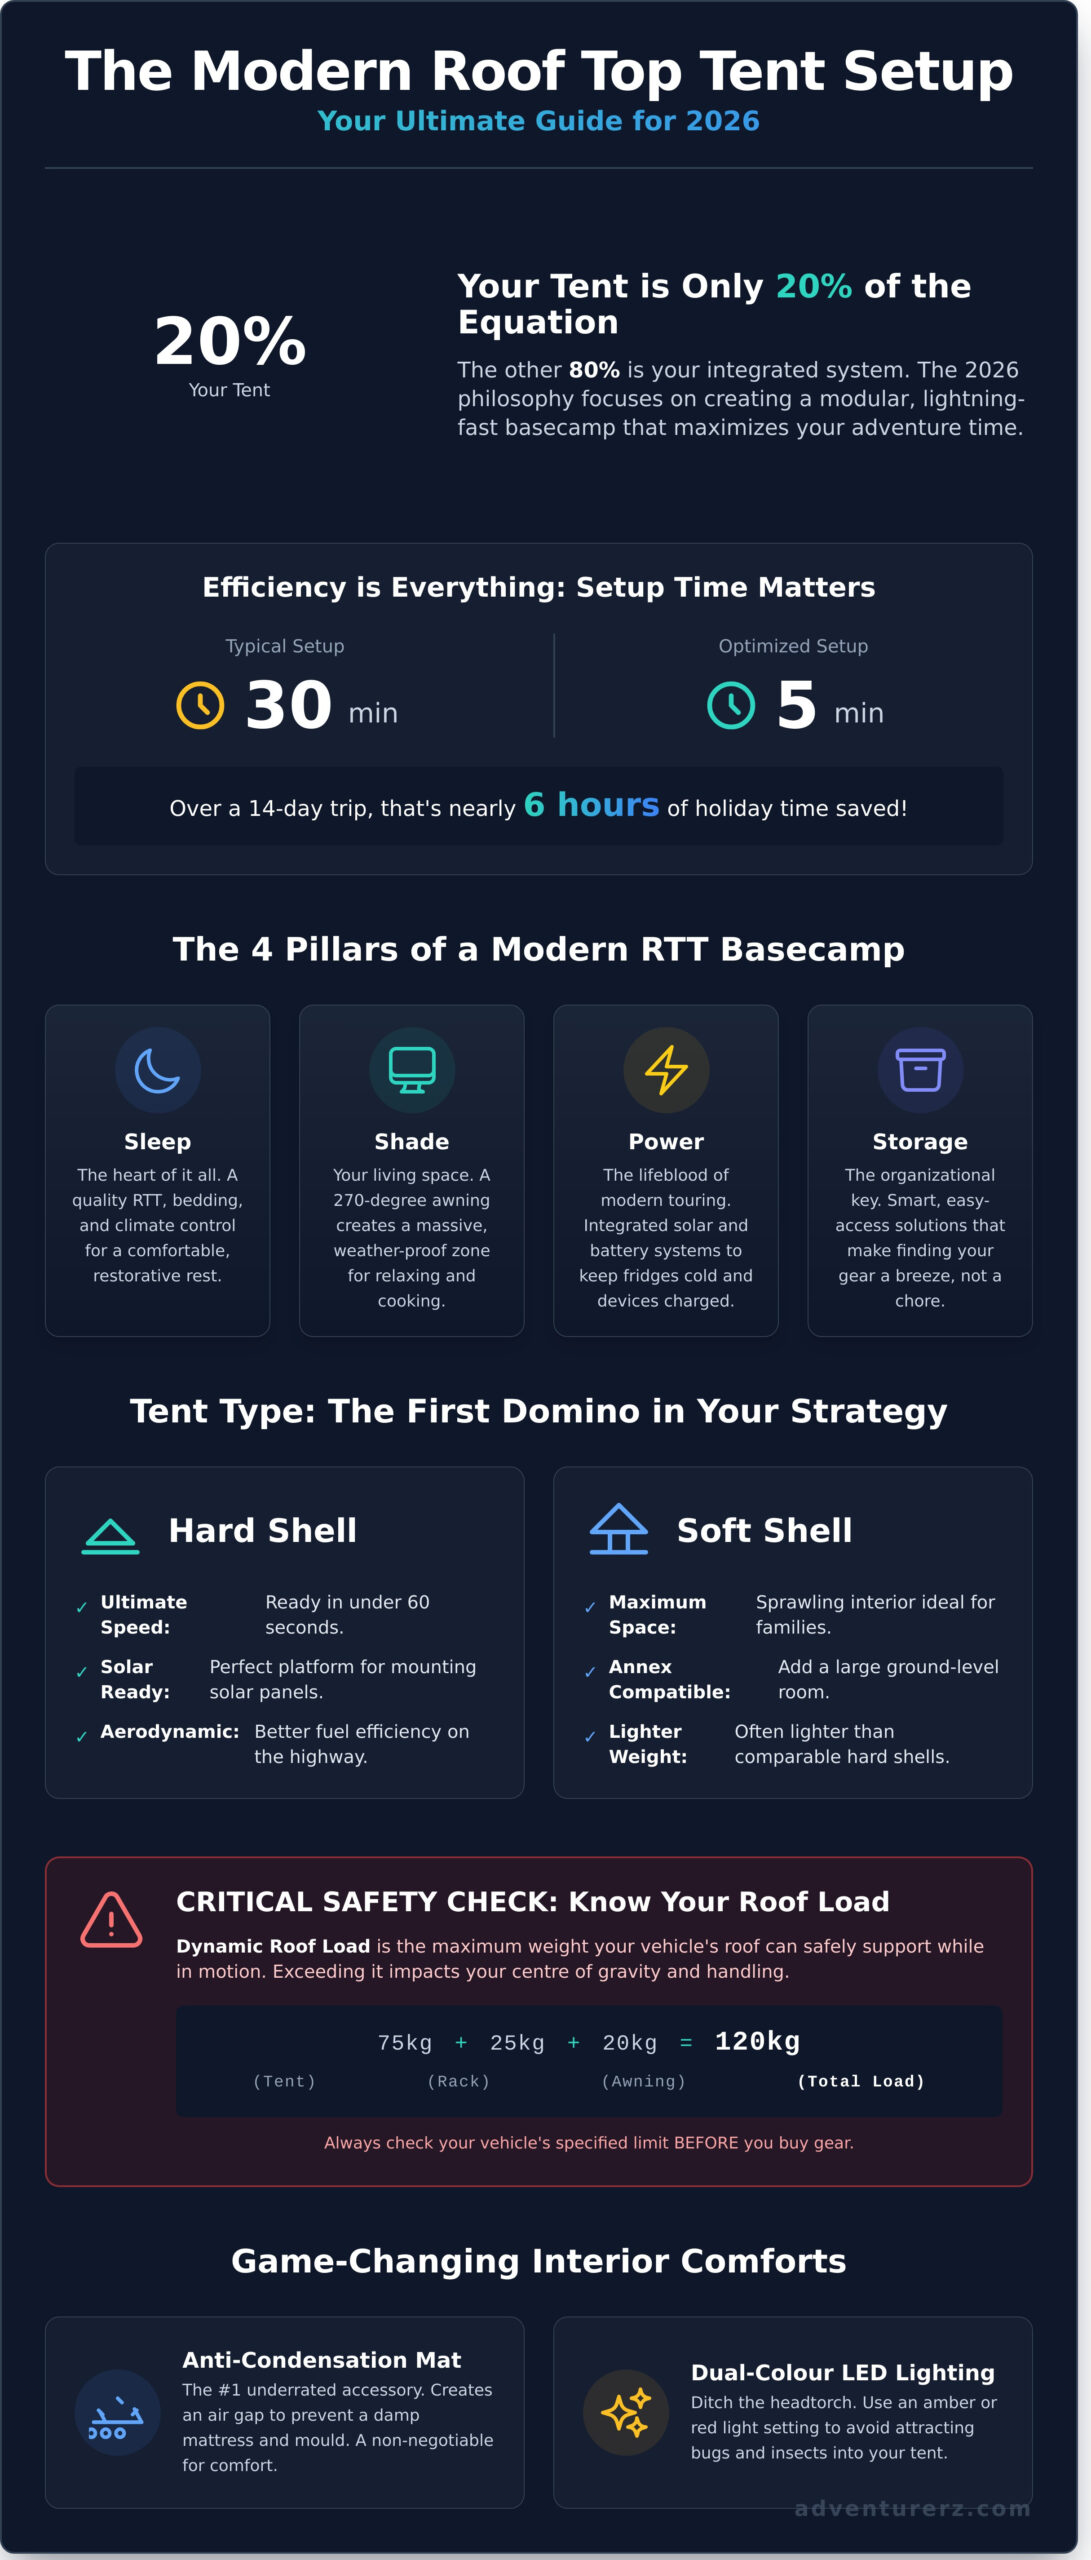
- Discover the 2026 philosophy of RTT camping, focusing on modularity and lightning-fast setup times to maximise your adventure.
- Unlock the secrets to 5-star comfort inside your tent, including the one underrated accessory that banishes condensation for good.
- We share brilliant roof top tent setup ideas that integrate 270-degree awnings to create a massive, weather-proof outdoor living space.
- Master your off-grid power system by learning how to mount solar directly to your hard-shell and bring essential 12V power into your tent.
- Get our step-by-step roadmap to build out your ultimate setup on a budget, all while making responsible, ‘Leave No Trace’ gear choices.
Beyond the Rack: What Defines a Modern Roof Top Tent Setup?
Let’s be honest, the game has changed! Gone are the days when a roof top tent was just a swag on stilts. The best roof top tent setup ideas today are guided by what we’re calling the ‘2026 RTT philosophy’: creating a fully integrated, modular basecamp. It’s a shift from simply ‘sleeping on your roof’ to building a complete off-grid habitat that deploys in minutes. For anyone new to this world, understanding what is a roof top tent is the first step, but the real magic lies in how you build your system around it.
After thousands of kilometres on the road and countless chats with fellow Adventurerz around the campfire, one truth stands out: setup efficiency is the single biggest factor in long-term travel happiness. Seriously. Imagine you’re on a 14-day trip, moving camp each day. A 5-minute setup versus a 30-minute setup saves you nearly six hours of your precious holiday time! That’s more time for a sunset beer, a fish, or just kicking back. The most inspiring roof top tent setup ideas are born from this need for speed and simplicity.
Here at Adventurerz, we approach every build with a core trifecta in mind: balancing weight, comfort, and our environmental impact. It’s a constant negotiation. Piling on every gadget might feel comfortable at first, but it can push your 4WD dangerously close to its GVM and burn more fuel on the highway. Our goal is to help you build a setup that’s ruggedly comfortable for a week in the High Country, yet light and considerate enough to leave no trace. It’s about smart, responsible adventuring.
So, what does this modular basecamp actually look like? We break it down into four essential pillars. A truly complete setup addresses each of these, working together in harmony:
- Sleep: The heart of it all. Your RTT, quality bedding, and ensuring a comfortable, temperature-controlled rest.
- Shade: Your living space. A 270-degree awning is the go-to for creating an instant, protected zone from the harsh Aussie sun.
- Power: The lifeblood of modern touring. From integrated solar panels to portable battery boxes, this keeps your fridge cold and devices charged.
- Storage: The organisational key. Smart packing cells, roof-mounted cases, and easy-access drawers that make finding your gear a breeze, not a chore.
Soft Shell vs. Hard Shell: Setup Implications
Your choice between a soft or hard shell RTT is the first domino in your entire organisational strategy. Hard shells, like clamshell or pop-top designs, are the champions of ‘fast-camp’ setups, often ready in under 60 seconds and providing a perfect platform for mounting solar panels. Soft shells, which fold out, offer sprawling internal space and the ability to add a large annex room, making them ideal for families or longer stays in one spot.
Understanding Dynamic vs. Static Roof Loads
This is the most critical safety check, and it’s where your vehicle’s Gross Vehicle Mass (GVM) matters far more than the A$3,000 you spent on the tent. Before you buy anything, do the maths! A 75kg tent + 25kg rack + 20kg awning = 120kg on your roof. You must ensure this is under your vehicle’s specified limit. Dynamic roof load is the maximum weight your vehicle’s roof can safely support while in motion, directly impacting your 4WD’s centre of gravity and handling on uneven terrain.
Interior Comfort Secrets: Turning Your Tent into a 5-Star Suite
Let’s get one thing straight, fellow Adventurerz: your roof top tent isn’t just a place to crash. It’s your mountaintop penthouse, your beachfront bungalow, your sanctuary after a long day on the tracks. A few smart upgrades can transform the interior from basic shelter to absolute bliss. We’re talking about the kind of comfort that makes you excited to zip up the door for the night. Forget roughing it; let’s start living it!
Here are five game-changing roof top tent setup ideas to elevate your interior space:
- The Anti-Condensation Mat: This is the single most underrated accessory, period. Your body heat meeting the cold aluminium floor of the RTT creates condensation overnight. Left unchecked, this leads to a damp mattress and eventually, dreaded mould. An anti-condensation mat, typically costing around A$150, creates a 10-15mm air gap, allowing moisture to escape and keeping your mattress bone-dry. It’s a non-negotiable for four-season camping.
- Integrated LED Strip Lighting: Ditch the headtorch fumbling! A permanent 12V or USB-powered LED strip provides perfect ambient light. The pro tip? Get a dual-colour strip with an amber or red setting. Standard white light is a massive invitation for every mozzie and bug in the vicinity, but insects are far less attracted to the warmer end of the light spectrum. No more frantic buzzing around your head.
- Pristine Interior Management: Institute a strict “no boots” policy! Mount a simple shoe bag on the exterior near the ladder entrance. This keeps mud, sand, and red dust out of your sleeping space. We also like to create a small “dirty zone” on a mat just inside the door for items like a wet jacket or daypack.
- Upgrade That Mattress: The factory-supplied foam mattress is a decent starting point, but a quality self-inflating mattress (SIA) is a revolutionary upgrade. Look for something with an R-value of 4 or higher for excellent insulation from the cold. Not only do you get superior comfort, but you also gain a significant thermal barrier, making chilly nights far more comfortable.
- Permanent Bedding Perfection: The holy grail of a fast setup is leaving your bedding in the tent. This single trick can cut your pack-down time from 15 minutes to less than 5! Many modern hardshell RTTs are designed with enough internal space to accommodate a doona and pillows. Waking up, climbing out, and simply closing the shell is an incredible feeling.
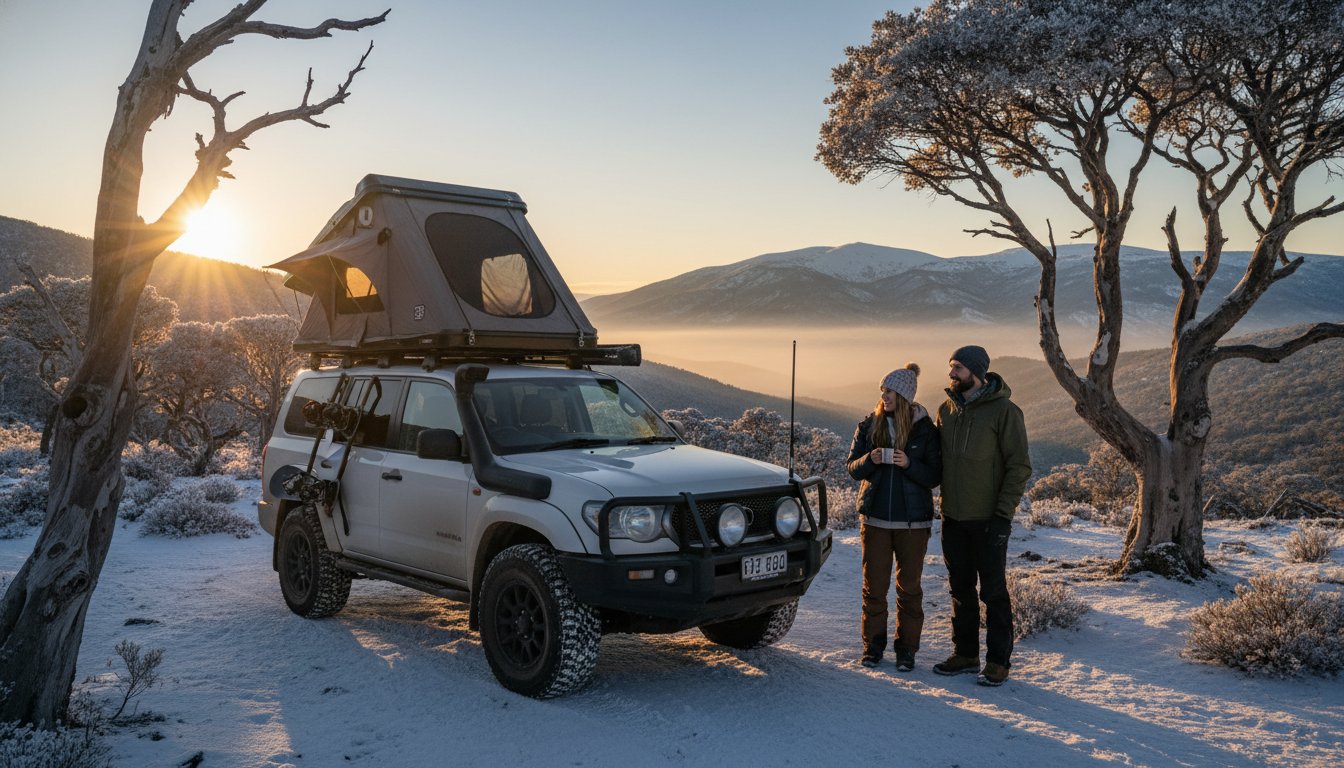
Climate Control in the Australian Bush
Aussie weather throws everything at us. To beat the heat, position a rechargeable 12V fan (like a Sirocco II) at one window to create cross-ventilation, pulling cool air across your tent. For winter trips in the Victorian High Country, a reflective thermal liner can boost the internal temperature by up to 8°C by reflecting your body heat. And during those sticky QLD summer storms, crack the windows for airflow and toss in a reusable moisture absorber to combat humidity.
Organization and ‘Small Space’ Living
Smart storage is everything. A roof-mounted cargo net is brilliant for stashing clothes or holding a tablet for a rainy-day movie. Having a dedicated spot for your headtorch, keys, and bug spray means no frantic searching in the dark. It’s all about creating a system. Whether you’re navigating a tight track or just trying to understand local dispersed camping regulations, preparation is key. We swear by modular packing cubes; they move seamlessly from your drawers at home, to the 4WD, to the RTT, keeping everything tidy.
By focusing on these interior details, you create a space that’s not just for sleeping, but for living. It’s these thoughtful touches that truly define the best roof top tent setup ideas. Ready to build your ultimate mobile suite? Explore our curated collection of RTT comfort and organisation accessories and start planning your next escape!
The ‘Living Room’ Expansion: Awnings and Ground-Level Integration
Your rooftop tent is your high-rise sanctuary, but the magic truly happens when you expand your living space to ground level. This is where your camp comes alive! A well-planned ground setup transforms your pitch from just a place to sleep into a fully-functional basecamp for cooking, relaxing, and sheltering from that unpredictable Aussie weather. Forget being cramped; we’re talking about creating a sprawling outdoor living room.
The undisputed king of this expansion is the 270-degree awning. Unlike a standard side awning, a 270 wraps around the side and rear of your 4WD, creating a massive 11-13 square metres of protected space. It’s an absolute game-changer. Once you have your tent sorted, the next step is building out this system. If you’re still piecing together the essentials, an excellent beginner’s guide to gear can help you nail down vehicle compatibility and core equipment choices.
- Idea 6: The ‘Dry-Entry’ Path. With a 270-degree awning, you create a seamless, covered path from your RTT ladder directly to your vehicle’s side or rear doors. No more frantic, wet dashes for a forgotten jacket during a downpour in the Blue Mountains. It’s one of the most practical roof top tent setup ideas you can implement.
- Idea 7: The Annex Room Addition. For longer stays or when you need genuine privacy, an annex room that zips onto the base of your tent is unbeatable. It’s the perfect spot to change clothes, set up a portable toilet, or simply escape the relentless march of flies and mozzies.
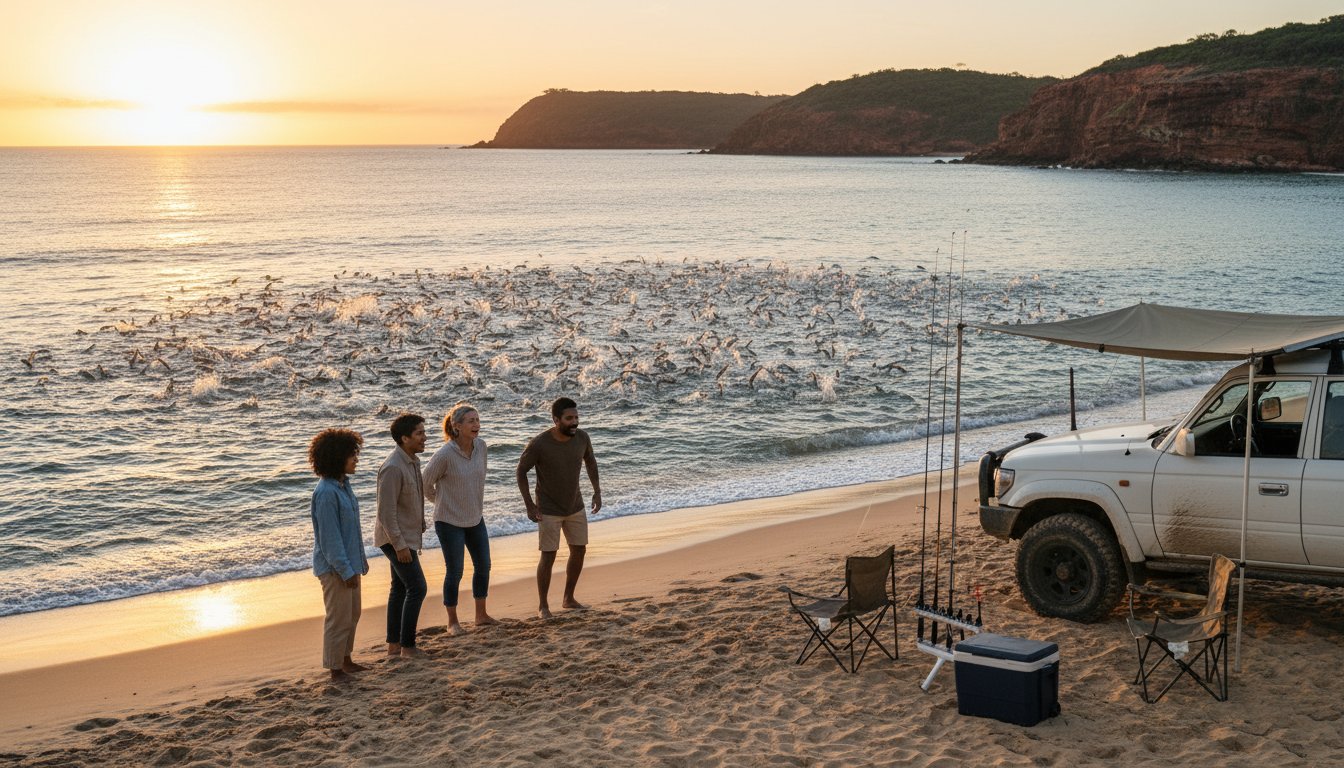
- Idea 8: Smart Ground-Level Flooring. Ditch that old, flaky tarp. For beach camping on K’gari (Fraser Island), a sand-free mat (costing around A$150-A$250) is your best mate. Its dual-weave mesh lets sand fall straight through. For muddy forest tracks, a heavy-duty PVC flooring offers better waterproofing and is easier to clean.
The Ultimate 4WD Kitchen Setup
A great kitchen makes for a happy camp. Position your fridge slide for easy access from your main prep area under the awning. We recommend placing your camp stove on the downwind side to keep smoke from billowing into your living space or tent. Think about your workflow: fridge to prep space to stove. Make it easy!
- Idea 9: Swing-Out Kitchen Tables. These genius bits of kit often mount to your rear bar and tuck away neatly, swinging out to provide a sturdy stainless steel prep surface right where you need it.
- Lighting the ‘Prep Zone’. To light your kitchen without inviting every insect in the territory, use warm-toned LED strip lighting. Look for lights with a colour temperature under 3000K or, even better, amber or orange LEDs. They are significantly less attractive to bugs than harsh, cool-white lights.
Privacy and Shower Solutions
Bringing a few creature comforts to the bush doesn’t mean sacrificing your rugged Adventurerz spirit. It just means you can stay out there longer! A quick, private shower after a dusty day is pure gold.
- Idea 10: Quick-Deploy Shower Ensuites. Forget wrestling with a pop-up tent. Mount a quick-deploy shower ensuite (like those from Darche or 23ZERO) to your roof rack. They fold out in under 30 seconds, giving you an instant, private cubicle.
- Responsible Greywater Management. As eco-conscious Adventurerz, we have a duty of care. Always use a biodegradable, phosphate-free soap. Capture your shower water in a collapsible bucket and dispose of it at least 50 metres away from any river, creek, or lake.
- Portable Toilet Storage. Accessibility is key, but so is discretion. Many modern canopy builds incorporate a dedicated slide-out compartment for a portable toilet, keeping it secure, out of sight, and odour-free until needed.
Off-Grid Power and Tech for Extended RTT Stays
Ready to push your camp setup further into the Aussie wilderness? Let’s talk power! Staying completely off-grid for more than a quick weekend means getting serious about your 12V system. For the modern Adventurerz, this isn’t about bringing the city with you; it’s about using smart tech to stay out longer, safer, and more connected when you need it most. Forget running the 4WD just to charge a phone. We’re diving into the best tech-focused roof top tent setup ideas for ultimate freedom.
Your journey to energy independence starts on the roof itself. Here are our top-tier ideas:
- Idea 11: The Integrated Solar Lid. Mounting flexible solar panels directly to the top of your hard-shell tent is a game-changer. A slimline 180W panel adds less than 4kg of weight but provides a constant trickle charge to your auxiliary battery all day long. It’s the ultimate set-and-forget power source, ensuring your fridge stays cold and your lights stay on.
- Idea 12: The In-Tent ‘Power Hub’. Stop dangling cords out the window! Run a dedicated, fused 8 B&S twin-core cable from your dual-battery system into the tent. Install a panel with a couple of USB-C PD (Power Delivery) ports for charging laptops and modern devices, a standard USB-A port, and a 12V accessory socket. Now you have a clean, safe, and convenient power station right by your sleeping bag.
- Idea 13: The Digital Nomad’s Starlink Mount. For those of us working from the road, reliable internet is non-negotiable. Custom roof rack mounts from Aussie fabricators allow you to securely stow your Starlink dish while driving and deploy it in minutes at camp. Paired with the Starlink Roam plan (around A$174/month as of early 2024), you can have high-speed internet from the Vic High Country to the Kimberley.
Of course, all this gear needs a power source. We are massive advocates for Lithium Iron Phosphate (LiFePO4) batteries. A 120Ah LiFePO4 battery weighs around 13kg and gives you more usable energy than a 30kg AGM equivalent. This massive weight saving is critical for staying under your vehicle’s Gross Vehicle Mass (GVM) and roof load limits.
Smart Lighting and Ambience
Great lighting transforms a campsite. Idea 14 is to install app-controlled RGB LED strip lighting inside and outside your RTT. You can switch to a dim red light to preserve your night vision or light up the area with bright white. Some systems can even be set to a strobe function, acting as an external ‘scare light’ to deter curious dingoes or other wildlife from getting too close. Always have a simple, eco-friendly backup like a solar-powered Luci Lantern, just in case.
Connectivity in Remote Areas
When you’re deep in the bush, a little bit of signal goes a long way. A Cel-Fi GO signal booster can turn one bar of unusable 4G into five bars of clear reception. For best results, mount the antenna high on your roof rack or bull bar. Inside the tent, Idea 15 is the ultimate low-tech luxury: an integrated tablet mount. Using a simple RAM Mount attached to an internal pole, you can create a ‘drive-in’ movie night under the stars. The most critical rule? All this tech must run off an auxiliary battery, managed by a DCDC charger like a REDARC BCDC1225D. This isolates your camp power, guaranteeing your starter battery is always fresh and ready to get you home. Explore our full range of dual-battery systems and solar solutions to build your perfect off-grid power setup!
Building Your Modular Setup: The Adventurerz 2026 Roadmap
Your ultimate overlanding rig isn’t born overnight; it’s built, refined, and perfected with every trip. We see your setup as an evolving ecosystem, a reflection of your adventures. That’s why we believe in a modular approach. It’s smarter, more affordable, and lets you build the perfect rig for your style of travel. Forget dropping A$15,000 all at once. Let’s map out a phased plan that gets you out there faster and grows with you.
Think of it in stages, spread over 12 to 24 months:
- Phase 1: The Foundation (First 6 months). Start with the non-negotiables: a high-quality roof top tent and a properly rated roof rack system. This is your base camp. Expect this initial investment to be between A$2,500 and A$5,000. Get this right, and everything else bolts on beautifully.
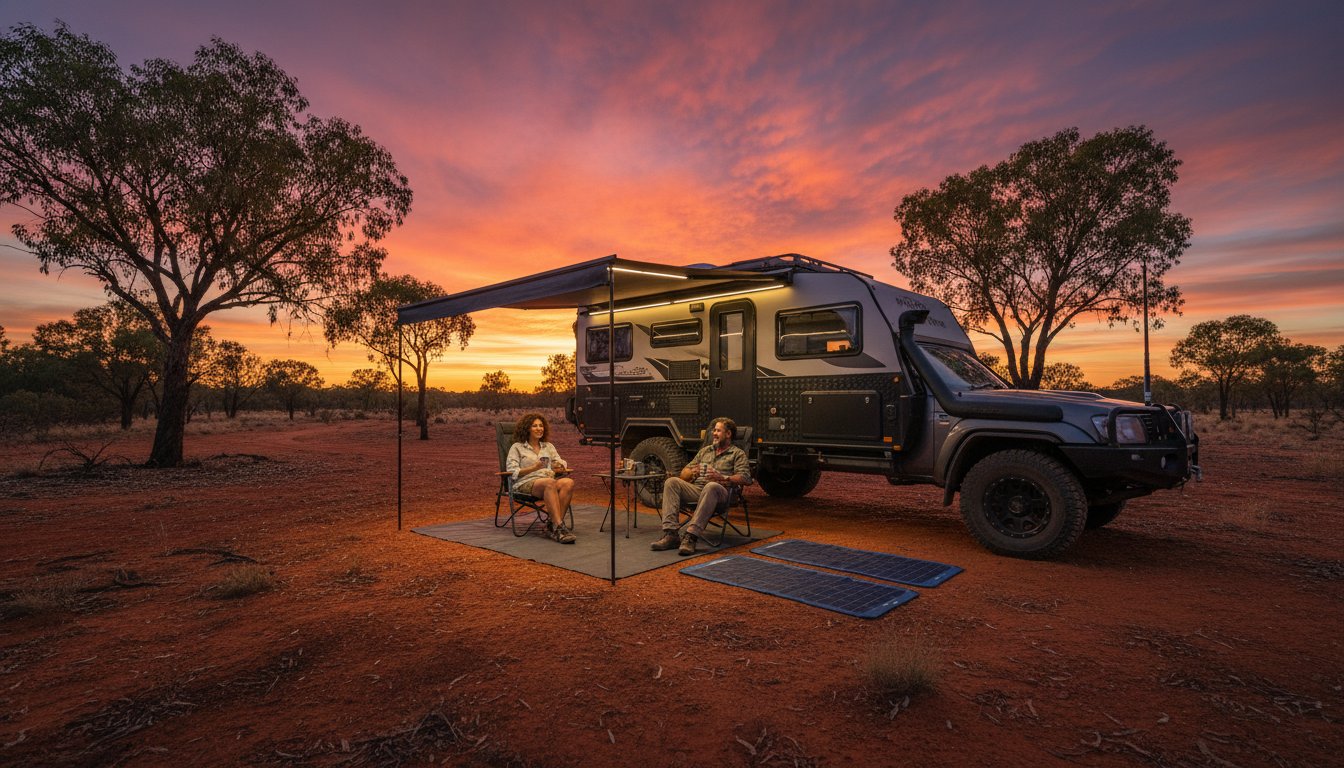
- Phase 2: The Comfort Zone (6-12 months). Now, let’s add shelter and power. A 270-degree awning provides massive coverage from the Aussie sun, and a basic portable power station keeps your devices charged. This stage adds another A$1,000 to A$2,000, but the payoff in livability is huge.
- Phase 3: Off-Grid Independence (12-24 months). This is where you chase true self-sufficiency. A dual-battery system, a permanently mounted solar panel, and a 12V fridge/freezer. You’re now equipped for multi-day stays in the most remote corners of the country.
The absolute best roof top tent setup ideas don’t come from a catalogue; they come from the community. Your rig isn’t built in a vacuum. Get on the forums, chat with fellow Adventurerz at camp, and see what works. The most ingenious solutions are often born from a shared problem on a dusty track somewhere in the Kimberley.
Sustainable Gear Choices
Building an epic rig and protecting our wild places go hand-in-hand. We champion a ‘repair over replacement’ ethos. A torn flyscreen or a busted zipper is a chance to learn a skill, not an excuse to buy new. Look for brands using durable, recycled fabrics and sustainably sourced hardware. For 4WD users, the ‘Leave No Trace’ philosophy means actively managing your impact by staying on designated tracks, packing out everything you pack in, and leaving your campsite better than you found it.
Ready for Departure: Final Rig Check
Before you hit the bitumen, a final check is critical. It’s your ritual for a safe and smooth trip. We’ve turned ours into a checklist that never fails. Grab a torque wrench and confirm every mounting bolt on your rack and RTT is tightened to the manufacturer’s spec, typically 15-20 Nm. Double-check your weight distribution, ensuring you’re well under your vehicle’s dynamic roof load limit, which is often around 80kg for many popular 4WDs. Then, challenge yourself with the ‘5-minute pack-down’. Can you get your entire camp packed and be ready to roll in under 300 seconds? It’s the ultimate test of an efficient setup! Feeling inspired? Plan your next remote adventure with Adventurerz!
Build Your Ultimate Basecamp for 2026 and Beyond
Your rig is more than just a vehicle; it’s the launchpad for your greatest adventures! The key takeaway for 2026 is modularity. It’s about building a system that grows with you, from integrating a 270-degree awning for that perfect ‘living room’ to adding a 200W solar panel setup for total off-grid freedom. We’ve shown how these creative roof top tent setup ideas can transform your RTT from a simple shelter into a 5-star suite under the stars, tested by our community of over 50,000 Australian explorers.
Ready to turn these ideas into reality? Join the Adventurerz community for more expert gear hacks and travel guides! As a proudly Australian-owned and community-driven hub, we are your go-to source for expert 4WD gear reviews and sustainable travel advocacy. We’re a tribe of fellow travelers committed to exploring our incredible backyard responsibly.
So get out there, build your dream rig, and we’ll see you on the tracks. The adventure is just getting started!
Frequently Asked Questions About Roof Top Tent Setups
Can I leave my sleeping bag and pillows inside the roof top tent when I close it?
Yes, you absolutely can leave your bedding inside most roof top tents, which is a massive time-saver at camp! Most soft shell RTTs have enough space for sleeping bags, pillows, and even a doona, easily accommodating up to 10cm of compressed bedding. With hard shell tents, especially the super-slim models, you might be limited to just your sleeping bags. Always check your specific model’s guidelines, but for most Adventurerz, it’s one of the best perks of RTT life!
How do I prevent condensation and mold from growing under my RTT mattress?
The most effective way to prevent condensation and mold is by installing an anti-condensation mat under your mattress. These mats, typically made from a 15mm thick coir fibre or polymer mesh, create a crucial air gap that allows moisture to escape. We also recommend fully unzipping your windows for 15-20 minutes each morning to air the tent out, especially in humid coastal areas. This simple routine keeps your sleeping space dry, healthy, and ready for the next adventure!
What is the best way to light the area under my rooftop tent at night?
The best way to light the area under your RTT is with flexible, dual-colour LED strip lighting. We love the 1.2-metre strips that can switch between bright white light (around 1200 lumens) for cooking and bug-repelling amber light for relaxing. You can attach them directly to the tent’s base or your awning frame with velcro straps. They’re a game-changer for creating a well-lit, functional camp kitchen and living space after the sun goes down in the bush.
Are rooftop tents too heavy for a standard SUV roof rack?
No, most rooftop tents are not too heavy, provided your vehicle is fitted with a suitable roof rack system. RTTs typically weigh between 50kg and 90kg. The key is your roof rack’s dynamic weight capacity (the limit while driving), which must exceed the tent’s weight. Brands like Rhino-Rack and ARB offer platform systems for most SUVs with dynamic ratings of 100kg or more, which is more than enough for the majority of two-person tents on the market.
How can I make my rooftop tent setup more wind-resistant during storms?
To make your RTT more wind-resistant, always park with the narrowest profile of your vehicle facing the wind. This simple step reduces the surface area being battered by gusts. We also recommend upgrading to heavy-duty guy ropes and using 300mm steel pegs, especially in sandy or soft soil. These simple but effective roof top tent setup ideas can make the difference between a rough night and a secure, restful sleep during a classic Aussie southerly buster.
Do I need a dual-battery system to run lights and fans in my tent?
No, you don’t strictly need a dual-battery system for just lights and a fan, especially for weekend trips. A quality portable power station, like a 200Wh lithium unit, is a fantastic, more affordable alternative. These can run LED lights and a 12V fan for 2-3 nights easily and cost around A$300-A$500, compared to a fully installed dual-battery system which can exceed A$1,500. It’s a great way to stay powered up without the major vehicle modification.
What are the most essential setup ideas for camping with kids in an RTT?
The most essential roof top tent setup ideas for camping with kids focus on safety and comfort. First, add non-slip grip tape to the ladder rungs for secure footing, especially with morning dew. Inside, a soft, battery-powered LED lantern provides a comforting glow. We also love using a small gear hammock strung up inside for storing books and favourite toys, keeping the sleeping area clutter-free and making the tent feel like a special cubby house in the sky!
Is a hard shell or soft shell RTT better for fast-paced road trips?
A hard shell RTT is definitely better for fast-paced road trips where you’re moving camp daily. Most hard shells, especially clam-shell or pop-top designs, can be fully set up or packed away in less than 60 seconds. In contrast, a soft shell with its cover and window poles typically takes 5-10 minutes. The improved aerodynamics of a hard shell can also lead to slightly better fuel efficiency on those long Aussie highways, saving you a few dollars at the bowser.