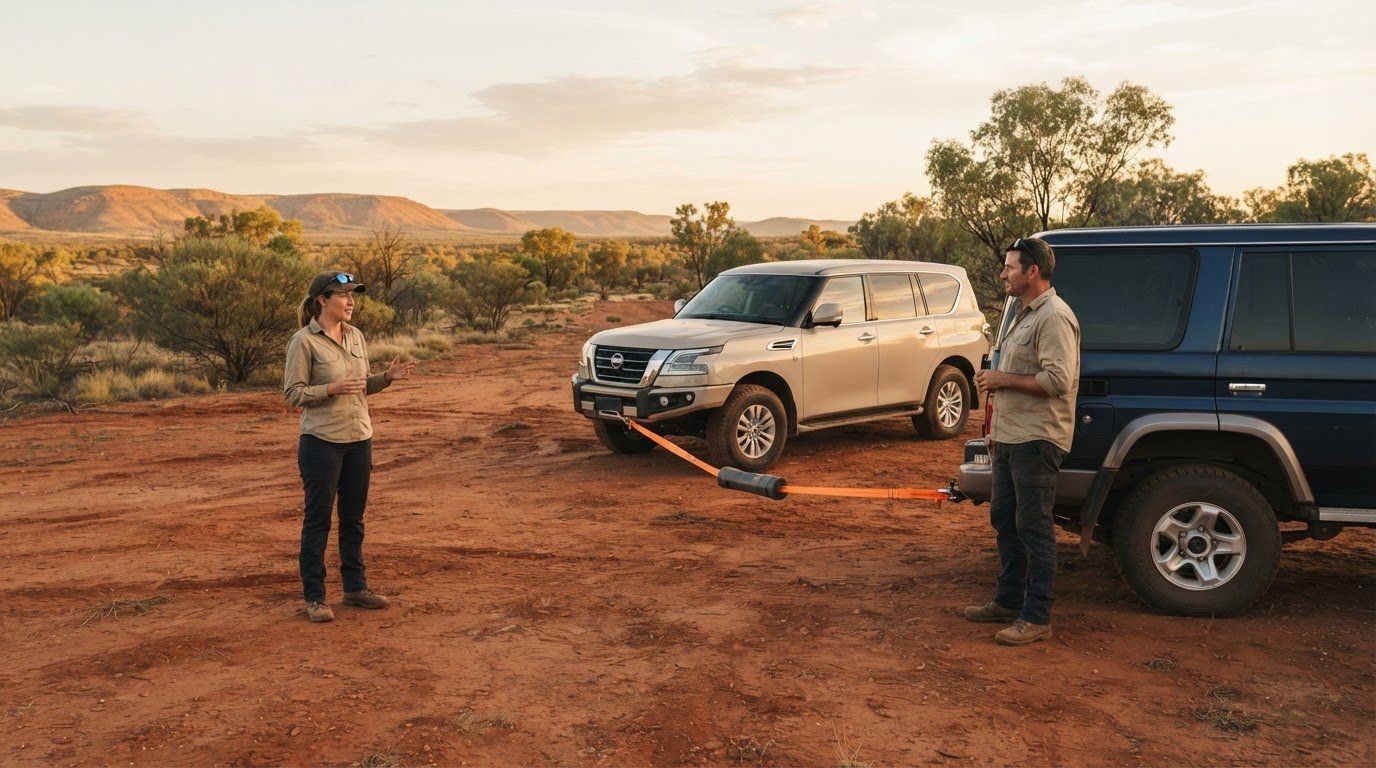
What if the most important part of a snatch recovery is knowing when not to attempt one? If you’re unsure how to use a snatch strap safely, look beyond the connection itself. Strap compatibility, rated recovery points, vehicle positioning and the people nearby all matter. A rushed pull can damage vehicles or equipment, or put someone in harm’s way. Taking time to assess the scene is part of responsible 4WD travel.
This guide covers checks for your recovery gear and a careful recovery sequence, including clear communication between drivers and keeping bystanders well away. We’ll explain how to compare a strap’s minimum breaking strength with the lighter vehicle’s GVM, check for damage and use rated recovery points, never a tow ball. You’ll also learn when to stop and choose another method or seek trained help. Always follow your strap and vehicle manufacturers’ current instructions. Reading a guide isn’t a substitute for hands-on training.
Key Takeaways
- Learn how to use a snatch strap safely by checking its condition, suitability and the vehicle manufacturers’ instructions before connecting it.
- Agree on the recovery plan with the other driver, then choose stable positions and a clear route that keeps people and obstacles well away.
- Use rated recovery points and compatible recovery gear; never use a tow ball as an attachment point.
- Keep the manoeuvre controlled and coordinated, and stop if conditions or communication make the recovery unsafe.
- Afterward, remove equipment only when it’s unloaded, then inspect it and follow the manufacturer’s guidance on care and retirement.
Table of Contents
- How to Use a Snatch Strap Safely: Understand the Recovery Before You Begin
- Check Your Snatch Strap, Vehicles, and Recovery Points Before Connecting
- How to Set Up a Snatch Strap Recovery Step by Step
- How to Perform the Recovery Carefully, and When to Abort
- After a Snatch Recovery: Inspect Gear, Learn, and Prepare for Next Time
How to Use a Snatch Strap Safely: Understand the Recovery Before You Begin
A snatch strap recovery isn’t simply towing with a different piece of webbing. A purpose-designed snatch strap is dynamic recovery equipment intended to stretch under load and help transfer recovery force between suitable vehicles. How it behaves depends on its design and condition, so check the manufacturer’s description and instructions rather than relying on a generic definition. This guide can help you understand the decisions involved, but it doesn’t replace practical instruction or the current directions for your strap and vehicles.
That stretch also means a recovery can have serious consequences if something goes wrong. Unsuitable equipment, attachment points, vehicle positioning or communication can put people at risk and damage vehicles or gear. For a foundational overview, see Snatch strap, then refer to the manufacturer’s guidance for your specific equipment.
For a visual introduction to the recovery process, watch this overview:
What makes a snatch-strap recovery different from towing?
A controlled snatch recovery uses the strap’s designed stretch to help transfer force between vehicles. Towing generally means a steadier pull, while a winch uses a powered line. Each method has different equipment and risks, and none suits every situation. Don’t substitute a general tow strap or winch extension for a snatch strap unless its manufacturer explicitly says it’s suitable for that use. Avoid assumptions about stretch, speed or force. Follow the instructions for your exact strap and vehicles.
When should you avoid a snatch recovery?
Pause before connecting anything if the recovery plan, gear or conditions raise doubts. In particular, don’t proceed if:
- The strap or connectors are damaged, or their suitability is uncertain.
- You can’t confirm that the attachment points are rated and appropriate for recovery.
- The vehicles aren’t suitable for the proposed method, or the ground is unstable.
- Water, steep slopes, traffic, poor visibility or nearby people make it hard to control the scene.
These conditions can make movement harder to predict, keep people clear or communicate reliably. If you can’t agree on a clear plan, stop and seek trained assistance. Knowing how to use a snatch strap safely includes recognising when another recovery method, or help from someone with practical experience, is the better choice.
Check Your Snatch Strap, Vehicles, and Recovery Points Before Connecting
Before setting up, check the whole recovery system, not just the strap. A strap that looks sound can still be unsuitable for the vehicles or attachment points, and a damaged connector can compromise the setup. As part of using a snatch strap safely, inspect your gear before each use and keep it accessible, rather than buried under other equipment.
How do you check a snatch strap is suitable and serviceable?
Read the strap’s label and instructions. Confirm its intended use, minimum breaking strength (MBS), care requirements and retirement criteria. Australian snatch straps must carry specified information under the Consumer Goods (Motor Vehicle Recovery Straps) Safety Standard 2017. The label should be legible, permanently attached and visible in use. The standard’s MBS recommendation is 2 to 3 times the GVM of the lighter vehicle, but check the strap instructions and vehicle manufacturers’ guidance for your setup.
Inspect the full length of the strap, including the stitching and loops. Look for cuts, fraying or abrasion, damaged stitching, contamination, heat damage, altered labels or other signs of wear. If it’s been exposed to water, follow the manufacturer’s care instructions, as saturation can reduce a strap’s strength and stretch. Don’t use gear with visible damage, unreadable identification or an uncertain history. Colour isn’t a reliable way to judge a strap’s rating.
Never knot, modify or join straps unless the manufacturer expressly permits that method. If you can’t verify the strap’s suitability or condition, set it aside. A recovery isn’t the time to guess.
Which attachment points and accessories are appropriate?
Check both vehicles. Use only purpose-designed recovery points that are rated and approved for the intended direction of pull. A point designed for another use, such as an ordinary tie-down, isn’t automatically suitable for recovery. Never attach recovery gear to a tow ball or tow hitch. If you can’t confirm a point’s purpose or rating, don’t connect to it.
Use compatible, rated connectors in line with the vehicle and equipment manufacturers’ instructions. Don’t improvise with hardware that wasn’t designed or confirmed for recovery. Before connecting, check each connector for damage and make sure it fits the recovery points correctly. If any part of the system is unclear, stop and consult the relevant manufacturer or seek trained assistance.
Build a simple pre-trip habit: keep the strap and compatible recovery gear together, inspect them before use, and check them again afterward. This makes it less likely that damage or missing information will go unnoticed when the track gets challenging.
How to Set Up a Snatch Strap Recovery Step by Step
A careful setup gives both drivers time to understand the plan before the strap is under load. Treat this sequence as a framework, not a substitute for hands-on instruction. Follow the strap and vehicle manufacturers’ current directions, and don’t proceed if they conflict with your training or the conditions on the track.
Before connecting equipment, both drivers should agree on the recovery direction, each vehicle’s role, how they’ll communicate and what will trigger an immediate stop. If either driver is unsure, pause and reset the plan.
- 1. Assess the scene. Check the ground and intended route. Choose stable positions and a clear path that avoids people, obstacles and traffic. Don’t continue if visibility or conditions prevent you from controlling the area.
- 2. Position the vehicles. Place them according to the strap and vehicle manufacturers’ instructions and your practical training. Avoid unnecessary repositioning once the plan is agreed. If the vehicles can’t be aligned or positioned as directed, stop rather than improvise.
- 3. Set communication signals. Choose a communication method both drivers can use reliably. Agree on a clear start signal and an unmistakable stop signal, and confirm each driver knows how to stop safely if anything changes. Don’t rely on signals that can’t be seen or heard from the vehicles.
- 4. Clear the recovery area. Keep bystanders well away from the vehicles, strap and recovery path. No one should stand near or straddle the strap, or handle it while it may be under load. Follow the manufacturers’ guidance and your practical training for safe distances; don’t guess at a universal figure.
- 5. Connect the equipment. Lay the strap out without twists, then attach it only to the verified recovery points using compatible hardware fitted as instructed. Use a recovery damper as directed by the strap manufacturer. It can’t eliminate every hazard, so it doesn’t replace keeping people clear.
- 6. Make a final check. Before either vehicle moves, confirm both drivers are ready, the route remains clear, the strap is correctly connected and no one has entered the recovery area. If anything has changed, give the stop signal and reassess.
These steps make how to use a snatch strap safely a shared, deliberate process rather than a rushed manoeuvre. Begin the recovery only when both drivers understand the signals and agree the setup is still safe.
How to Perform the Recovery Carefully, and When to Abort
Once the setup is complete, keep the recovery measured and deliberate. Both drivers should follow the agreed signals and the current instructions for their vehicles and strap. This section offers general guidance, not a substitute for practical training or equipment-specific directions. If you’re unsure what to do, stop rather than improvise.
What does controlled recovery look like?
Each driver should know their role and act only on the agreed start signal. Keep communication clear throughout, and use gradual, coordinated actions consistent with the manufacturers’ guidance. A dramatic run-up or sudden acceleration isn’t a safe shortcut. Don’t repeat attempts or increase force beyond what the equipment is designed for. Observers must stay well clear. Nobody should approach or handle the strap, connectors or recovery points while they’re under tension.
Watch the whole system, not just the vehicle being recovered. If the strap, hardware or either vehicle behaves differently than expected, give the stop signal. The drivers should stop safely according to their training and vehicle instructions, then reassess before taking further action.
When should you stop and choose another recovery method?
Abort if a vehicle shifts unexpectedly, a connection slips, new damage appears, signals become unclear or a person enters the recovery area. Stop if changing conditions affect visibility, traction or control. Don’t treat an unsuccessful attempt as a reason to try again with more force. First identify what has changed and whether the setup remains suitable.
After stopping, don’t approach a strap or connector that may still be under load. Follow your training and the manufacturers’ directions for making the scene safe before reassessing the recovery points, vehicle positions, ground and route. If the original plan no longer suits the conditions, consider a suitable alternative recovery method or seek trained assistance. If you can’t confidently identify a safe next step, leave the recovery stopped.
- Stop: A connection moves, equipment shows damage, or a vehicle changes position unexpectedly.
- Clear: A person, traffic hazard or changing condition compromises the recovery area.
- Reassess: Check whether the method and setup remain appropriate before taking further action.
Knowing when to abort is a key part of how to use a snatch strap safely. Stopping protects everyone and gives you the chance to choose a better-supported option.
After a Snatch Recovery: Inspect Gear, Learn, and Prepare for Next Time
The recovery isn’t finished when the vehicle is free. First, make sure both vehicles are stable and the strap, connectors and recovery points are no longer under load. Keep people clear until you confirm it’s safe to approach. Don’t release or remove any component that may still be tensioned; follow your practical training and the manufacturers’ instructions.
How should you care for a snatch strap after use?
Inspect the strap along its full length, including stitching and attachment loops. Check connectors and recovery points for deformation, damage or other changes. Note anything unusual, such as unexpected movement or a connection shifting during the recovery. If you find damage or can’t confidently assess a component, remove it from service until it’s been assessed. Don’t rely on appearance alone to decide that suspect gear is safe to use again.
Clean, dry and store the strap according to its manufacturer’s care instructions. Check those instructions for retirement criteria, and replace or retire the strap if it meets them or its history and condition are uncertain. Before your next trip, make sure the recovery equipment is accessible and its identification and instructions remain legible.
How can you build recovery skills before travelling?
Build recovery skills through practical instruction, not in a pressured situation on the track. Look for hands-on guidance from a suitably qualified provider, and check the provider’s qualifications and course details before booking. In a supervised setting, practise identifying equipment, agreeing on communication signals and deciding when to stop. These habits help the whole group make calmer decisions when conditions change.
Good preparation is a shared 4WD habit. Before heading out, discuss who’ll communicate, where recovery equipment is stored and how the group will respond if a recovery plan no longer feels safe. That preparation supports responsible travel and helps everyone look after each other and the places they explore.
For more ideas and practical reading before your next trip, explore outdoor and 4WD guides from Adventurerz. This information can support your preparation, but it doesn’t replace hands-on recovery instruction or the current directions for your equipment.
Make Every Recovery a More Prepared One
Knowing how to use a snatch strap safely starts well before either vehicle moves. Check that your strap and connectors are serviceable, match the equipment to the vehicles and use verified recovery points. Then agree on the plan and signals, keep people clear, and follow the manufacturers’ instructions throughout.
Stay ready to stop. If equipment shifts, conditions change or communication breaks down, don’t push on just to finish the recovery. Reassess, consider another method or seek trained help. A guide can support your preparation, but it can’t replace practical instruction and the current directions for your gear.
Responsible 4WD travel is a shared effort. Explore Adventurerz’s outdoor and 4WD guides for more 4WD, camping and responsible exploration content to help you prepare. Plan carefully, look out for your travelling companions and enjoy the journey with confidence.
Frequently Asked Questions
Is a snatch strap the same as a tow strap?
No. A snatch strap is purpose-designed dynamic recovery equipment, while a tow strap is generally intended for a steadier pull. Their construction and intended use can differ, so don’t assume one can replace the other. Check the strap’s label and manufacturer instructions before use. If those instructions don’t clearly confirm it’s suitable for the recovery you’re planning, don’t connect it.
Can you attach a snatch strap to a tow ball?
No, never attach a snatch strap to a tow ball. Tow balls and ordinary tow hitches aren’t suitable recovery attachment points, and they can fail under recovery forces, creating a serious projectile hazard. Use only vehicle recovery points rated and approved for the intended direction of pull. If you can’t confirm a point is suitable, stop and seek advice rather than improvising.
How do you attach a snatch strap safely?
Attach it only to verified, rated recovery points on both vehicles, using compatible connectors fitted as their manufacturers direct. First inspect the strap and hardware, check they’re suitable for the vehicles, and agree on the recovery plan and signals with the other driver. Keep bystanders clear and use a recovery damper as instructed. Follow current manufacturer directions and practical training.
What happens if a snatch strap breaks during recovery?
A strap failure can cause the strap or connected hardware to move violently, potentially injuring people or damaging vehicles. That’s why everyone must stay clear of the recovery path and never approach equipment while it’s under tension. A recovery damper may reduce some risks but can’t make a failure harmless. If a strap breaks, stop, keep people away and don’t reuse damaged equipment.
Do you need a recovery damper when using a snatch strap?
Use a recovery damper as advised in the strap’s instructions. Australian snatch strap safety requirements include supplying instructions that advise using a recovery damper. A damper doesn’t eliminate the hazards of a recovery, so it’s no substitute for compatible gear, rated recovery points, clear communication and keeping people well away. Check the manufacturer’s current directions for the correct placement and use.
How many times should you attempt a snatch recovery?
There’s no universal safe number of attempts. Don’t keep repeating a recovery if the vehicle isn’t moving as expected or the setup is changing. Stop and reassess the ground, vehicle positions, equipment and recovery points before considering another step. If the cause of the failed attempt isn’t clear, or the plan no longer feels safe, choose another method or seek trained assistance.
Can a beginner use a snatch strap safely without training?
A beginner shouldn’t treat a written guide as a substitute for practical recovery instruction. Snatch recoveries involve dynamic forces, equipment compatibility and coordinated decisions under pressure. Consider learning from a suitably qualified provider in a supervised setting before attempting one on the track. If you’re new to recovery or unsure about any part of the plan, don’t proceed; seek trained help instead.