Your roof top tent is only as reliable as the four points of contact holding it to your vehicle. While we often obsess over canvas quality or mattress thickness, the true hero of any rugged setup is the hardware. We’ve all felt that pang of anxiety while cruising at 100km/h, wondering if a single loose nut could turn a dream trip into a highway disaster. This 2026 roof top tent mounting hardware guide is here to replace that worry with absolute confidence and technical clarity.
It’s easy to feel overwhelmed by M8 versus M10 sizes or wonder why some brackets rust after one coastal trip while others stay pristine. We believe that mastering your rig is a vital part of being a responsible explorer. We’ll show you exactly how to choose the right bolts, brackets, and rails to ensure a secure, vibration-free mount. You’ll gain a deep understanding of dynamic versus static load ratings and which specialised materials prevent rust in our harsh environments. We’re breaking down the latest quick-release innovations and torque specs so you can handle the installation solo and focus on the adventure ahead.
Key Takeaways
- Learn the critical difference between dynamic and static load ratings to ensure your vehicle roof and rack can safely handle the weight of your tent while in motion.
- Discover why 304 or 316 stainless steel is the non-negotiable standard for hardware that withstands the harsh, salty conditions of the Australian coast.
- Use this roof top tent mounting hardware guide to decide between the versatility of universal kits and the precision of platform-specific mounts for brands like Rhino-Rack and Front Runner.
- Master the technical side of rig preparation with expert tips on torque specifications and the “two-person rule” for a secure, vibration-free installation.
- Safeguard your gear from theft by implementing specialised security hardware, such as pin-in-hex or keyed nuts, on your mounting brackets.
Table of Contents
- Understanding Roof Top Tent Mounting Systems & Load Ratings
- Essential Mounting Hardware Components: Bolts, Brackets, and Rails
- Comparing Mounting Kits: Universal vs. Vehicle-Specific Solutions
- Installation Best Practices & Ongoing Hardware Maintenance
- Securing Your Investment: Anti-Theft Hardware & Final Safety Checks
Understanding Roof Top Tent Mounting Systems & Load Ratings
Your mounting system serves as the critical handshake between your vehicle, your Roof rack system, and your home away from home. We like to think of it as a structural chain where every link must be unbreakable. Most modern tents, whether they’re rugged hardshells or classic soft-shell designs, rely on an extruded aluminium mounting rail fixed to the base. This rail acts as a track for your bolts and sliders. We often see newcomers grab generic bolts from a local hardware store, but these often lack the tensile strength or vibration resistance needed for the Australian bush. High-vibration 4WD conditions can cause standard hardware to shear or loosen, which is why this roof top tent mounting hardware guide prioritises specialised, high-grade components that can handle the rigours of corrugated tracks.
Dynamic Load: The Hardware Stress Test
We need to talk about what happens when you hit the highway. Dynamic load is the weight your rack and hardware can support while the vehicle is in motion. When you’re cruising at 100km/h, wind resistance creates a massive amount of uplift and drag, effectively increasing the stress on your brackets. It’s not just about the static weight of the tent. If you’re tackling corrugated roads, the constant high-frequency vibration acts like a jackhammer on your bolt threads. Research shows that dynamic weight capacity for most aftermarket crossbars sits between 34kg and 68kg, while premium platforms can support up to 100kg. We always recommend over-specifying your hardware. If your tent weighs 65kg, don’t settle for a system that just barely meets that mark. Aim for a safety buffer that accounts for the violent forces of remote travel and heavy winds.
Static Load: Supporting the Community
Once we’ve found the perfect spot and popped the latches, the math changes. Static load refers to the weight capacity when the vehicle is parked. This figure is significantly higher because you’re no longer fighting G-forces or wind resistance. You must calculate the combined weight of the tent, the occupants, and any bedding left inside. A quality mounting system distributes this weight evenly across the rack’s footprint, preventing point loading that could dent your roof or bend your crossbars. Before you commit to a setup, check if your current rack can handle the hardware footprint of your chosen roof top tents. A wider distribution of brackets leads to a more stable night’s sleep and less long-term wear on your vehicle’s structural gutters or rails. We want your gear to last for years of exploration, and that starts with a foundation that won’t buckle under pressure.
Essential Mounting Hardware Components: Bolts, Brackets, and Rails
We’ve established that the mounting system is your rig’s lifeline. Now, let’s look at the specific hardware that makes it work. The “Big Three” of RTT hardware consist of bolts, sliders, and plates; these are what keep your tent anchored through every creek crossing and coastal gale. Most quality setups use M8 or M10 bolts. While M8 is common, we often prefer M10 for heavier hardshell tents to provide that extra margin of safety. Using the right size ensures your brackets don’t flex under the massive forces generated by dynamic and static roof loads during off-road travel.
In Australia, metallurgy matters more than most people realise. We’ve seen too many zinc-plated bolts crumble after one week on a salty beach track. 304 stainless steel is the minimum standard for any serious explorer, but if you’re a coastal regular, 316 “marine grade” stainless is the gold standard. It offers superior resistance to pitting and corrosion in our harsh environments. High-tensile steel is essential for off-road durability because it resists shearing under extreme stress. We always use Nyloc nuts for every connection. These have a nylon collar that grips the bolt thread, preventing the “slow loosen” caused by engine vibration and corrugated roads. Standard nuts simply won’t stay tight under the constant rattling of a 4WD. This roof top tent mounting hardware guide prioritises these specialised components to ensure your setup lasts the distance.
Channel Sliders and T-Bolts
Channel sliders are the unsung heroes of adjustability. These small metal blocks slide into the aluminium rail on your tent’s base, allowing you to position the tent perfectly over your rack. Some brands use specialised T-bolts, while others use square-head bolts that fit into the track. Be careful with compatibility; a slider designed for one brand’s rail might be too wide or too narrow for another. We recommend checking our expert roof top tent reviews to see which brands provide the most versatile and durable mounting kits for your specific rig.
Mounting Plates and Brackets
Your choice of mounting plate determines how the weight sits on your crossbars. Flat plates are standard, but “sandwich” brackets that wrap around the crossbar provide more surface area and significantly better stability. If you’re worried about your rack’s powder coating, look for rubber-lined brackets that prevent metal-on-metal contact. For those of us running platform racks, custom low-profile brackets are a game-changer. They keep your overall height down, which is vital for clearing low-hanging branches and improving fuel economy on long highway stretches.
Comparing Mounting Kits: Universal vs. Vehicle-Specific Solutions
Choosing between a universal mounting kit and a system designed for your specific rack is often the first hurdle in any rig build. Most tents arrive with a “one size fits most” universal hardware kit. These typically use a sandwich-plate design that clamps around standard round or square crossbars. While they’re incredibly versatile, they can be bulky and sometimes lack the sleek integration needed for modern aerodynamic setups. If you’re swapping your tent between different vehicles, a universal kit is a practical choice, but it often requires more frequent tension checks on corrugated roads.
If you’ve invested in a premium platform rack from brands like Front Runner, Rhino-Rack, or Yakima, you’ll likely need specialised hardware. These systems rely on T-slot extrusions where standard brackets simply won’t fit. You’ll need brand-specific channel nuts or specialised brackets that slide directly into the rack slats. This creates a much stronger, low-profile connection that looks integrated rather than bolted on. Using this roof top tent mounting hardware guide to match your rack’s specific track width ensures you don’t end up with “bolt slop” that leads to annoying rattles during your trip.
Sometimes, the best solution is to source your own hardware. We’ve seen many experienced explorers in our community build custom mounting plates from 6mm aluminium to achieve the perfect fit. This is particularly useful for custom flat-trays or non-standard canopy racks where commercial kits fall short. Just remember to stick to the 316 stainless steel and high-tensile standards we’ve already covered to maintain safety.
The Quick-Release Advantage
For the weekend warriors among us, quick-release systems are a brilliant innovation. Removing your tent when it’s not in use significantly reduces the “tent-on-roof” fuel penalty, which can save you a fortune on long highway hauls. Premium quick-release kits, such as those from Front Runner, feature robust safety locking mechanisms that ensure the tent stays put until you’re ready to shed the weight. While these systems add a small weight penalty of roughly 3kg to 5kg, the ability to store your tent in the garage between adventures makes the investment worthwhile for many.
Platform Rack Integration
Mounting to T-slot extrusions is the gold standard for a clean, quiet rig. By sliding your hardware directly into the rack slats, you eliminate the need for bulky external clamps. This low-profile hardware is essential for minimising wind noise and keeping your vehicle’s centre of gravity as low as possible. It also makes it much easier to mount other accessories like shovels or recovery boards alongside your tent. Check out our guide to roof top tents for more on tent styles and how they interface with these modern platform systems.
Installation Best Practices & Ongoing Hardware Maintenance
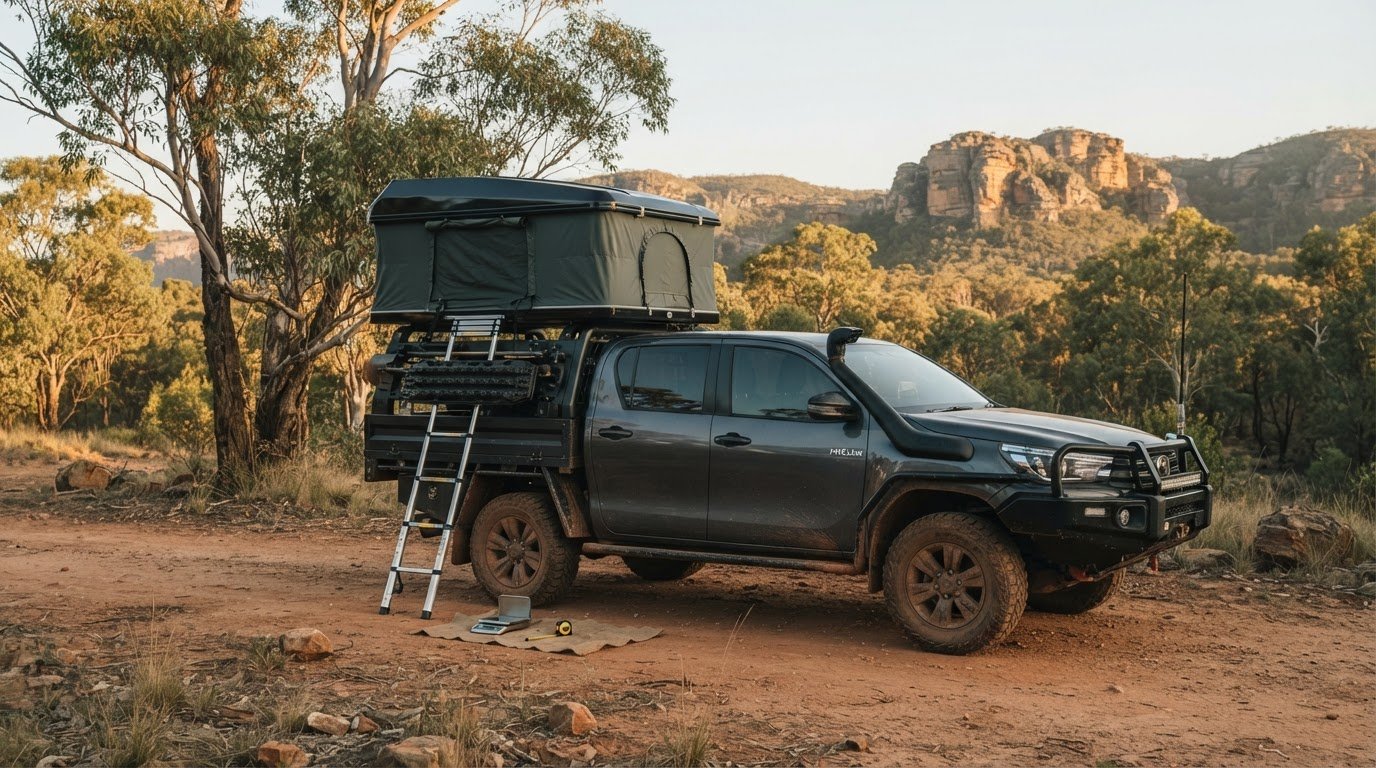
Rig preparation is a ritual that demands patience and precision. Before you even lift the tent, remember the “Two-Person Rule.” Most rooftop tents weigh between 57kg and 113kg, making them an awkward, heavy lift for one person. We’ve seen too many scratched roofs and strained backs from solo attempts. Grab a mate, use a sturdy set of ladders, and take your time. This stage is where your roof top tent mounting hardware guide becomes a checklist for safety. Once the tent is on the rack, your best friend is a quality torque wrench. Moving beyond the “tighten until firm” approach is vital for off-road reliability. Over-tightening can stretch the bolt threads, while under-tightening leads to the hardware vibrating loose on the first corrugated track you hit.
When working with the stainless steel hardware we recommended earlier, you must use an anti-seize lubricant. Stainless steel is prone to “galling,” a process where the threads heat up and cold-weld together during tightening. Without lubricant, you might find your bolts permanently stuck or snapped before you even leave the driveway. After your first 50km of driving, pull over and perform a vibration test. Check every nut and bracket. The initial settling of the tent on the rack often leads to a slight loss in tension, and this quick check prevents a catastrophic failure on the highway.
Step-by-Step Hardware Alignment
Achieving perfect alignment is about more than just aesthetics; it’s about vehicle dynamics. We always centre the tent over the vehicle’s longitudinal axis to ensure optimal weight distribution and reduce wind drag. Use a spirit level to check that the tent base remains flat across your crossbars. If the bars are uneven, it can put a permanent “twist” in your tent frame. Ensure every bolt is perfectly perpendicular to the mounting plates. If a bolt is angled, it creates a shear point that is significantly more likely to fail under the stress of a sudden stop or a deep pothole.
Long-term Maintenance for Australian Conditions
Our environment is notoriously tough on gear. If you’ve been exploring coastal tracks, your hardware needs a thorough rinse with fresh water to remove salt spray. Even 316 stainless steel benefits from a regular wipe-down with a lanolin-based protectant. Make hardware inspection a part of your monthly routine. Look for signs of stress, such as hairline cracks in brackets or tea-staining on bolts. If you spot significant corrosion or bent threads, retire that hardware immediately. We want you to focus on the sunset, not the sound of your tent rattling. For more advice on keeping your setup in peak condition, check out our expert rig preparation tips and detailed tent reviews.
Securing Your Investment: Anti-Theft Hardware & Final Safety Checks
We’ve spent time choosing the right metallurgy and alignment, but we can’t ignore that a high-quality tent is a significant investment. Standard M8 nuts are an invitation for gear thieves because they can be removed with a basic 13mm spanner in minutes. This is where your roof top tent mounting hardware guide shifts from structural integrity to asset protection. We believe that peace of mind is just as important as a secure mount when you’re parked up in a busy urban area or at a popular trailhead. By replacing even two of your standard nuts with security fasteners, you create a formidable deterrent that forces opportunistic thieves to move on.
Security nut options have come a long way. Pin-in-Hex bolts require a specialised bit that isn’t found in most standard toolkits. For even better protection, keyed nuts use a unique socket pattern, similar to wheel locks on a car. If you use a quick-release system, such as the Front Runner Quick Release Mount Kit, ensure it’s the version with integrated locking tabs or a place for a padlock. Research shows that anti-theft accessories, like iKamper Bracket Locks, are becoming a standard addition for those who value their gear. This is especially vital in urban environments where your rig might be parked on the street overnight.
Specialised Security Fasteners
Keyed nuts work by replacing the standard hex head with a proprietary shape that only your specific socket can turn. You can source these from specialised 4WD outlets or directly from premium tent manufacturers. We also suggest the “Hidden Bolt” strategy. By positioning your brackets in hard-to-reach spots or using custom bash plates, you make it incredibly difficult for a thief to get enough leverage with a tool. Pair your secure tent with the best 4WD awnings for the ultimate setup that stays exactly where you put it, no matter where you park.
The “Wobble Test” and Final Inspection
Before you hit the tracks, perform a final inspection. Grab the tent and give it a firm shake; there should be zero lateral movement or vertical lift. If it moves, your brackets aren’t seated correctly or your crossbar spacing needs adjustment. Don’t forget to check the bolts connecting your rack to the vehicle roof, as these are often overlooked and can loosen over time. Hardware fatigue is a result of over-tightening or heat cycles. We’ve put together a final checklist for your pre-trip routine to ensure your roof top tent mounting hardware guide is fully implemented:
- Verify all security nuts are engaged and the key is stored safely in your glovebox.
- Check for any signs of “tea staining” or surface rust on the bolts.
- Ensure your quick-release pins are fully locked and secondary safety clips are in place.
- Test the tension on your rack-to-vehicle mounting points to ensure the entire system is rigid.
Gear Up and Hit the Tracks with Confidence
Mastering your rig’s technical side is the ultimate way to ensure a safe and responsible journey across our beautiful landscape. We’ve explored the vital role of 316 stainless steel in preventing coastal rust and the absolute necessity of respecting dynamic load ratings before you head off-road. By implementing this roof top tent mounting hardware guide, you’ve moved from guesswork to expert-level preparation. You now know that regular torque checks and specialised security nuts are what stand between a successful expedition and a gear failure.
Our Australia-wide community insights and independent, expert-led gear testing are designed to help you make the most of every adventure while focusing on safe exploration. Now that your mounting foundation is unbreakable, it’s time to find the shelter that suits your needs. Explore our expert Roof Top Tent reviews to find your perfect match. We’re proud to be part of your journey toward self-reliance. See you out there on the tracks, ready for whatever the wild throws your way!
Frequently Asked Questions
Can I use standard zinc-plated bolts for my roof top tent?
You should avoid using standard zinc-plated bolts for any permanent outdoor rig. While they’re cheap and readily available, the thin plating quickly fails in our salty coastal air and humid bush environments. We’ve seen these bolts crumble after just one season. Instead, we recommend 304 or 316 stainless steel. These materials offer the long-term durability and corrosion resistance required for safe, responsible exploration across the diverse Australian landscape.
What is the best bolt size for mounting a roof top tent?
M8 and M10 are the most common sizes you’ll encounter. Most soft-shell tents utilise M8 bolts, which are perfectly adequate for lighter loads. However, if you’re running a heavy hardshell model, we suggest upgrading to M10 hardware for increased shear strength. This roof top tent mounting hardware guide prioritises safety, so always ensure your bolts are high-tensile grade to withstand the violent vibrations and forces of remote 4WD tracks.
How often should I check the tightness of my mounting hardware?
We recommend performing an initial check after your first 50km of driving to account for the tent settling. After that, make it a habit to inspect your hardware before and after every major trip. If you’re frequently tackling corrugated roads, a quick five-minute monthly check is essential. Using a torque wrench ensures your bolts stay within spec, preventing the “slow loosen” that engine vibrations and rough terrain can cause over time.
Do I need a specific mounting kit for my brand of roof rack?
You might need a specialised kit depending on your setup. While many tents include universal brackets for traditional round or square crossbars, platform racks from brands like Rhino-Rack and Front Runner require specific T-slot hardware. These specialised channel nuts and brackets provide a much more secure, low-profile connection. Always verify the channel width of your rack before purchasing hardware to ensure a perfect, rattle-free fit for your next big adventure.
What happens if I over-tighten the mounting bolts?
Over-tightening can lead to hardware fatigue by stretching the bolt threads beyond their elastic limit. In stainless steel components, it often causes “galling,” where the threads cold-weld together and become permanently stuck. This weakens the structural integrity of your mount, making the hardware more likely to snap when subjected to the high-stress dynamic loads of highway driving or the constant jarring of corrugated outback tracks.
Is it safe to mount a roof top tent on factory-installed roof bars?
It’s rarely safe to rely on factory-installed bars for a rooftop tent. Most standard vehicle bars have a dynamic load rating between 50kg and 75kg, which many tents exceed once you factor in the weight of the mounting system. This roof top tent mounting hardware guide suggests upgrading to a heavy-duty aftermarket rack. These systems are designed to handle the weight and wind resistance of a tent while the vehicle is in motion.
How can I prevent my roof top tent from being stolen?
Protecting your gear starts with making it difficult for opportunistic thieves. We suggest replacing standard M8 nuts with specialised security fasteners like Pin-in-Hex bolts or keyed nuts. These require unique tools that aren’t found in a basic toolkit. For those who frequently park in urban areas, locking quick-release brackets or even a simple “Hidden Bolt” strategy can provide the extra layer of security needed to ensure your home away from home stays put.
What tools do I need for a standard roof top tent installation?
You’ll need a basic but specialised toolkit for a successful install. A quality torque wrench is non-negotiable for meeting specific tension requirements, alongside a socket set or spanners (typically 13mm or 17mm). Don’t forget anti-seize lubricant to prevent stainless steel galling and a spirit level to ensure the tent sits flat across your bars. Most importantly, grab a mate to help with the heavy lifting to keep the process safe and enjoyable.