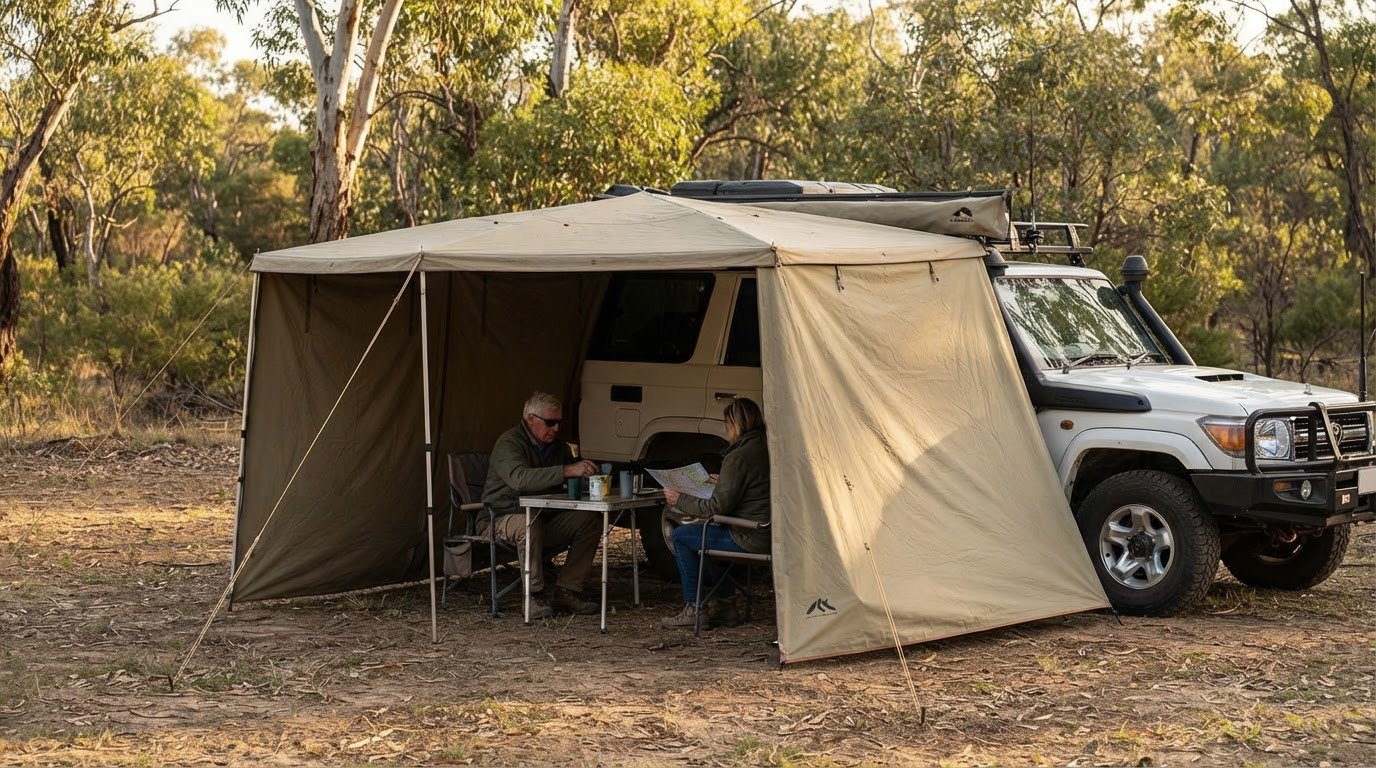
A sloping awning roof can help wind roll over rather than push underneath it. Knowing how to properly anchor a 4WD awning in high wind means setting the roof at a downward angle, securing it with suitable tie-downs and pegs, and checking every connection as conditions change. If strong or sustained winds are forecast, pack the awning away instead of relying on anchors alone.
It makes sense to focus on straps and pegs first, but the awning’s shape and exposure matter too. A flat, loose roof can catch the wind, while side walls and screens can act like sails. The right setup reduces movement, but it cannot make an awning safe to leave open in every gust.
We’ll cover how to slope the roof to shed rain and limit wind getting underneath, secure the awning barrel and legs, choose pegs for sandy or hard Australian ground, and inspect straps and connections after gusts. With a methodical setup and a willingness to pack down when conditions turn, you can camp with greater confidence and leave the site as you found it.
Key Takeaways
- Learn how roof angle and exposure affect wind lift, including why screens and side walls can catch gusts.
- See how to secure an awning barrel and legs with well-positioned tie-downs while avoiding excessive tension.
- Choose peg styles and lengths to suit sandy or hard ground, so anchors are less likely to pull free.
- Know what to inspect after gusts, from loosened stakes to stressed straps and connection points.
- Recognise when changing conditions call for packing the awning away rather than relying on extra anchoring.
Table of Contents
- Securing an awning barrel with tie-down straps
- What affects how much wind an awning can handle?
- Selecting suitable pegs for hard or sandy ground
- Inspecting anchors and connections after gusts
- Which awning pegs and guy ropes are best for high winds in Australia?
- Adventurerz: 4wd awnings reviews and recommendations
Securing an awning barrel with tie-down straps
Understanding how to properly anchor a 4WD awning in high wind starts with a stable, balanced setup. Australian campgrounds may have site-specific instructions, so follow posted directions for awnings and changing weather.
-
Use Pegs and Straps to Secure the Awning
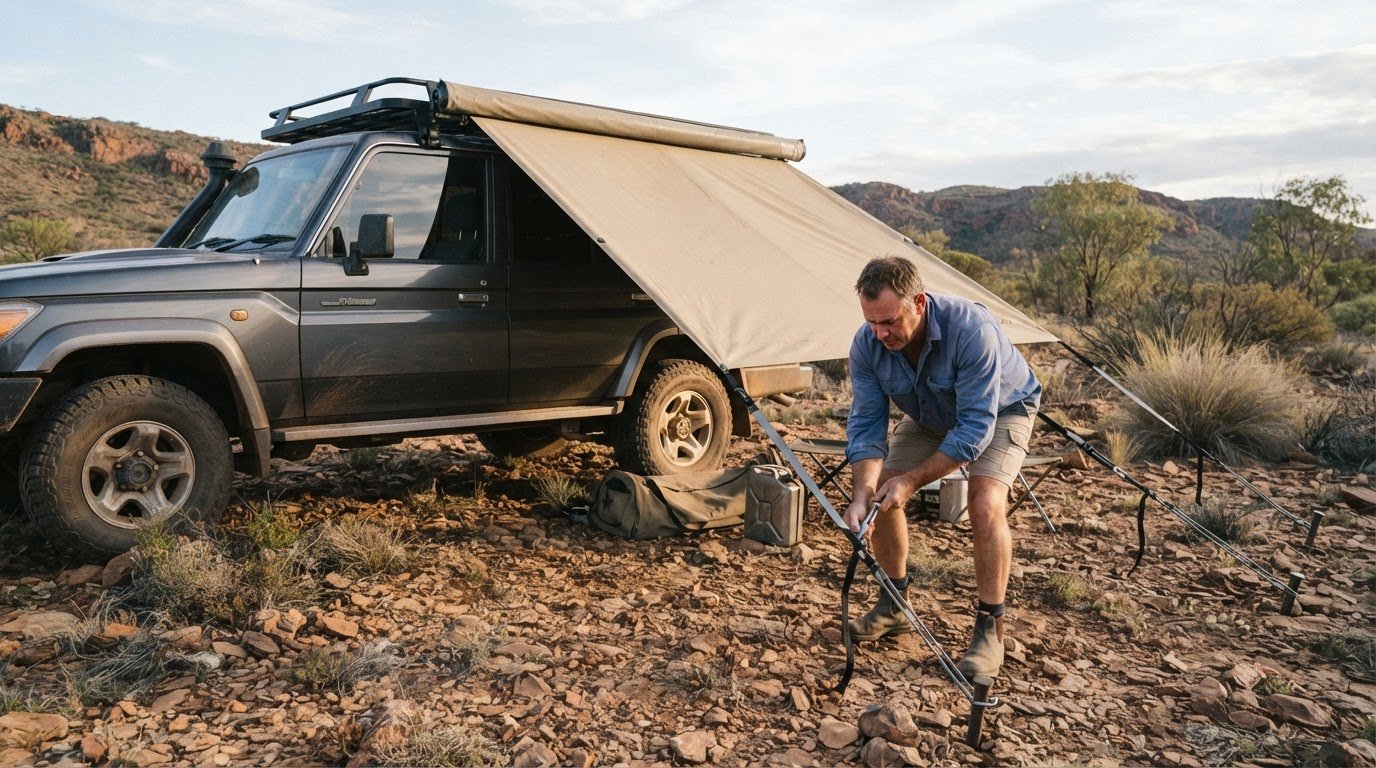
Extend the awning fully, then secure its outer legs with guy ropes and suitable pegs. Use two guy ropes at each outer corner, with each rope running to its own anchor point. Position each peg so the rope pulls across it rather than straight along its shaft. Check that the barrel and fabric are supported rather than left swinging freely.
-
Avoid Over-Securing and Awning Damage
Tension each strap until the awning feels steady, then stop before the fabric, arms or barrel bow under strain. Anchors should allow controlled movement rather than locking the frame rigidly against every gust. Avoid ratchet straps, which can apply excessive tension. Choose a tie-down with some give, then inspect the fabric for stretched seams or sharp creases after tightening.
- Secure the barrel with outdoor or marine tie-down straps, which resist stretching and salt-air degradation. Run each strap over the rolled barrel and connect it to a sound anchor point, keeping it clear of sharp edges. Attach guy ropes to suitable awning or vehicle mounting points, not door handles, mirrors or unsupported body panels. This reduces abrasion and avoids loading parts not designed to hold the awning.
- Support the awning legs and secure their bases so a gust cannot lift them. Peg through each leg’s base where the design allows, then check that every foot sits firmly on the ground. Keep strap paths straight and clear of moving vehicle parts. If a mounting point shifts or an awning arm flexes sharply, reduce tension and reassess the setup before using it again.
- Secure loose camp gear before the wind picks up. Pack lightweight chairs, tables and loose items into the vehicle or anchor them separately; flying gear can strike the awning and strain its fabric or supports. Don’t use furniture as an awning anchor. For anyone learning how to properly anchor a 4WD awning in high wind, keeping the space below and around the setup clear is part of a secure camp routine.
What affects how much wind an awning can handle?
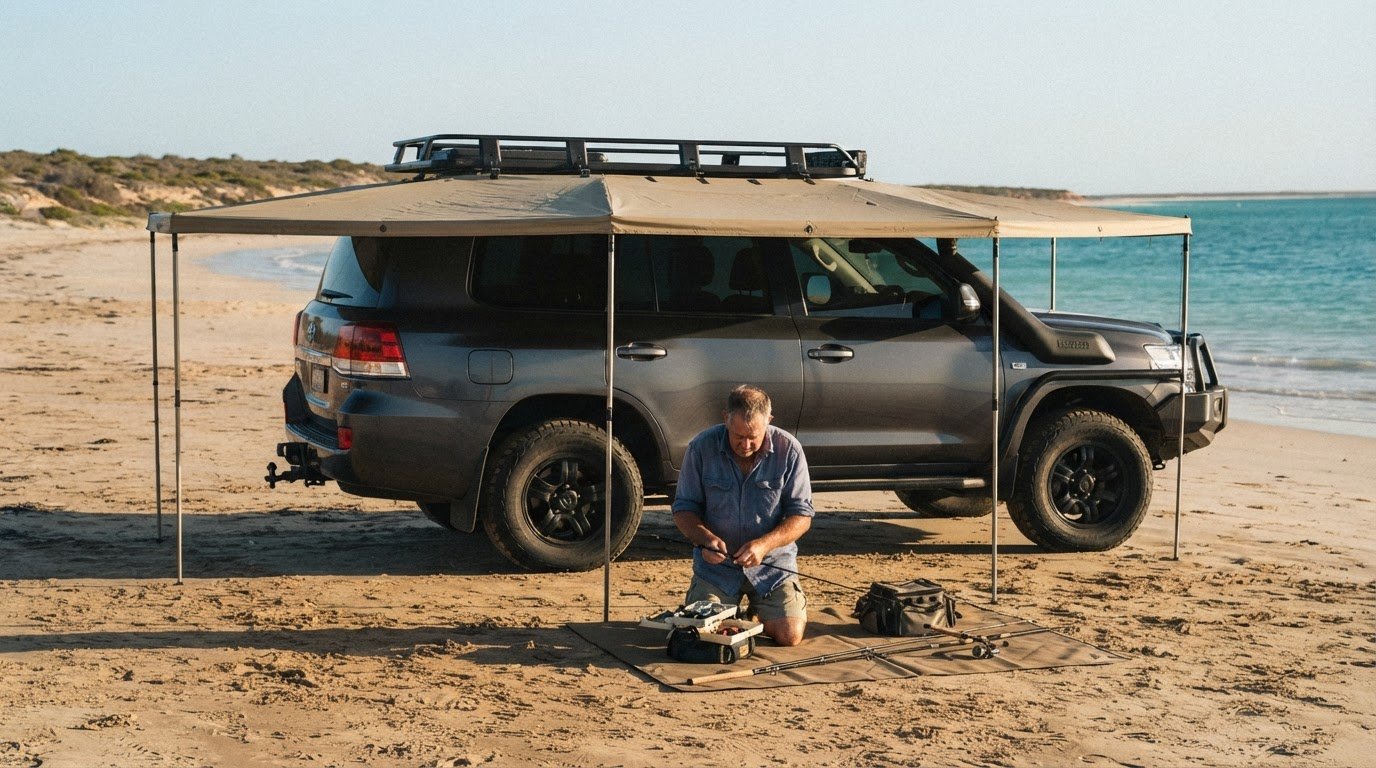
Wind exposure, roof angle, side walls and anchor placement all affect lift. Leaving an awning open in strong gusts can make the fabric balloon, pull pegs loose and strain the arms or vehicle mounts.
-
Angle the Awning to Reduce Wind Lift
Lower one outer edge slightly so the roof slopes away from the vehicle. This helps rain run off and reduces the chance of wind pushing underneath the awning. In exposed coastal camps, a slight downward angle can help wind pass over the roof. Check the slope after adjusting the legs, and avoid a flat surface where water could pool.
-
Angle Straps and Pegs to Resist Wind
Position each strap and peg about 45 degrees away from the shelter, so the rope pulls across the peg rather than straight out. This angle helps the anchor resist pull-out as the awning shifts in gusts. Keep the strap line clear of paths and vehicle doors, and make sure each peg sits firmly. A loose or upright peg can work free under repeated tension.
- Assess the whole setup before opening side walls or privacy screens. These surfaces can catch the wind like sails, increasing force on the awning fabric and supports. In strong, exposed conditions, leave screens rolled away and keep the awning open only if it remains stable. A sheltered campsite can have very different wind exposure from an open beach or bushland setting.
- Watch the roof and fabric as conditions change. Repeated flapping or ballooning means the awning is struggling, even if its pegs still look secure. Reduce exposed surfaces and pack the awning away when strong or sustained winds are forecast. Do not wait for a strap to loosen or an arm to flex sharply before acting. Those signs may appear after the fabric has already started lifting.
- Reassess the direction of the wind, not just its strength. Wind can shift around trees, buildings and other vehicles, while coastal gusts may arrive across open water with little shelter. Keep the roof sloped and the anchors aligned with the direction of pull. For help weighing awning design and setup features, browse these 4WD awning reviews and recommendations.
Selecting suitable pegs for hard or sandy ground
Match each anchor to the ground beneath the awning, not just the weather overhead. Sandy soil, compacted earth and hard ground hold pegs differently, so choose and position them carefully.
-
Choose Pegs for the Ground Type
Use longer pegs in sandy ground, where short stakes can pull free in a gust. For loose coastal sand, longer stakes or screw-style anchors offer more resistance to pull-out. In firmer soil, choose a peg that can be driven securely without bending. Check the ground around every awning leg and guy-rope anchor. A peg that moves by hand needs repositioning or a more suitable anchor.
-
Pre-Drill Hard Ground
For particularly hard ground, pre-drill with a 12 mm masonry drill bit before installing a Ground Dog peg. This creates a pilot hole and makes placement more manageable than forcing the peg into compacted earth. Keep the hole aligned with the intended anchor position, then install the peg and test its hold with a controlled pull. Don’t hammer against a peg that is bending or refusing to enter.
-
Anchor Awning Legs with Ground Screw Pegs
Install a ground screw peg beside each awning leg where the soil allows, then connect the leg’s anchor point securely. Turn the screw into the ground until its helical section is engaged, keeping it aligned with the direction of the load. Check that it does not rock or lift when tension reaches the leg. In sandy camping spots, a longer screw-style anchor can resist pull-out better than a short, straight stake.
- Secure the base of every awning leg so a gust cannot lift its foot. Peg through the base where the awning’s design allows, then check that the leg stays planted as the fabric moves. Use an anchor suited to the soil at that exact point. The ground beneath one leg may be firmer than beneath another. Do not assume a peg is holding simply because it entered the soil.
- Test each anchor before relying on the setup. Pull gently on the guy rope and watch for the peg shifting, soil loosening or the leg lifting. If an anchor moves, reposition it in firmer ground or switch to a longer or screw-style option suited to the surface. Angle the peg to resist the rope’s pull, and leave enough space around it to avoid a trip hazard at camp.
Inspecting anchors and connections after gusts
After a gust passes, inspect the anchors, straps and connection points before leaving the awning unattended. Gusts can gradually loosen pegs and change tension across the frame.
- Start at the ground anchors and follow each guy rope towards the awning. Look for pegs that have tilted, lifted or shifted in loosened soil. A peg that moves under a gentle pull needs attention before the next gust. Check the ground around the anchor too, since disturbed or crumbling soil can reduce its hold.
- Check every rope and strap for slack, then restore firm tension without pulling the frame rigid. Guy ropes should feel secure, not excessively tight. If a rope has loosened, take up the slack and check its peg again. Tightening one rope can shift the load onto another anchor, so check neighbouring lines rather than stopping after the first adjustment.
- Inspect the awning’s connection points, including clips, buckles, stitching and vehicle mounting hardware. Look for a buckle that has slipped, stitching that has separated, or a mounting point that has moved. On a 4WD, check for strap abrasion where webbing touches a sharp edge. Stop using a damaged connection; extra tension won’t repair it.
- Examine the frame and fabric for changes after the gusts. Look for bent arms, loose joints, stretched seams and fresh creases near attachment points. A caravan-style awning frame can transfer movement from one section to another, so inspect both sides even if only one corner appeared to lift. Keep clear of any component that looks unstable while assessing it.
- Recheck the complete setup after each adjustment. Confirm that the awning remains supported, the guy ropes are firm and the pegs have not loosened again under tension. If the fabric continues flapping or the frame keeps shifting, pack the awning away rather than repeatedly tightening the anchors. Before leaving camp, secure loose gear and make sure no strap or rope creates a trip hazard.
After the wind passes, reassess the entire anchoring arrangement rather than assuming it is unchanged. Check the stakes, straps and connection points in an orderly way, looking for anything that has shifted or lost its hold. Gusts can loosen anchors gradually, and the change may not be obvious from a distance. If a stake or connection has moved, address it before relying on the awning again. Then inspect nearby parts too: the load is shared across the setup, and correcting one point can affect another.
Pay particular attention to caravan awning guy ropes. They help hold the awning steady, but pulling them as tight as possible is not the goal. They should be firm without being excessively tight. If a rope has loosened, adjust it, then reassess the surrounding anchors and connections. A careful check helps distinguish a secure setup from one that only appears settled after a gust. If an anchor or connection still seems uncertain, do not leave the awning unattended until you have addressed the issue. Make this inspection part of your response after wind, not just a check during setup. Focus on the parts most likely to have changed, rather than relying on how the awning looked before the gust.
Which awning pegs and guy ropes are best for high winds in Australia?
Choose anchors to suit the ground and tie-downs that hold tension without making the awning rigid. On Australian trips, match each part of the setup to the campsite’s surface and wind exposure.
- Match peg style to the soil at your campsite. Longer stakes or screw-style anchors suit sandy coastal ground, where short pegs can pull out more readily. In firmer soil, choose a peg that can be driven securely without bending. Check the ground at each anchor point, since soil can vary across one campsite. A peg that shifts under a controlled pull is not holding reliably.
- Choose tie-downs designed for outdoor or marine use. These straps resist stretching and salt-air degradation, useful qualities for coastal touring. Check the strap for worn stitching, fraying or damaged hardware before packing it. Keep the webbing clear of sharp edges on the vehicle and awning. An abraded strap can weaken where it rubs, even if its buckle still closes.
- Use two guy ropes at each outer corner to support the awning’s exposed edge. Position the ropes so they share the load instead of pulling from one point. Secure each rope to its own suitable anchor, then adjust until it feels firm without excessive tension. A slack rope can let the fabric move sharply; one pulled too tight can strain the awning as gusts shift.
- Consider how rope angle affects the peg’s hold. Set each anchor so the rope pulls across the peg rather than directly along its shaft. An angle of about 45 degrees away from the shelter helps resist pull-out. Keep the line clear of walkways, vehicle doors and camp gear. Recheck the angle if the peg moves or the rope starts dragging across the ground.
- Judge the complete setup, not just the strength of one peg or rope. A sheltered campsite places different demands on anchors than exposed coastal ground, and side walls can catch wind like sails. Keep the awning’s load balanced, inspect each connection, and pack it away when strong or sustained winds are forecast. Explore 4WD awning options and design features to understand how awning construction affects your setup choices.
Adventurerz: 4wd awnings reviews and recommendations
Adventurerz offers 4WD awning reviews and recommendations to help you assess awning designs, features and setup considerations for Australian trips. Turn to these insights when comparing options or planning how an awning will suit your vehicle, campsite and expected conditions. A considered choice matters, but safe use still depends on matching anchors to the ground, checking connections and packing down when strong or sustained winds are forecast.
For a broader camp setup, Adventurerz shares reviews and recommendations on rooftop tents, camping equipment and hiking equipment. Use these resources to plan gear choices around the way you travel, while keeping responsible camping practices in mind.
Contact Adventurerz to discuss your outdoor information needs.
Make a wind-ready setup part of every trip
Build your awning routine before your next remote camp, not while gusts are already lifting the fabric. Practise opening, securing and packing it away at a familiar campsite, and note which anchors suit the ground you encounter. That preparation makes calm decisions easier when the weather shifts, especially when travelling somewhere exposed or far from assistance.
Knowing how to properly anchor a 4WD awning in high wind is also about recognising when not to leave it open. Let changing conditions guide your choices, and treat packing down as a sound part of responsible travel rather than a setback. Protecting your shelter and campsite keeps the focus on the journey ahead.
If you’re planning your setup or want to explore awning options, contact Adventurerz about your awning setup. Prepare thoughtfully, travel with care, and enjoy the next stretch of track.
Frequently Asked Questions
How do you secure a 4WD awning in strong winds?
Reduce the awning’s exposed surfaces, secure its support points and pack it away if strong or sustained winds are forecast. Keep side walls and privacy screens rolled up, since they can catch gusts. Check the vehicle mounts and awning connections before applying tension. If the fabric starts ballooning or the frame shifts repeatedly, do not keep tightening. Retract the awning and wait for calmer conditions.
What wind speed can a 4WD awning safely withstand?
There isn’t one safe wind-speed rating for every 4WD awning, so follow the limit given for your particular model. As a general comparison, caravan awning guidance describes light winds up to 20-25 km/h and moderate winds of 25-40 km/h with suitable support. These ranges aren’t a universal 4WD awning rating. Gusts, exposure and screens can change the load, so pack down before conditions become strong or sustained.
How do you anchor a 4WD awning on sand, rocky ground and soft soil?
On sand or soft soil, use longer stakes or screw-style anchors to resist pull-out, then test each anchor with a controlled pull. Rocky ground needs a different approach: do not force a peg into solid rock or a loose crack. Find soil that can hold the anchor, or pack the awning away if there is no suitable point. Check the ground at each leg, as conditions can vary across one campsite.
How do you reinforce a 4WD awning frame in gusty conditions?
Support the frame through its intended legs, guy-rope points and vehicle connections rather than attaching extra loads to the arms. Use two guy ropes at each outer corner, keeping tension firm without making the structure rigid. Check joints and mounting points for movement as gusts pass. If the frame flexes sharply, the fabric balloons or connections shift, reduce exposure and retract the awning instead of forcing it to stay open.
When should you retract a 4WD awning due to wind?
Retract it early when strong or sustained winds are forecast, or when the fabric begins flapping or ballooning. Most caravan awnings should be retracted, lowered or packed away when wind speeds exceed 40 km/h; that figure isn’t a universal rating for 4WD awnings. Don’t wait for anchors to loosen before acting. If gusts are building or changing direction at an exposed campsite, packing down is the safer choice.