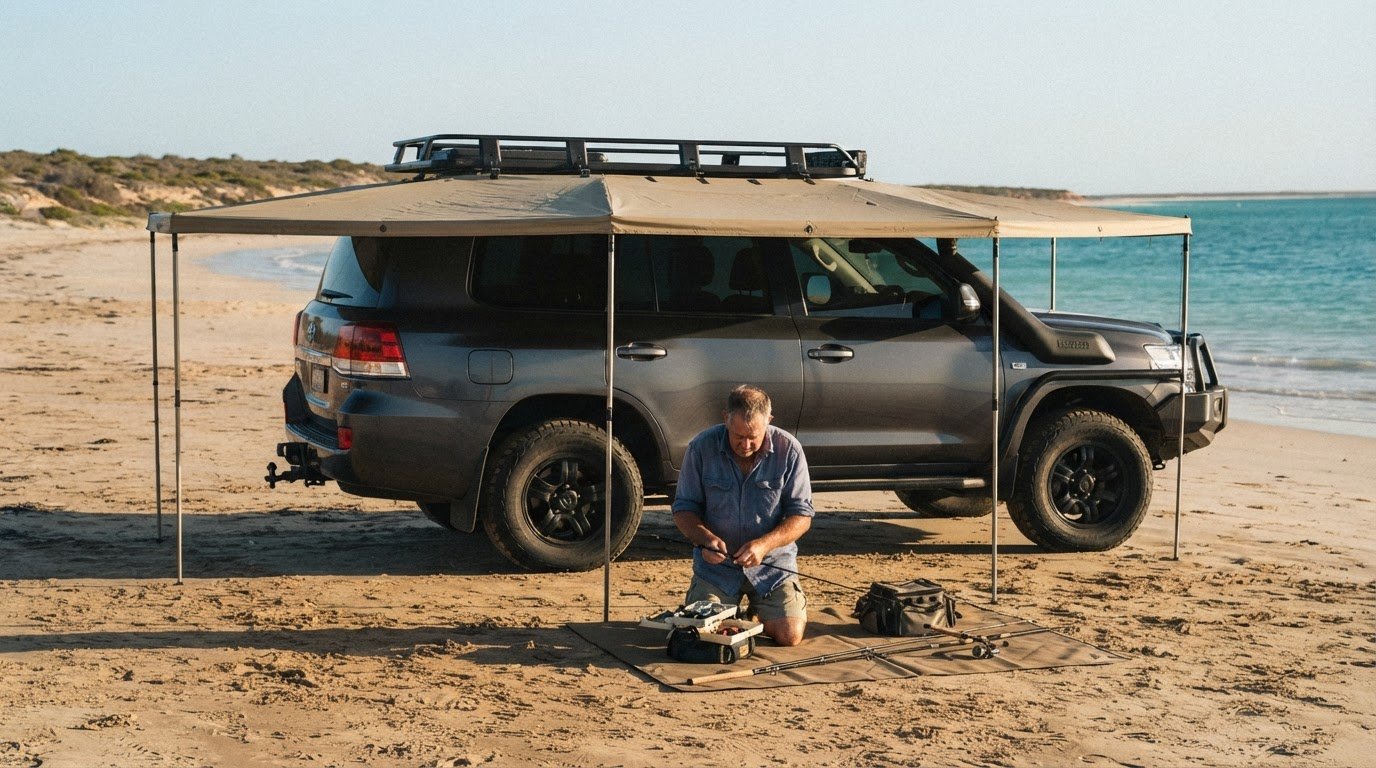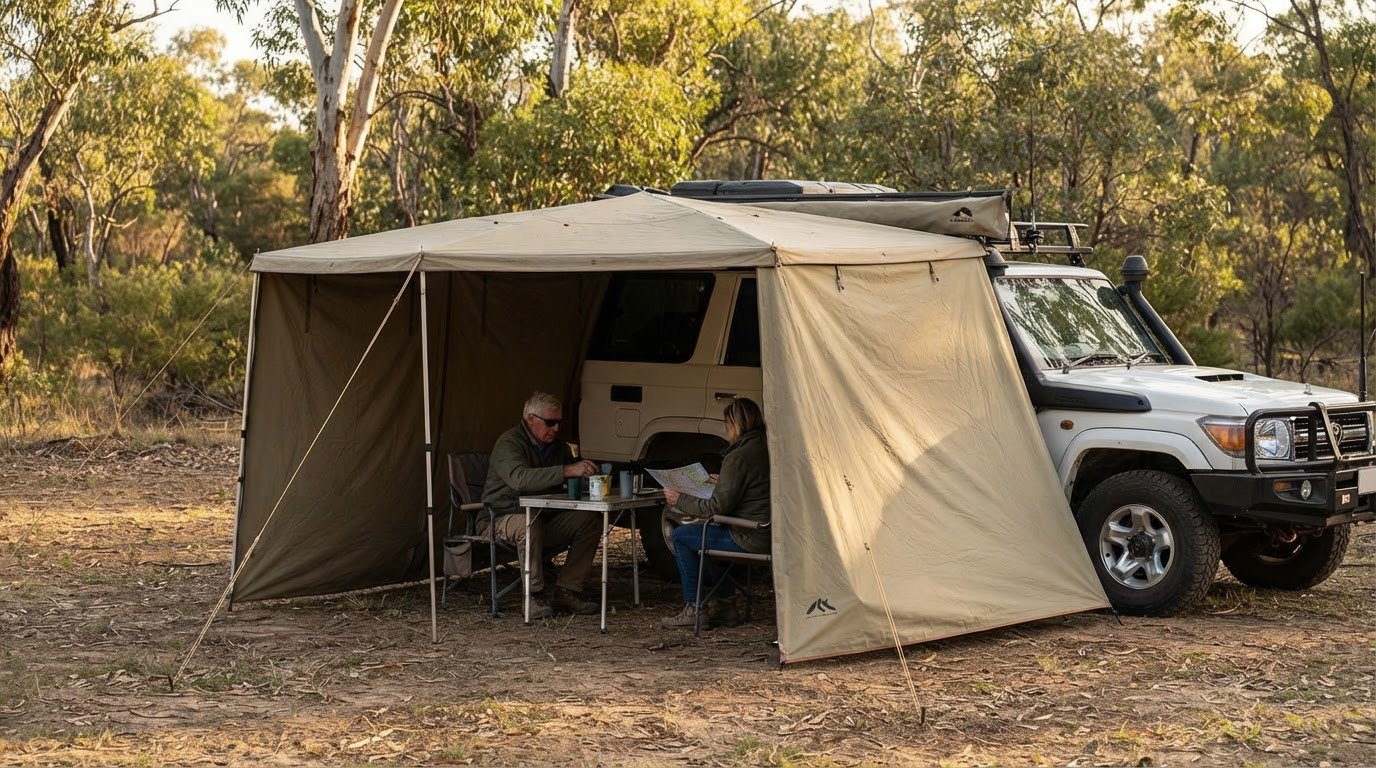
The biggest awning isn’t automatically the best 4WD awning for fishing and beach trips. A straight awning can suit a simple shaded setup, while a 180-degree awning wraps around one side and the rear; a 270-degree awning provides more coverage. Choose according to your vehicle, mounting space and the shelter you’ll use, remembering that awnings are designed mainly for shade, with light rain protection as a secondary use.
It makes sense to want room to sort fishing gear, share a beachside lunch or take a break from the sun without carrying more than you need. The right setup balances coverage with practical vehicle fit and manageable handling.
This guide compares awning styles and dimensions, then covers useful accessories, fabric, hardware and weather protection. You’ll also find care tips for sandy, salty trips, helping you choose gear that suits your Australian coastal adventures and leave each spot ready for the next crew.
Key Takeaways
- Match the awning style to the shade you need around your vehicle and how you use your fishing or camping setup.
- Choose dimensions with your roof rack, vehicle length and available mounting space in mind.
- Consider accessories such as lighting, mosquito nets and windbreaks for a more useful beachside shelter.
- Compare fabric, poles, fittings and seams, and remember that an awning is primarily for shade.
- Plan for sand, salt and damp fabric when packing up after a coastal trip.
Table of Contents
- 1. Choosing an awning style for camping and fishing trips
- 2. Matching awning dimensions to roof racks and vehicles
- 3. Accessories such as lights, mosquito nets and windbreaks
- 4. Awning fabric, hardware and weather protection
- 5. Side awnings for beach trips and picnics
- Adventurerz: 4wd awnings reviews and recommendations
1. Choosing an awning style for camping and fishing trips
Start with how you travel and where you’ll use the shade. A straight awning suits a simple setup beside a 4WD, while a wraparound design shelters more of the vehicle’s side and rear. For a couple stopping to fish, a compact shaded area may be enough. A family setting up chairs, a table and beach gear may value broader coverage. A caravan-based trip may also need a different layout from touring with everything mounted to one vehicle.
A 180-degree awning wraps around one side and the rear of the vehicle. A 270-degree awning offers more coverage, which can help create a larger shaded space for lunch or sorting fishing gear. On an open beach, that extra reach can be useful, but the best choice still depends on available mounting space and how much shelter you’ll use. More coverage also means more fabric and hardware to manage during setup.
Choose the mounting side with your regular stops in mind. Many Australian tourers mount an awning on the passenger side to create a safer campsite when parked roadside. That placement can also suit a beach stop, with shade beside the vehicle rather than behind it. Consider access to doors, your approach to the fishing spot and where you’ll prepare gear before choosing a side.
For beach fishing, prioritise practical shade over maximum coverage. A 180-degree or 270-degree model can extend shelter around the rear, while a straight awning keeps the covered area focused along one side. The Rhino Rack Sunseeker covers over 4 square metres; its Batwing awning provides 270-degree shade over 11 square metres. These examples show how style and coverage differ. Keep an awning secured, and don’t leave it open and unattended, as wind can place leverage on the roof rack.
Setup time matters after a long drive. After a seven-hour drive, spending one hour putting up an awning may be undesirable. Look at how the awning deploys and packs away, and consider whether you’ll set it up alone or with a travel companion. The 4WD awning reviews and recommendations can help compare styles and features.
Assess freestanding awnings by their support system, coverage and setup, as well as their fit with your vehicle and trip plans. Compare the design and intended use rather than relying on the freestanding label alone.
Popular 4WD awning prices vary with style, coverage, materials and included hardware. Compare those features against how often you’ll use the awning and the space your vehicle can carry.
2. Matching awning dimensions to roof racks and vehicles
Start with the vehicle’s roof length and usable mounting space, not the awning’s advertised coverage alone. A straight 2.0 m or 2.5 m awning is often enough for couples and small families, depending on those dimensions. For fishing trips, also consider the space needed to stand beside the vehicle and organise rods or other gear under cover. A longer awning only helps if the roof rack can support its mounting position without obstructing access or other equipment.
Check compatibility across the whole mounting system: vehicle, roof rack or platform, brackets and awning back plate. Most awnings attach to a roof rack using an aluminium back plate. The rack’s shape and available mounting points determine where the plate can sit, while the vehicle’s roofline affects clearance above doors and other fittings. A platform may offer different attachment positions from a bar-style rack, so match the brackets to your actual rack rather than assuming a universal fit.
Roof load ratings matter because both the vehicle and rack have limits. Follow the ratings and installation guidance for your vehicle and rack, accounting for the awning and mounting hardware. A matching bolt pattern alone doesn’t show that the complete setup is suitable. Position the awning so it doesn’t obstruct doors, roof accessories or access to equipment carried above the vehicle.
Before mounting, compare the back plate with the rack’s straight sections and attachment points. A curved roof or angled rack can affect clearance and alignment. Check that the awning can open without hitting a raised door, rooftop tent or other accessory. If your setup includes a rooftop tent, plan both mounting positions together rather than treating each item separately.
Plan for wind separately. Don’t leave an awning open and unattended, as wind can put leverage on the roof rack. If it stays up overnight, peg it down in case the wind picks up, but remember that pegs don’t remove the need to respond to changing conditions. Pack the awning away when wind strengthens instead of relying on its supports to hold it open.
For a practical fit comparison, record your vehicle’s roof length, rack type, clear mounting area and other roof accessories before choosing dimensions. Then compare those details with 4WD awning reviews and recommendations, focusing on mounting arrangements as well as shade coverage. This helps narrow the options to awnings that suit your vehicle and the way you travel.
3. Accessories such as lights, mosquito nets and windbreaks
Choose accessories for the jobs your awning needs to handle. A light can help you sort fishing gear after sunset, while a mosquito net can make an enclosed seating area more comfortable. A windbreak adds a barrier on an exposed beach, but also changes airflow and the feel of the shelter. Start with your usual stop: a quick lunch needs less gear than an evening fishing session beside the vehicle.
Check how each accessory attaches before packing it. Some systems use dedicated channels or attachment points, while others need separate supports. Compatibility affects both setup and storage. For example, a net designed for one awning shape may not fit another frame. Keep small fittings together in a labelled pouch so they’re easy to find once the awning is open.
Plan where to put lights before you arrive. Aim one at the table or gear area without shining into anyone’s eyes. Keep leads and power equipment out of walkways, where people may move between the vehicle and beach in low light. For fishing, direct the light at your workspace rather than the shoreline to keep the camp area contained.
A windbreak can shelter you beside the vehicle when a beach breeze makes an open awning less comfortable. Set it to suit the wind direction, and leave a clear path between the vehicle doors and seating area. Mosquito nets suit still evenings when insects gather around camp, but secure the edges to close gaps. Match accessories to conditions instead of carrying every option on every trip.
Practise attaching accessories at home before travelling. Open the awning, fit the net or windbreak, then pack everything away. This trial shows whether an accessory blocks a door, clashes with the roof rack or makes fishing gear awkward to reach. Test the whole setup with the vehicle parked as it will be at camp, not just with the parts laid out separately.
Telescopic poles can support an awning, but accessories still need to suit its frame and attachment method. Keep pole sections, pegs and fittings together, and remove loose items before packing. After a beach stop, brush sand off accessories before storing them, as grit can make closures and fittings harder to use.
There isn’t one permit rule to assume for every Australian beach. Check signs and local beach access information for restrictions on setting up an awning at your intended stop, and pack it down if site rules or conditions call for it.
4. Awning fabric, hardware and weather protection
Start with the fabric’s sun protection and construction, not colour alone. Look for an awning fabric with a UVP rating of 50+, and compare the product details rather than assuming all fabrics perform alike. Polyester/cotton fabric weighing 300 gsm is a useful benchmark when assessing material weight. For a weekend fishing trip, consider how the fabric will handle regular packing, exposure and storage. The best choice balances shade, manageable handling and the conditions you expect to encounter.
Fabric type affects what an awning is suited to, so weigh the material and its intended use together. Polyester/cotton is one option to compare, with 300 gsm providing a specific reference point. Check the fabric’s stated sun-protection rating rather than judging it by colour or thickness alone. Don’t treat a fabric’s colour or thickness as a substitute for its listed rating. Clear product specifications make it easier to compare awnings on the same basis.
Inspect the frame and hardware as carefully as the canopy. Most 4WD awnings use telescopic aluminium poles with a twist-and-lock function. For sturdier support and durability, choose stainless-steel twist-lock poles, hinges and fittings. Check how each pole locks, then look for movement or looseness in the joints. Reinforced seams and precise finishing are also worth examining, especially where fabric joins the canopy or attaches to the structure.
Set expectations around weather protection. A 4WD awning is designed primarily to provide shade, with light rain protection as a secondary use. It isn’t a substitute for a dedicated shelter in severe weather. Before opening it, assess the conditions at your campsite and keep an eye on changes while it’s deployed. If wind picks up, pack the awning away; its fabric and hardware aren’t a reason to leave it exposed.
After a trip, let damp fabric dry fully before storing it to help prevent mould and unpleasant smells. Open the awning somewhere with airflow, check seams and fittings, and pack it only when dry. Inspect twist locks and hinges for sand or visible wear before your next drive. These checks help keep the fabric and moving parts ready for another fishing trip.
5. Side awnings for beach trips and picnics
A side awning can turn the space beside your 4WD into a practical beachside base. Use it to shelter a picnic table, keep bags out of direct sun, or sort fishing gear before heading to the water. Its value comes from how the shaded area works with your vehicle, not simply how far the fabric extends. Leave enough room to open doors and move between the car, chairs and beach equipment.
Plan your layout before unfolding the canopy. Park with the awning side facing your seating area, then place the table and chairs underneath without blocking vehicle access. Keep fishing tackle in a closed tub, and leave sandy footwear near the edge, away from food. This keeps the picnic area organised and makes packing up after a beach stop easier.
Sun direction can change where the shade falls during a longer stop. At lunchtime, the vehicle may provide useful cover; later, the shade may move away from the table. Consider how long you’ll stay and whether you can safely reposition the vehicle before choosing your setup. An extended awning can cover more of the side area, but useful coverage depends on where its supports and edges sit.
Keep your beach setup tidy. Secure loose bags, wrappers and lightweight gear so they don’t blow across the sand. Keep chairs and accessories within the sheltered area, away from nearby vegetation and dunes. Choose a firm, suitable spot for the vehicle and keep the awning clear of other beach users. A compact setup lets you enjoy the stop without spreading camp beyond the shade you need.
Pay attention to salt and sand before storage. After a coastal trip, brush sand from the awning and rinse salt residue from brackets and poles. Let damp fabric dry fully before packing it away to help prevent mould and unpleasant smells. This quick care routine also lets you spot grit around fittings before your next trip.
For a picnic, a straight side awning may provide focused cover for a table and chairs. For a longer beach stop, broader coverage can make room for more gear, but it also takes up more space beside the vehicle. Choose according to your group size, vehicle layout and packing habits. The best setup provides useful shade while keeping access clear and the beach tidy.
Adventurerz: 4wd awnings reviews and recommendations
Adventurerz offers 4WD awning reviews and recommendations to help you compare coverage, vehicle fit, setup and materials for coastal trips. Turn to these comparisons when you’ve narrowed down the style you need but want a clearer view of how different awnings suit your fishing or beach setup. You can also explore camping equipment reviews and recommendations when planning the rest of your camp kit.
Let your priorities, such as shade beside the vehicle or easy setup after a drive, guide your choice. A considered setup helps us enjoy Australia’s outdoors while keeping camp practical and beach spots tidy.
Contact Adventurerz to share your questions about choosing a 4WD awning.
Make your next coastal setup your own
The best 4WD awning for fishing and beach trips is the one that fits the way you travel, not just the conditions in a product description. Before your next outing, picture your usual stop: where you’ll park, what you’ll keep within reach, and how you want to use the shade. That practical starting point can help you choose gear that earns its place on the vehicle and supports more thoughtful time outdoors.
Adventurerz brings together reviews and recommendations for 4WD awnings, rooftop tents and camping equipment, helping you explore options for a complete Australian touring setup. Use those insights to shape a shortlist around your vehicle and travel plans, then keep your beach camp compact and leave the site tidy for the next crew.
Contact Adventurerz for awning advice and take the next step towards a setup that suits your coastal adventures. Here’s to more comfortable stops and memorable days by the water!
Frequently Asked Questions
What 4WD Awning Features Are Worth Paying For?
Prioritise a secure vehicle fit, useful shade and construction suited to your trips. For fishing, consider whether the awning leaves room to reach doors and gear without dismantling camp. Look for clear information about fabric protection, seam finishing and pole or hinge materials. Choose accessories that solve a regular problem, such as lighting a sorting area after sunset, rather than adding bulk you rarely use.
What are the best 4WD awnings in Australia for fishing and beach trips?
The best 4WD awning for fishing and beach trips depends on your vehicle, group and usual stops. A straight awning can suit a compact lunch setup, while wraparound coverage can shelter more space beside and behind the vehicle. For a specific model, compare its mounting arrangement, deployment method and usable shaded area against your touring setup. Don’t choose by coverage alone: the awning also needs to fit your rack and leave vehicle access clear.
Which 4WD awnings are best for wind and coastal conditions?
Choose an awning with sturdy support hardware and well-finished seams, and plan for wind whenever you use it. Position the vehicle to suit the conditions, stay with the canopy, and pack it away if the wind increases. No awning should be treated as a substitute for secure shelter in severe weather. For coastal trips, a simple post-trip routine helps keep salt and sand from lingering on fittings.
Which 4WD awnings are easiest to install and pack away?
The easiest awning is one you can confidently deploy and stow with your usual crew. Before travelling, practise opening it and returning the fabric, poles and pegs to their storage places. Check that the sequence feels clear and the packed awning fits its intended position on the vehicle. A solo traveller may value a different setup from a pair sharing the task, so match the mechanism to how you tour.
How do you protect a 4WD awning from salt, sand and corrosion?
After a coastal trip, brush loose sand off the fabric and rinse salt residue from brackets and poles before storage. Pay attention to joints and fittings, where grit or salt can remain after a quick clean. Let wet fabric dry fully before packing it away to help prevent mould and odours. Once clean and dry, store the awning securely so loose straps or components don’t rub against other gear during travel.
What mounting systems and roof-rack requirements do 4WD awnings need?
Most awnings mount to a roof rack through an aluminium back plate, but the bracket arrangement must suit your rack and vehicle. Before installation, compare the rack’s attachment points with the awning’s plate and check the setup against the relevant vehicle and rack load ratings. Consider roof shape, door clearance and nearby accessories too. A rooftop tent or other roof equipment may affect where an awning can be mounted and opened.
What are the best freestanding 4WD awnings available in Australia?
Compare freestanding awnings by their support system, coverage and setup, as well as their fit with your vehicle and trip plans. Choose according to the design and intended use, not the freestanding label alone.