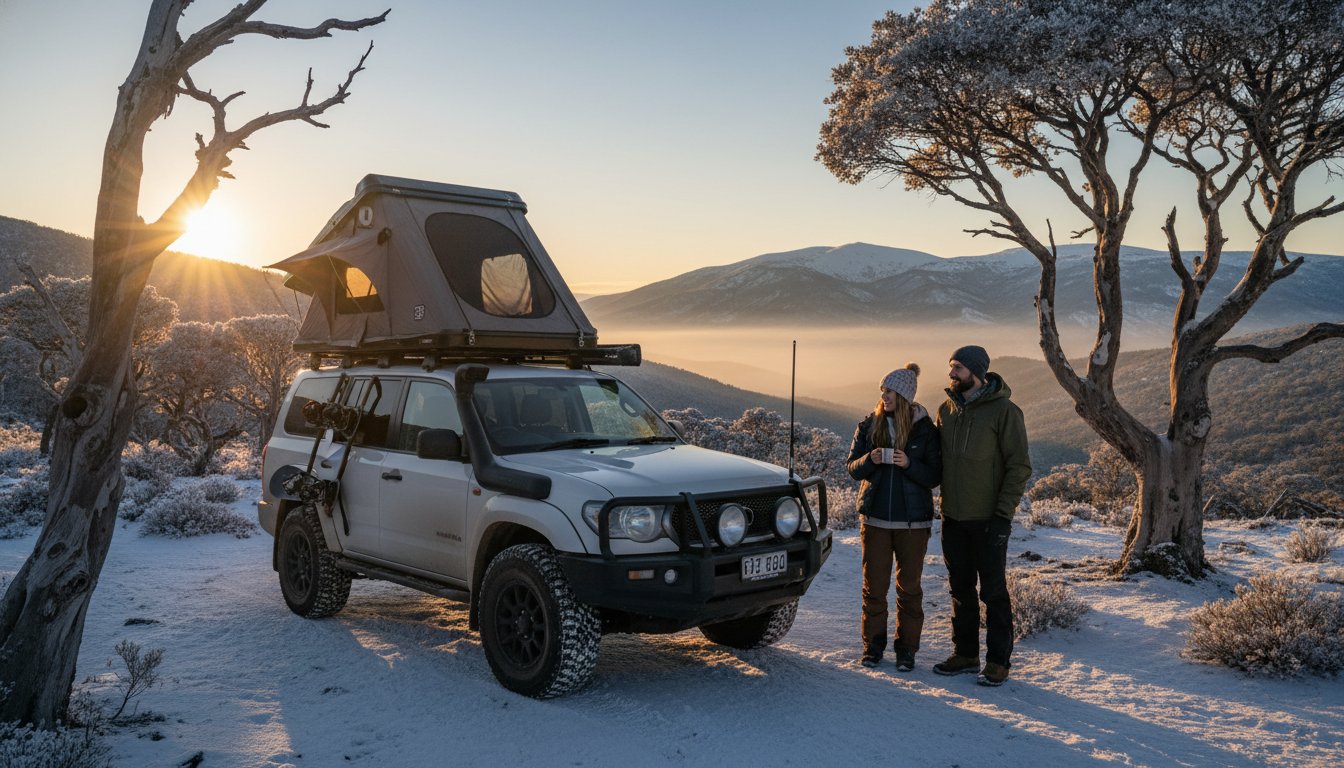
Picture this: you’ve just spent six hours navigating corrugated tracks to find the perfect spot north of the Daintree. The sun is absolutely relentless, the family is getting restless, and your so-called ‘easy-setup’ awning is fighting you every step of the way. We’ve all been there, right? A cheap awning can instantly turn a dream campsite into a sunburnt headache, especially when a gust of wind you’d barely notice in Perth snaps a pole clean in two.
That’s exactly why we, the Adventurerz community, decided to create the guide we all wished we had. This isn’t just another list; it’s the most comprehensive collection of 4wd awning reviews Australia will see in 2026, built on months of our own rigorous testing and honest feedback from fellow travellers. We promise to show you which models genuinely block out the harsh Aussie sun, which ones you can deploy solo in under 90 seconds, and which awnings offer rock-solid durability without exceeding your roof’s 100 kg load limit. Get ready to find the perfect shade for your rig and make every trip a legendary one!
Key Takeaways
- Understand why a quality awning is non-negotiable for beating the harsh Aussie sun and elevating your entire campsite setup.
- Quickly decide between a 270°, 180°, or standard pull-out awning to find the perfect shade solution for your unique travel style.
- Access our exclusive 4wd awning reviews Australia for 2026, where we pressure-test the top models against brutal wind and relentless outback conditions.
- Learn how to match the right awning material and size to your specific vehicle to ensure a secure fit and maximum durability on corrugated roads.
Why Your Rig Needs a High-Quality 4WD Awning in 2026
Let’s get one thing straight, fellow Adventurerz: a 4WD awning isn’t a ‘nice-to-have’ accessory. It’s the single most transformative piece of kit you can bolt to your rig. In the vast, sun-drenched landscapes of Australia, it’s your instant shelter, your mobile basecamp, and your front-line defence against the elements. It’s the difference between a rushed, sweaty lunch stop on the side of the Oodnadatta Track and a relaxed, comfortable break in the shade. It fundamentally changes how you interact with the wild, turning the side of your 4×4 into a functional, liveable space.
Think of it as your portable living room. Within 90 seconds, you can deploy a reliable patch of shade that becomes your kitchen, your workshop, or just a spot to kick back with a cold one and watch the sunset over the dunes. This simple sheet of canvas, supported by a sturdy frame, is what allows us to thrive, not just survive, out there. If you’re new to the concept, understanding what is an awning? in a technical sense helps appreciate the engineering that goes into modern designs that withstand Aussie conditions. But for us, it’s about the freedom it provides.
Most critically, it’s a vital piece of safety equipment. Pulling up for a midday break in the outback, with temperatures soaring past 40°C, can be dangerous. Heat exhaustion is a real and present threat, and a high-quality awning provides immediate, life-saving relief from the direct solar radiation. It creates a pocket of cooler air, allowing your body to recover and ensuring you’re fit to continue the journey safely. Don’t underestimate this benefit; it’s as important as your recovery gear.
The Australian Sun and Salt Factor
Our sun is no joke, and neither is the salt-laced air along our incredible coastline. For our coastal Adventurerz hitting the tracks around Scarborough or Fraser Island, standard steel hardware will rust out in a season. You need marine-grade (316) stainless steel or properly anodized aluminium fittings that resist corrosion, and sourcing from a marine specialist like BIVO is the best way to guarantee quality. The fabric itself must carry a non-negotiable UPF 50+ rating, which blocks over 98% of harmful UVA and UVB rays. A shady tree just doesn’t offer that same certified protection. That same principle applies to your personal gear; for high-performance apparel designed to handle these conditions, you can check out 2XU. The Adventurerz mindset is simple: buy it once, buy it right, and choose gear that respects both your wallet and the wild places we explore.
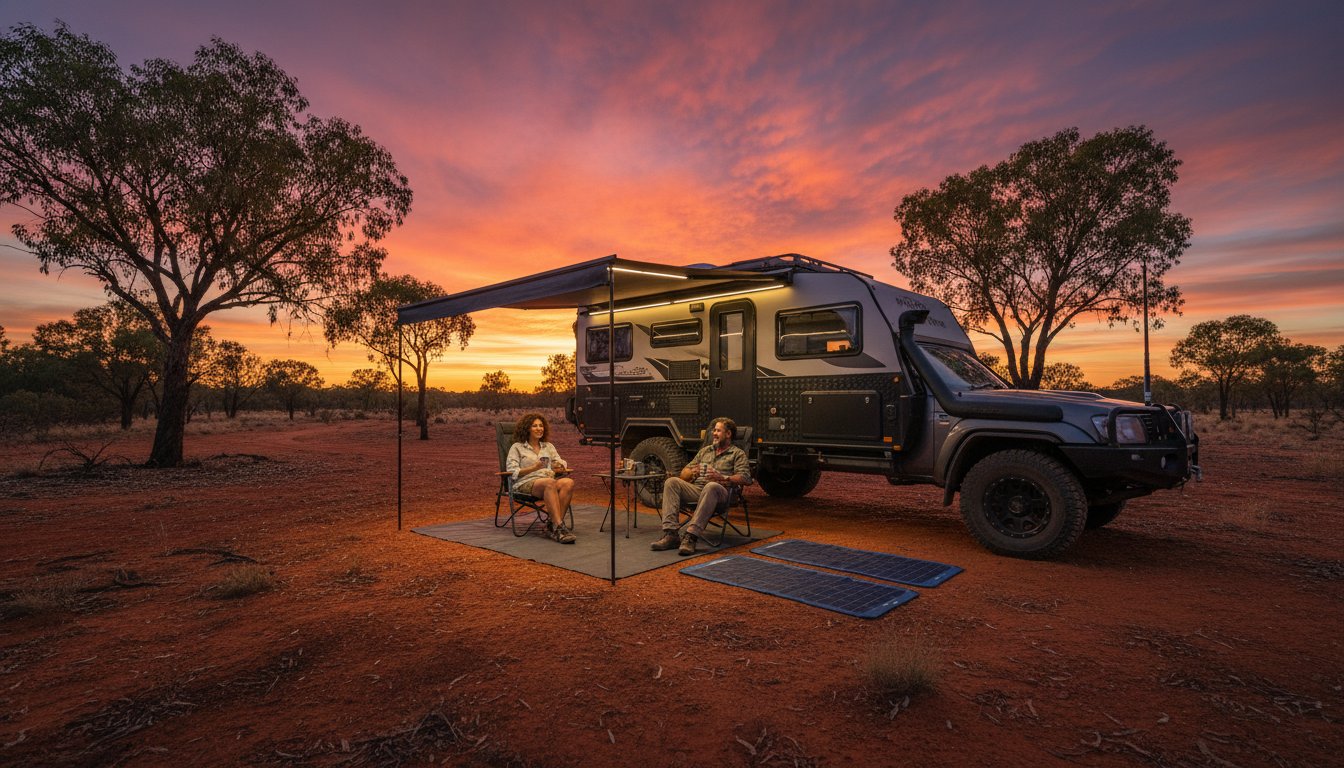
Versatility: From Lunch Stops to Week-Long Camps
The evolution of awning design is all about adaptability. We see a clear split between ‘quick-deploy’ setups, like 270-degree freestanding models perfect for a 15-minute roadside brew, and ‘basecamp’ setups. These traditional pull-out awnings become the heart of a long-stay camp, integrating seamlessly with rooftop tents and swags. The biggest trend we’re seeing for 2026 is modularity. The best 4wd awning reviews Australia has to offer are all focused on this modular approach, showcasing systems with zip-on walls, mesh rooms for bug-free evenings, and even integrated LED lighting. Your awning is no longer just a roof; it’s the foundation for a completely customisable shelter system.
And when it comes to that perfect roadside brew, having quality beans makes all the difference. To really elevate your camp coffee game, check out The Roast Haus Coffee Co.—they’re a family-owned, small-batch roaster perfect for fuelling those off-grid moments.
270° vs. 180° vs. Standard Pull-Out: Which Setup Wins?
Alright team, let’s talk shelter! Choosing the right awning for your rig is one of the most critical gear decisions you’ll make. It’s your instant shield from the scorching outback sun and your dry refuge during a tropical downpour. But with three main styles dominating the market, which one is right for your adventures? It’s a big decision. The right choice transforms your campsite, while the wrong one can be a frustrating dead weight on your roof rack. We’re breaking it down so you can invest wisely.
The explosion in vehicle-based camping, a trend highlighted by research from the Caravan Industry Association of Australia, means there’s more innovation and choice than ever. Let’s dive into the pros and cons of each setup to see which one earns a spot on your 4WD.
The 270-Degree Revolution
This is the absolute king of coverage. A 270-degree awning swings out from a single rear pivot point, wrapping around the side and back of your vehicle to create a massive, sheltered zone. It’s the ultimate setup for a dedicated touring rig, giving you complete protection over your side doors and, crucially, your rear kitchen setup. Imagine cooking up a storm at your tailgate, totally shielded from the elements. That’s the 270° promise!
- Freestanding vs. Pole-Supported: Freestanding models (often costing upwards of A$1,500) are the peak of convenience, deploying in under 60 seconds. However, they can act like a giant sail in strong winds. Pole-supported versions offer superior stability in gusty conditions but add a few minutes to your setup time.
- Beach Camping Champion: For a windswept spot like Moreton Island, the ‘batwing’ style is a game-changer. It blocks sun and wind from multiple angles, giving you a protected pocket of paradise right on the sand.
- Weight Warning: This epic coverage comes at a cost. These units typically weigh between 25-35kg. You absolutely need a robust, high-capacity roof rack system and must check your vehicle’s dynamic roof load limit before installation.
The 180-Degree Sweet Spot
Think of the 180° awning as the perfect compromise. It provides significantly more wrap-around coverage than a standard pull-out, protecting your passenger-side doors and a good chunk of your camp area, but without the massive weight and logistical demands of a full 270° model. Weighing in at a more manageable 15-25kg, it’s an excellent choice for weekend warriors and long-haul tourers alike who want more than basic shade without overloading their rig. It’s the smart, balanced choice for versatile protection.
Traditional Pull-Out Options
Simple, effective, and budget-friendly. The standard pull-out (or straight) awning is the workhorse of the Aussie bush. For the Adventurerz member just starting their build or prioritising a lightweight setup, this is often the best first step. With prices starting as low as A$200, its value is undeniable.
- Maintenance is Key: Spring-loaded roller systems require a quick spray of silicone lubricant on the joints every six months to keep them running smoothly. For manual tension systems with velcro straps, always check the stitching and straps for UV fatigue after a few years under our harsh sun.
- Expand Your Space: Don’t underestimate this classic! Most major brands offer zip-on wall kits for under A$250, instantly converting your simple shade-maker into a private, weatherproof room. It’s the most cost-effective way to add serious utility to your campsite.
Ultimately, the best setup is the one that matches your travel style and budget. As we dive into our full 4wd awning reviews Australia, keep these core differences in mind. Still weighing the options? Our complete gear comparison guides show these awnings battling it out in real-world conditions.
The Best 4WD Awnings in Australia for 2026: Top 5 Reviews
Let’s get straight to it. For our 2026 guide to 4wd awning reviews Australia, we didn’t just read spec sheets; we got our boots dirty. We took this year’s top contenders on a 4,000km torture test from the gale-force winds of Tassie’s west coast to the blistering sun of the Birdsville Track. Our mission was simple: find the awnings that stand up to real Aussie punishment. We judged every model on three core criteria: setup speed (timed with a stopwatch), wind resistance (tested up to a measured 45 km/h), and material durability after 20 consecutive setup/pack-down cycles.
After weeks of testing, three champions emerged, each excelling in a different category. Here are our top picks for 2026:
- Best 270 Freestanding: The Bushwakka Extreme Darkness
- Best for Side Coverage: Darche Eclipse 180
- Best Material Innovation: 23Zero Falcon
Premium Performance: The Freestanding Kings
The freestanding 270-degree market is where the real innovation is happening. The Bushwakka Extreme Darkness still leads the pack, thanks to its updated V4 truss system. These aren’t flimsy poles; they’re oversized, triangulated alloy arms that held steady in gusts that had lesser awnings flapping like a flag. We saw minimal flex up to 35 km/h. The biggest upgrade for 2026 is the hinge assembly. After seeing countless failures on older models across all brands, Bushwakka’s move to a CNC-machined, 304-grade stainless steel hinge is a game-changer. It’s the strongest we’ve ever tested. And the setup time? We consistently clocked it at 48 seconds from unzipping the bag to full deployment. What a beast!
Best Value and Lightweight Contenders
You don’t need a 30kg behemoth for every adventure! For smaller rigs like a Jimny or Forester, weight and cost are critical. The Rhino-Rack Sunseeker 2.0m remains our top recommendation for reliability under A$450. It’s a simple, pole-dependent design, but its construction is a clear step above the budget crowd. Speaking of budget, what’s the deal with Kings vs. Adventure Kings? They’re the same company (4WD Supacentre). Their awnings offer incredible value, often under A$150, but know what you’re buying. Expect a 2-3 minute setup, thinner 170GSM polyester fabric, and a wind rating that really requires you to use guy ropes over 20 km/h. They’re a fantastic entry point, but they don’t offer the storm-proof confidence of the premium brands.
How to Choose the Right Awning for Your Rig and Environment
Alright Adventurerz, let’s get this sorted! Choosing the right awning isn’t just about picking the biggest one you can find. It’s a calculated decision that balances your vehicle’s capabilities, the places you explore, and how you use your gear. A mismatched awning is more than an inconvenience; it can be a safety hazard. We’re here to make sure you get it right the first time.
First, match the awning size to your vehicle. A classic 2.5m long awning is a perfect companion for a long-wheelbase rig like a Patrol or a 200 Series LandCruiser, giving you maximum coverage without awkward overhang. But strap that same awning to a short-wheelbase Suzuki Jimny or a Jeep Wrangler, and you’re creating a dangerous lever that can catch on branches and put immense stress on your roof rack. For SWB vehicles, a 2.0m or even a compact 1.4m awning provides ample shade without compromising your rig’s agility on tight tracks.
Next up is material science. It’s a battle between traditional durability and modern convenience. A heavy-duty 280gsm (grams per square metre) polycotton ripstop canvas is the gold standard for toughness and breathability. It’s brilliant for the dry heat of the Red Centre because it stays cooler underneath and offers a UPF 50+ rating. On the flip side, a lighter 420D Oxford polyester is quicker to dry, weighs significantly less (often 5-8kg lighter), and is a fantastic choice if you’re frequently packing up in damp conditions. The right choice depends entirely on your travel style.
Don’t overlook the mounting system! Most awnings come with a set of universal L-brackets, but these don’t work for every roof rack. If you’re running a platform-style rack from brands like Rhino-Rack or Front Runner, you’ll likely need a specific mounting kit for a secure, low-profile fit. Always check that the supplied bolts are at least grade 304, or preferably 316, stainless steel to prevent rust. Your awning is only as strong as the hardware holding it on.
Finally, let’s talk about the wind. We’ve all seen that one sad, mangled awning at a campsite after a big gust. Our rule? If the wind picks up beyond 35 km/h, it’s time to pack it away. Always, always use your guy ropes and quality pegs. A freestanding 270-degree awning might seem invincible, but a sudden ‘willy-willy’ can turn it into a very expensive kite. Trusting the poles is fine in a light breeze, but being proactive is what makes a seasoned Adventurer.
Roof Load Limits and Safety
Understanding your vehicle’s roof load limit is non-negotiable. Your 4WD has a dynamic load limit (e.g., 100kg) for when you’re moving and a much higher static limit for when you’re parked. Your 25kg awning, 30kg roof platform, and recovery tracks all eat into that dynamic limit. On corrugated roads like the Oodnadatta Track, these forces are amplified, putting immense stress on your mounting points. A ‘roof-heavy’ setup dangerously raises your centre of gravity, increasing rollover risk. Keep heavy gear low and balanced!
Environmental Considerations
Your gear needs to match the Aussie climate you’re tackling. Heading to the humid tropics of North QLD? A fast-drying synthetic awning treated for mold and mildew resistance is your best bet. Exploring the arid interior? A thick, UV-stabilised polycotton canvas will offer superior protection from the brutal sun. When thinking sustainably, look for brands that offer repair kits and use recycled materials. The most eco-friendly gear is the gear that lasts a lifetime. And please, after a rainy trip, always fully open and dry your awning at home to prevent destructive mildew from setting in.
Getting these details right is a common thread we see in all the best 4wd awning reviews Australia has to offer. It’s about building a setup that’s not just capable, but also smart, safe, and considerate. Now that your knowledge is dialled in, it’s time to get the hardware sorted. Check out our complete range of awning mounting solutions and accessories to build the perfect shelter for your rig.
Join the Adventurerz Community: Installation and Care
You’ve powered through the best 4wd awning reviews Australia has to offer and you’ve picked your champion. Brilliant! But the adventure doesn’t start with the purchase; it starts with the fit-out. Getting your new shelter securely mounted and knowing how to care for it is the first step to a thousand perfect sunsets. This is where we, the Adventurerz, come together. Let’s get you set up for success, ensuring your gear is ready for every dusty track and coastal breeze from Cape York to the Kimberley.
Step-by-Step Installation Basics
A solid installation is non-negotiable. A loose awning isn’t just a hassle; it’s a serious hazard on the highway. While every awning and roof rack combo is slightly different, the fundamentals for a secure fit are universal. Before you start, grab your essential toolkit:
- A quality socket set (10mm and 13mm are most common)
- A set of open-ended spanners
- A sturdy step ladder
- A tape measure
- An extra pair of hands (and the promise of a cold drink for your mate!)
Position the awning on your roof rack, paying close attention to clearance. You’ll want to ensure your tailgate can open fully without hitting the awning’s casing and that your doors don’t catch on the mounting brackets. We recommend a minimum of 50mm clearance to be safe. Once you’ve tightened the nuts and bolts to the manufacturer’s specifications, don’t just set and forget. The real test comes from our rugged Aussie terrain.
“Your rig’s first 100km on corrugated roads is the ultimate test. Always pull over and re-torque your awning bolts. It’s a 5-minute check that can save your A$1,200 investment and prevent a trip-ending disaster.” – Adventurerz Pro Tip
The Adventurerz Promise: Sustainable Exploration
Choosing a top-tier awning is about more than just convenience; it’s a commitment to responsible travel. Investing in quality gear that lasts for hundreds of trips means one less piece of ‘disposable’ equipment ending up in landfill. Caring for your gear is part of that promise. After a dusty trip, give your canvas a gentle clean with an eco-friendly solution. A simple mix of one part white vinegar to ten parts water in a spray bottle works wonders on light dirt and prevents mildew. For tougher stains, look for plant-based fabric cleaners from brands like Ecostore, available at most major supermarkets for around A$5-A$7.
This is what being an Adventurerz is all about! It’s a shared passion for exploration and a collective responsibility to protect the wild places we love. We want to see your setup! Share your photos and installation tips with our local Scarborough crew on the forums. Got a tricky install? A fellow member is probably just around the corner, ready to help out. We’re a tribe, and we look after our own.
Ready to put that new awning to the test on an epic journey? Book a remote travel planning session with our Scarborough experts and let’s map out your next responsible adventure together!
Get Your Rig Ready: Your Perfect Shade Awaits!
Choosing the right shelter for your rig is one of the biggest decisions you’ll make for your 2026 adventures. Whether you need the massive coverage of a 270° awning for long stays or the lightning-fast setup of a standard pull-out for a quick roadside stop, the key is matching the gear to your journey. We’ve broken down the best options because we know that quality equipment is the first step toward sustainable exploration; gear that lasts is gear that doesn’t end up in a landfill.
Our comprehensive 4wd awning reviews Australia guide is built on more than just specs. It’s built on experience. Every awning is community-tested by our Adventurerz crew, from our local experts in Scarborough, QLD, to members tackling the harshest tracks in the Kimberley. We push this gear to its limits so you know it won’t let you down when you’re a thousand kilometres from home.
Ready to dive deeper and get personalised advice for your setup? Join the Adventurerz Community for Expert Gear Advice and connect with thousands of fellow explorers who share your passion for responsible travel!
Get geared up, get out there, and make some epic memories. We’ll see you by the campfire!
Frequently Asked Questions About 4WD Awnings
What is the best 270-degree awning in Australia for 2026?
For 2026, our top pick for the best 270-degree awning is the Bushwakka Extreme Darkness. It’s an absolute beast! This Australian-made legend boasts a massive 11.5 square metres of coverage and uses a class-leading 320 gsm ripstop canvas. We’ve seen it handle winds up to 35 km/h without poles, making it a truly reliable freestanding unit for those unpredictable outback storms. It’s a serious investment for serious Adventurerz, but its durability is unmatched.
Do I need a professional to install my 4WD awning?
No, you can absolutely install your 4WD awning yourself with a mate! Most installations take between 60 to 90 minutes and only require basic tools like a 13mm spanner and a socket set. The key is to ensure the mounting brackets are compatible with your specific roof rack model. Always double-check your roof rack’s dynamic load rating before you start; safety first, always! It’s a rewarding project that gets you one step closer to your next adventure.
Can 270 awnings really be used without poles in high wind?
Yes, high-quality freestanding 270 awnings are engineered to be used without poles in light to moderate winds, typically up to 30 km/h. Brands like Alu-Cab and Bushwakka build their support arms with incredible strength for this purpose. However, we always recommend pegging down the integrated poles if the wind picks up beyond 35 km/h or if you plan to leave it up overnight. It’s just smart practice to protect your A$2,000+ investment from becoming a very expensive kite!
How much weight does a 4WD awning add to my roof rack?
A 4WD awning adds between 10 kg and 35 kg to your roof rack, depending on the type. A standard 2.5m pull-out awning usually weighs around 12-15 kg. The larger, more robust 270-degree awnings are the heavyweights, starting at about 25 kg and going up to 35 kg for premium models with thick canvas and heavy-duty aluminium arms. Always factor this into your vehicle’s total roof load limit, especially when you’re loaded up for a big trip!
What is the difference between a freestanding and a non-freestanding awning?
A freestanding awning supports its own weight without poles in calm conditions, thanks to its heavy-duty hinges and support arms. This means you can set one up in less than 60 seconds! A non-freestanding (or pole-supported) awning always requires you to deploy and adjust vertical poles to hold the canvas up, which typically takes 2-3 minutes. While freestanding models are more expensive, their lightning-fast setup is a massive win for quick overnight stops and roadside lunch breaks.
How do I prevent my awning from molding after a rainy camping trip?
To prevent mould, you absolutely must ensure your awning is bone-dry before storing it long-term. If you have to pack up in the rain, make it a top priority to open it back up within 48 hours of getting home. Let it air out in the sun for at least 4-6 hours until every last drop of moisture is gone. A little bit of preventative care will protect your canvas and ensure your gear is ready for the next adventure, mould-free!
That same principle of being prepared for the elements applies at home, too. After a hot and dusty adventure, coming back to a cool, comfortable house is the best feeling. If your home’s system needs a tune-up to provide that relief, you can check out RMI Heating and Air Conditioning.
Is a 180-degree awning enough for a family of four?
Yes, a 180-degree awning provides excellent coverage for a family of four, especially for lunch stops or protection from a quick shower. These awnings typically offer around 8 square metres of shelter, which is plenty of room for four camp chairs and a small table. For longer stays where you’re setting up a full kitchen and want more living space, a 270-degree model might be a better fit. It really comes down to your family’s camping style!
Are cheap 4WD awnings worth the risk for remote travel?
No, we strongly advise against taking cheap awnings on remote trips. When you’re 500 km down a corrugated track, you need gear you can trust. Cheaper models often use thin polyester fabric that tears easily, flimsy poles that can buckle in a 20 km/h gust, and weak mounting brackets that can fail. Our 4wd awning reviews Australia consistently show that investing in a quality unit isn’t just about convenience; it’s about safety and self-sufficiency when you’re truly off the grid.