The brightest auxiliary lights on the market might actually be making your night driving more dangerous. We’ve all endured that brutal eye fatigue after hours behind the wheel, squinting as overpowering, icy-blue beams reflect off metal road signs and suspended outback dust. Chasing inflated raw lumen claims often leaves us with washed-out foregrounds, mounting brackets that rattle loose on bone-jarring corrugations, and genuine worry about vehicle compliance. Installing a balanced road glow spotlight setup changes the game entirely, pairing long-range punch with soothing peripheral spread and functional ambient backlighting.
You’ll learn how to cut through misleading marketing claims, evaluate optical lux ratings and color temperatures, and choose durable gear built to survive remote tracks. We also break down legal mounting heights, ingress protection ratings, and bulletproof harness wiring so you can travel self-reliantly. Here is our complete field guide to illuminating your path safely, reliably, and responsibly across every open stretch ahead.
Key Takeaways
- Discover how a modern road glow spotlight balances extreme projection distance with soft peripheral lighting to eliminate hazardous shoulder blind spots.
- Look past inflated showroom raw lumen claims by learning to benchmark usable lux distance and fatigue-reducing color temperatures.
- Identify the right optical setup for your touring style, pairing tight spot beams for open outback highways with wide flood optics for winding tracks.
- Ensure long-haul reliability by verifying essential IP68 and IP69K ingress seals and anti-vibration engineering that withstand relentless corrugations.
- Master compliant mounting positions and mandatory high-beam relay triggering to keep your 4WD safe, legal, and trail-ready.
Table of Contents
- What Is a Road Glow Spotlight and How Does It Transform Night Driving?
- The Science of Optical Clarity: Lumens, Lux, and Color Temperature
- Choosing the Ideal Beam Pattern: Spot, Flood, or Combination
- Durability, Ingress Ratings, and Anti-Vibration Engineering
- Installation Protocols, Electrical Safety, and Legal Road Compliance
What Is a Road Glow Spotlight and How Does It Transform Night Driving?
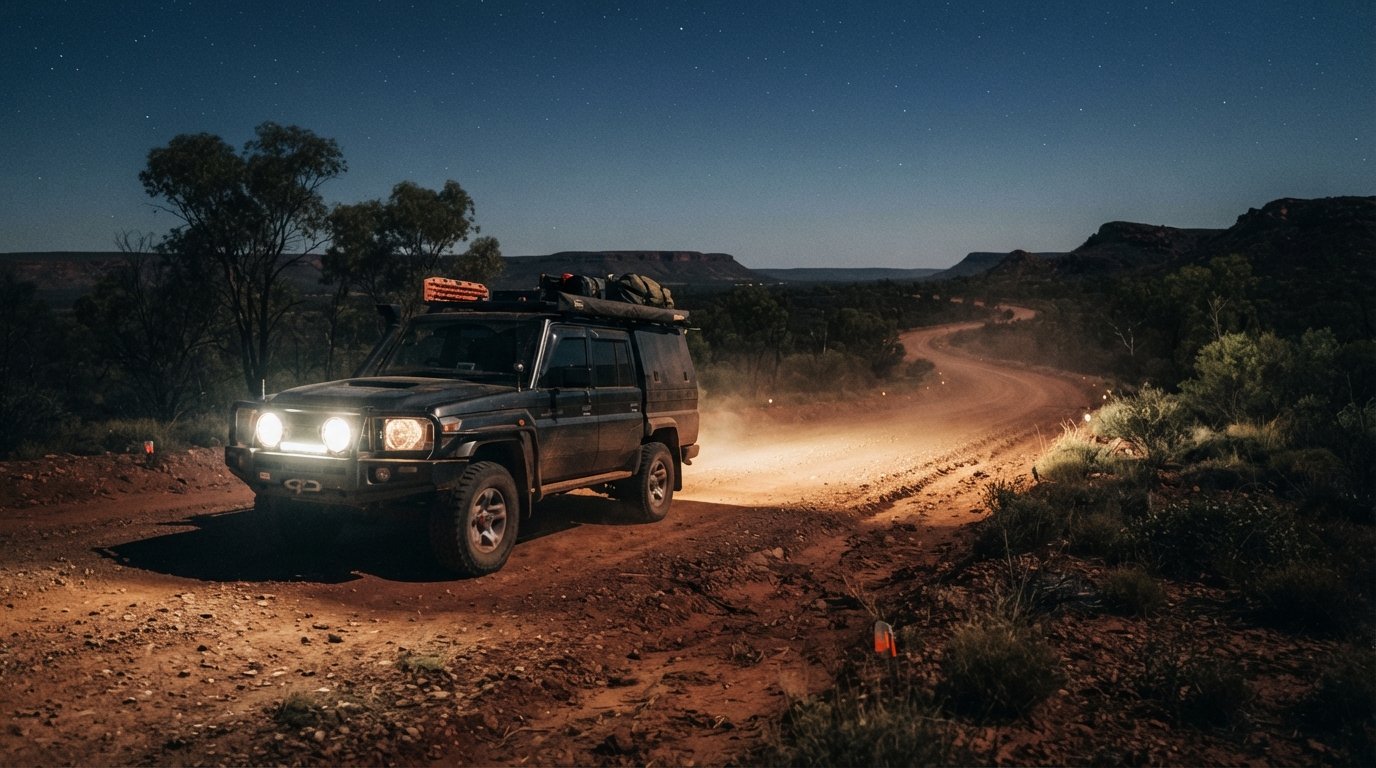
A road glow spotlight represents a modern shift in auxiliary illumination, moving beyond the brute-force pencil beams of the past. Instead of firing a piercing, hyper-concentrated shaft of light into the distance, these setups deliver high-intensity forward projection paired with a wide, soft ambient wash. This peripheral spread illuminates the dark verges where standard lights leave hazardous blind spots. Engineered inside sealed aluminium housings certified under international Ingress Protection (IP) code standards, they ensure your forward illumination survives relentless track dust and torrential river crossings alike.
To see how balanced beam profiles outperform narrow pencil beams across real terrain, check out this practical breakdown:
Understanding Road Glow vs. Traditional Long-Range Spotlights
Traditional long-range pencil spots typically focus light into a tight 5-degree beam. While projecting light hundreds of metres down a straight track looks great on paper, it produces severe tunnel vision. Your eyes naturally lock onto that brilliant centre point, leaving track edges pitch black. When your sight constantly jumps between extreme glare and deep darkness, pupil readjustment delays cause visual fatigue and slow your reflexes. A road glow spotlight eliminates this harsh contrast. By spreading clean, uniform light across your peripheral vision, it lets you scan roadside terrain smoothly, keeping your mind alert and your eyes relaxed during long night hauls.
Why Stock High Beams Fall Short on Remote Highways
Factory headlights, whether basic halogen or standard modern LEDs, struggle to cast adequate light beyond two hundred metres. At highway touring speeds of 100 km/h, your 4WD covers roughly 28 metres every second. Once you factor in human perception time, braking reaction, and heavy vehicle weight, factory high beams give you almost no time to evade sudden hazards. Wandering stock, unmapped track washouts, and grazing kangaroos emerge from the shadows with mere fractions of a second to spare. Auxiliary lighting pushes that safety envelope outward, giving you the visibility needed to anticipate hazards early and travel self-reliantly.
The Science of Optical Clarity: Lumens, Lux, and Color Temperature
Lighting packaging often dazzles buyers with astronomical figures, yet raw output tells only a fraction of the real story. When selecting auxiliary driving lights, true optical clarity comes from how effectively photons strike the ground rather than how brightly emitters burn inside a lab. Understanding the interaction between output, optical focus, and light spectrum prevents blinding foreground glare while meeting rigorous optical thresholds such as FMVSS Standard No. 108 requirements for controlled, safe illumination.
Raw Lumens vs. Usable Lux: Cutting Through Marketing Numbers
Raw lumens measure the theoretical maximum light emitted by bare LED diodes under ideal laboratory conditions. In practice, thermal droop and optical transmission losses through heavy-duty polycarbonate lenses cause a 15% to 35% drop in real-world effective lumens. Precision reflectors are what transform this raw energy into controlled illumination. Usable reach is benchmarked in lux, where 1 lux represents the light cast by a full moon, the universally recognized threshold needed to read print or clearly identify an obstacle at cruising speeds.
- Raw Lumens: Theoretical maximum output measured at the emitter level before lens and heat losses.
- Effective Lumens: Real-world usable light exiting the sealed lamp housing.
- 1 Lux Benchmark: The standard metric showing the precise distance at which illumination remains functional for human vision.
Color Temperature and Beating Highway Fatigue
Light spectrum plays an equally massive role in driving safety. Many mass-market lights pump out cool white beams exceeding 6500K. This icy blue tint causes severe backscatter, reflecting intensely off reflective road signs, suspended dust, and rain. The human eye struggles with this harsh wavelength, leading to headache-inducing strain after an hour behind the wheel.
Opting for a road glow spotlight calibrated between 5000K and 5700K delivers daylight-balanced light with a higher Color Rendering Index (CRI 75 to 85). This natural hue preserves depth perception, allowing you to distinguish red dirt ruts from bitumen patches and grey kangaroos against dry scrub. For drivers tackling prolonged touring routes, exploring our independent reviews on adventurerz.com can help match balanced optical performance with the right vehicle accessories.
Choosing the Ideal Beam Pattern: Spot, Flood, or Combination
Every off-road track demands a specific optical geometry. Bolting on massive auxiliary lamps won’t help if your light pools in the dirt directly before your bumper or shoots uselessly over cresting sand dunes. Dialling in a balanced road glow spotlight setup means tailoring optical spread to your driving style. It is about matching beam profiles with the broader touring build, ensuring your rig remains streamlined when loaded with heavy gear like 4WD awnings and roof systems.
Evaluating Spot Beams for Long-Distance Track Penetration
Spot and hyper-spot reflectors use tight 5° to 10° beam angles to channel lumens far down the centreline. These pencil-thin patterns throw usable light anywhere from 500 metres to over 1.5 kilometres ahead, making them invaluable for open outback highways and dead-straight pastoral corridors. However, pure spot beams fall flat on tight, undulating bush trails. Without peripheral dispersion, driving through dense timber leaves you essentially blind to animals browsing along the shoulders.
Harnessing Flood and Spread Beams for Peripheral Road Glow
Flood and combo reflectors solve that tunnel-vision effect by projecting light at broader angles. Driving and combo lenses push light out across a 20° to 35° arc, while wide-cornering and work floods disperse beams across 40° to 90° or more. This horizontal wash bathes culverts, creek banks, and fence lines in clear light. Running a hybrid pair, such as one pencil spot on the driver side and one wide spread on the passenger side, creates an ideal road glow spotlight configuration for mixed Australian touring.
Step-by-Step Decision Matrix for Remote Touring Vehicles
Configure your auxiliary setup systematically before hitting unsealed tracks:
- Step 1: Audit your routes. Match your optics to the road. Fast bitumen and open clay pans benefit from deep reach, while winding coastal tracks require broad shoulder visibility.
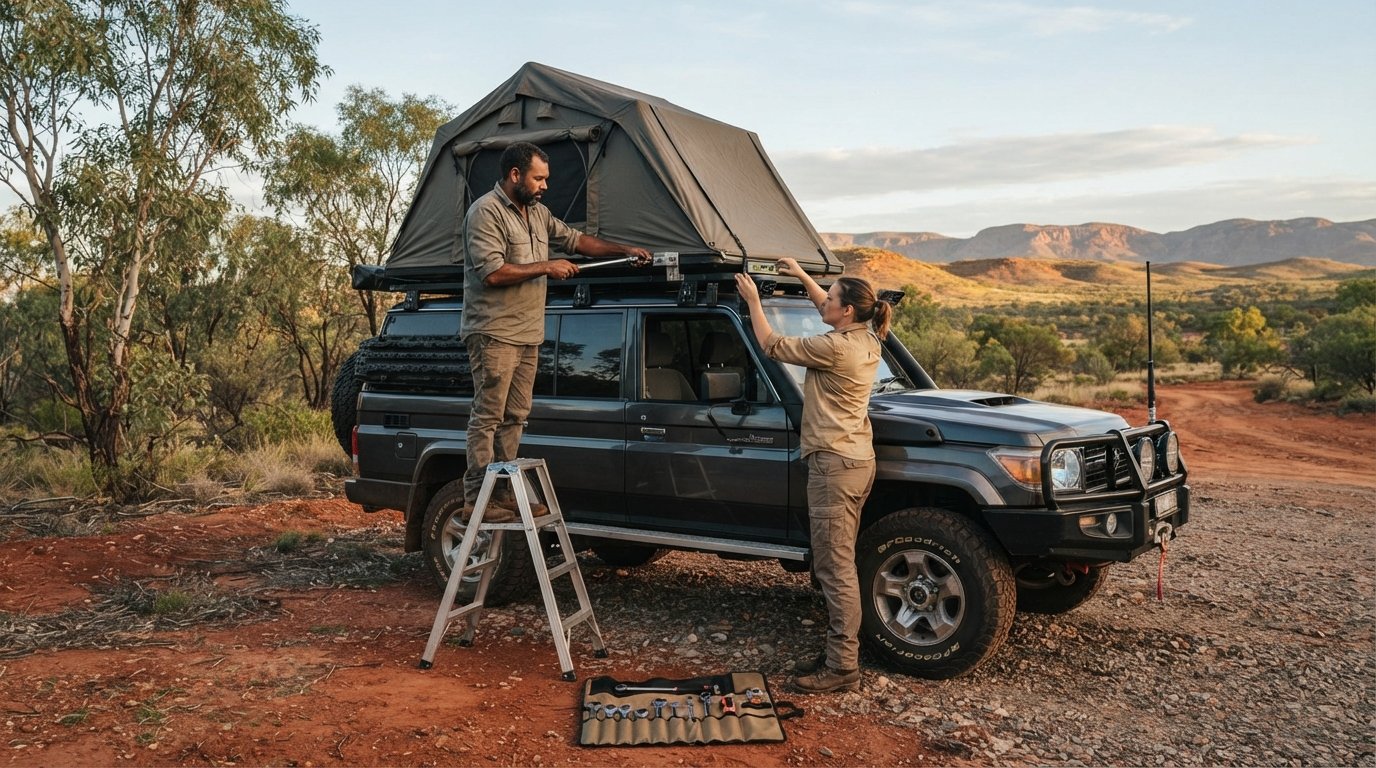
- Step 2: Assess mounting positions. Ensure your lights sit securely on bull bar tabs within local height limits. When outfitting touring rigs carrying high-clearance gear like rooftop tents, avoid roof-mounted forward spotlights that cause severe bonnet glare and run afoul of road safety benchmarks like FMVSS No. 108 vehicle lighting regulations.
- Step 3: Calculate electrical draw. Size your 12V wiring, fuses, and auxiliary batteries so your high-output driving lights run cleanly alongside 12V camp fridges and dual-battery systems.
Durability, Ingress Ratings, and Anti-Vibration Engineering
Corrugated outback tracks will shake inferior auxiliary lights to pieces within a few hundred kilometres. Relentless harmonic vibrations loosen cheap hardware, crack budget housings, and break internal circuit solder joints. Meanwhile, talcum-fine bulldust and deep river crossings search for the slightest perimeter seal failure. Equipping your vehicle with a road glow spotlight designed for genuine remote touring requires looking past cosmetic powder coating to scrutinize mechanical build standards.
Weatherproofing Standards: Demystifying IP68 and IP69K
Water and dust protection ratings indicate whether your lights can survive real backcountry conditions. Basic IP67 gear handles temporary shallow puddles, but true remote travel calls for IP68 and IP69K certified housings.
- IP68 Continuous Submersion: Guarantees the housing remains sealed against water entry when fully submerged during deep river crossings.
- IP69K High-Pressure Protection: Validates resistance against high-temperature, high-pressure washdowns at 80 to 100 bar and 80°C, blocking out pressurized water and ultrafine bulldust.
- Pressure Equalization Breathers: Micro-porous ePTFE membranes allow expanding internal air to vent when running hot, preventing the dangerous vacuum effect that sucks creek water through seals during sudden submersions.
- Hard-Coated Polycarbonate: High-impact lenses deflect high-speed gravel rooster-tails without cracking or clouding over years of highway abuse.
Mounting Brackets and Vibration Resistance on Harsh Corrugations
Single-bolt, cast-alloy brackets are the most common hardware failure point on isolated tracks. Sustained corrugations generate violent dynamic continuous vibration forces between 10G and 15.6G RMS. Under this punishment, cast aluminium brackets often snap at the pivot, leaving expensive lamps dangling by their harnesses.
Insist on robust multi-bolt bases laser-cut from 3mm to 4mm structural stainless steel. Multi-bolt footprints clamp firmly across bull bar platforms, distributing structural load and preventing gradual beam dip over rocky terrain. Adding keyed anti-theft nuts also keeps your high-performance road glow spotlight locked onto your bumper when parked at trailheads. To prepare your entire touring setup for remote expeditions, explore our field-tested 4WD gear reviews on adventurerz.com.
Installation Protocols, Electrical Safety, and Legal Road Compliance
High-performance illumination requires strict wiring discipline and adherence to vehicle standards. Installing a pair of high-output lamps is not just about raw optical reach; it involves protecting your vehicle’s sensitive electrical architecture while respecting fellow drivers on shared roads. A compliant road glow spotlight installation ensures your forward illumination works in seamless coordination with your primary lighting controls without blinding oncoming traffic.
National Lighting Regulations: Mounting and High-Beam Alignment
National vehicle standards govern how driving lights must be mounted and wired. Auxiliary forward-facing lamps must operate only when your main high beams are active, switching off instantaneously the second you dip your stalk to low beam. Regulators also require an independent cabin-accessible isolation switch, allowing you to disable your spotlights entirely while keeping factory high beams functional.
- Sightline Clearances: Spotlights mounted on bull bars must sit below the driver’s forward field of vision, avoiding hood obstructions or reflections off elevated aerials.
- Symmetrical Placement: Auxiliary lamps must be mounted in matched pairs, fitted symmetrically relative to the vehicle’s centreline.
- Downward Alignment: Aim your lamps on level ground so the primary hotspot targets the road ahead rather than projecting straight into the rearview mirrors of forward traffic.
Wiring Harnesses, Relay Sizing, and Battery Protection
Under-sizing your wiring or using low-grade terminals invites voltage drops, flickering, and dangerous electrical fires. Standard practice requires calculating total continuous current draw and sizing inline fuses to 125% of that load. Pair this safety margin with a high-capacity 30A or 40A 12V DC automotive relay and multi-strand 14 AWG or 12 AWG copper wire to hold circuit voltage drops below 3%.
Route your conduit carefully along inner chassis rails and firewall bulkheads, anchoring every run with UV-resistant p-clips well clear of hot exhaust dumps and razor-sharp sheet metal corners. Always terminate connections with multi-pin waterproof Deutsch plugs rather than generic spade connectors. These heavy-duty sealed terminals block corrosive mud, salt spray, and moisture, preventing high-resistance faults during remote river crossings. With your electrical platform dialled in, you can hit isolated tracks with confidence. Take a moment to map out your upcoming routes using the Adventurerz travel planning guides before heading deep into unmapped country.
Equip Your Touring Rig for the Track Ahead
Conquering unpredictable unsealed roads at night comes down to balance rather than sheer, blinding power. Moving away from exaggerated raw lumen ratings and dialling in a proper road glow spotlight setup gives you the ideal harmony of distance penetration and peripheral awareness. By pairing daylight-balanced color temperatures with vibration-proof brackets and compliant wiring, you protect your eyes from fatigue while ensuring your vehicle remains completely trail-ready.
True self-reliance starts long before you turn the ignition key. Building a dependable touring setup allows us to explore pristine country safely and responsibly without stressing our vehicle’s electrical platform. Ready to plan your next remote trek? Explore our expert 4WD gear reviews and expedition guides at Adventurerz. Backed by extensive independent reviews of Australian remote touring setups and community-tested advice, we’re here to help you venture further into the wild with complete confidence.
Frequently Asked Questions
What is the difference between a spotlight and a light bar for road glow?
Spotlights utilize deep parabolic reflectors to project focused light far down the track, whereas light bars spread medium-intensity illumination across a broad, shallow area. Choosing a round road glow spotlight setup provides long-range distance vision alongside a soft foreground wash, whereas light bars often create excessive foreground splash directly before your bumper, impairing distant visual acuity.
Are road glow auxiliary spotlights legal to use on all public roads?
Yes, provided they are wired strictly through your vehicle’s high-beam circuit and fitted with an independent cabin isolation switch. They must turn off instantly when you dip to low beam. Additionally, auxiliary driving lamps must be mounted symmetrically, sit below the driver’s direct line of sight, and remain covered if local rules mandate covers for off-road optics.
Can auxiliary spotlights be mounted to roof racks instead of the bull bar?
Roof mounting is generally restricted on public highways because overhead forward lights easily cause severe bonnet glare and blind oncoming traffic. Most jurisdictions require roof-mounted high-output lamps to be fitted with opaque protective covers while driving on gazetted roads. Sticking to bumper or bull bar platforms ensures full compliance and prevents distracting reflections across your windscreen.
What color temperature is best for cutting through dust and fog?
Warm white to selective yellow light between 2700K and 3000K is best for airborne dust, rain, and thick fog. These longer wavelengths minimize Rayleigh and Mie scattering, dramatically reducing blinding backscatter glare. For standard dry highway cruising, daylight-balanced diodes between 5000K and 5700K offer the best balance of depth perception and contrast without causing excessive eye strain.
Do high-output LED spotlights drain my vehicle battery while driving?
No, a healthy vehicle charging system easily powers modern LED driving lights while the engine runs. A typical high-performance road glow spotlight pair draws between 10A and 25A total, well within the continuous output of standard factory alternators. Battery drain only becomes a genuine risk if auxiliary lights run for extended periods while parked with the engine switched off.
Why do some LED spotlights cause radio interference on UHF channels?
Poorly shielded internal circuit boards and cheap pulse-width modulation drivers emit electromagnetic radiation through the lamp body and wiring harness. This electromagnetic interference (EMI) travels along vehicle metalwork and enters your UHF antenna, generating static across emergency communication channels. Look for lamps certified to CISPR 25 Class 3 or Class 5 standards to ensure quiet radio operation.
How do I clean and maintain polycarbonate spotlight lenses after outback trips?
Soak caked mud and bugs with plenty of clean water and mild automotive soap before gently wiping them with a soft microfibre wash mitt. Never rub dry dust or grit across dry polycarbonate, as sharp silica scratches anti-scratch UV coatings. Periodically inspect the breather valves and wiring harness plugs for grit buildup to keep internal housings condensation-free.