The biggest battery isn’t always the best adventure powerbank: match capacity to your route and charging needs. A modern smartphone typically takes 2,500 to 3,500 mAh for a charge, so a 5,000 mAh pack suits day trips and overnights, while a 10,000 mAh pack is a practical starting point for longer outings. For multi-day trips with several devices, consider 20,000 mAh or more.
It’s tempting to choose the highest capacity you can carry, but weight and trip length matter just as much when every item needs to earn its place in your pack. The right choice provides enough useful charge without adding capacity you’re unlikely to need.
We’ll compare options by phone recharges, weight, price, trip type and water resistance to help you narrow down what fits your plans. You’ll see how priorities change between a quick overnight escape and a week on the track, and what to focus on when travelling light. Match the pack to your devices, time away and conditions to keep your setup practical for the adventure ahead.
Key Takeaways
- Estimate how many phone recharges and device top-ups your trip calls for before choosing battery capacity.
- For a 3-6-day backpacking trip, a 10,000 mAh pack is recommended for at least two phone recharges; balance that capacity against the weight in your pack.
- Compare price against useful features and trip needs, rather than assuming a more expensive charger is automatically the right fit.
- If you need to power larger electronics, look for a rating of 100 W or higher and use the power bank’s highest-rated outlet for faster charging.
- Match water resistance to the conditions you expect, and read an IP rating as a specific ingress-resistance measure, not a blanket guarantee for every water exposure.
Table of Contents
What Makes The Best Portable Power Pack?
Choose a pack by balancing capacity, carried weight, price and the conditions it will face outdoors. An adventure powerbank should suit your trip and devices, not simply offer the largest battery.
Capacity, Weight, Price, and Ingress Ratings
Capacity, measured in mAh, helps estimate how much charge is available, while weight shows what that capacity adds to your pack. Compare price alongside both, then consider the ingress rating for exposure to dust or water. An IP rating describes resistance to ingress; it doesn’t replace matching the pack to your trip’s conditions.
| Option | Capacity | Trip fit | Weight, price and ingress rating |
|---|---|---|---|
| Compact pack | About 5,000 mAh | Day trips and overnights | Compare its carried weight and price with its single-trip role; assess its stated ingress rating. |
| Mid-capacity pack | 10,000 mAh | 2-3 days with heavy device use | Balance capacity against pack weight and the value of the expected recharges. |
| Larger pack | 15,000 mAh | 4-5 days with heavy device use | More capacity can mean more weight; compare ingress ratings for your conditions. |
| High-capacity pack | 20,000 mAh or more | Multi-day trips with several devices | Consider the extra carried load alongside the price and rated ingress protection. |
Choose the row that covers your devices and trip, then balance its weight, price and ingress rating against the conditions you expect.
Capacity for Trip Duration and Device Use
Trip duration gives you a practical starting point, but device use changes the calculation. For day trips and overnights, about 5,000 mAh is recommended; for 2-3 days of heavy use, the recommendation is 10,000 mAh. Heavy use over 4-5 days points to 15,000 mAh, while several devices on a multi-day trip favour 20,000 mAh or more.
For a week or longer, carry a pair of 10,000 mAh packs or one 20,000 mAh pack. List devices such as a phone and headlamp, then consider how often you’ll use them. That helps balance capacity against the weight of extra charging cables and gear.
Smartphone Charging Estimates
A modern smartphone typically takes 2,500 to 3,500 mAh for a charge. Treat that as an estimate, not a promise that a pack’s full stated capacity becomes phone charge. A 10,000 mAh battery pack is recommended for at least two phone recharges on backpacking trips lasting 3-6 days.
For Australian domestic and international flights—whether heading out on a remote trek or planning a city escape with VegasWizzard—check the airline’s current rules before travelling. Permitted carriage can depend on the battery rating and baggage arrangement.
To choose a reliable pack in Australia, compare models from established outdoor or electronics retailers and read the stated warranty terms. Coverage depends on the warranty for the specific pack.
For van life, a high-capacity power station serves a different purpose from a lightweight phone pack: it prioritises powering larger equipment over minimal pack weight. Compare its capacity and connections with the devices you plan to run. An adventure powerbank is more practical for hiking when a compact phone-charging setup matters.
What do you get from a more expensive ultralight backpacking battery pack?
A higher price makes sense only if the charger’s features solve a real problem on your route. Compare output, charging ports, weight and recharge options with the devices you’ll carry.
Charging Ports and Pass-Through Charging
Port selection determines which devices you can connect and how you organise charging cables. Compare the power bank’s inputs, which recharge the pack, with its outputs, which charge your phone, headlamp or tablet. Several outputs can suit a group or multiple devices, while a simpler layout may be enough for one phone.
Pass-through charging means the power bank accepts charge while charging a connected device. It can simplify a campsite setup when there’s one charging source, but the pack and device share the incoming power. Check the product instructions for supported use, then plan the sequence around the pack’s input and output limits.
Fast Charging and Large-Device Power
Fast charging depends on the power bank’s output, the cable and the connected device. Use the highest-rated outlet on the pack for the fastest charging speeds. To power larger electronics, look for a rating of 100 W or higher, then compare that output with the device’s requirements.
Output rating matters more for tablets and larger electronics than for a basic phone top-up. A high-capacity pack with a lower output may store plenty of energy but charge a demanding device slowly or fail to power it. Match the output rating and cable to the device before leaving camp.
USB-C and Solar Recharge Times
There’s no single recharge time for USB-C or solar: it depends on the power bank’s capacity and input rating, as well as the charger or panel’s available output. USB-C recharge time depends on the input the pack accepts. Solar charging also depends on the panel and available sunlight, so changing conditions can affect how quickly energy enters the pack.
For a useful comparison, read the pack’s stated input and the charger or panel’s output. A higher-capacity pack needs more energy to refill; a compatible, higher-output USB-C source can supply it faster than a lower-output source. Treat a solar panel as a variable source, not a fixed timetable.
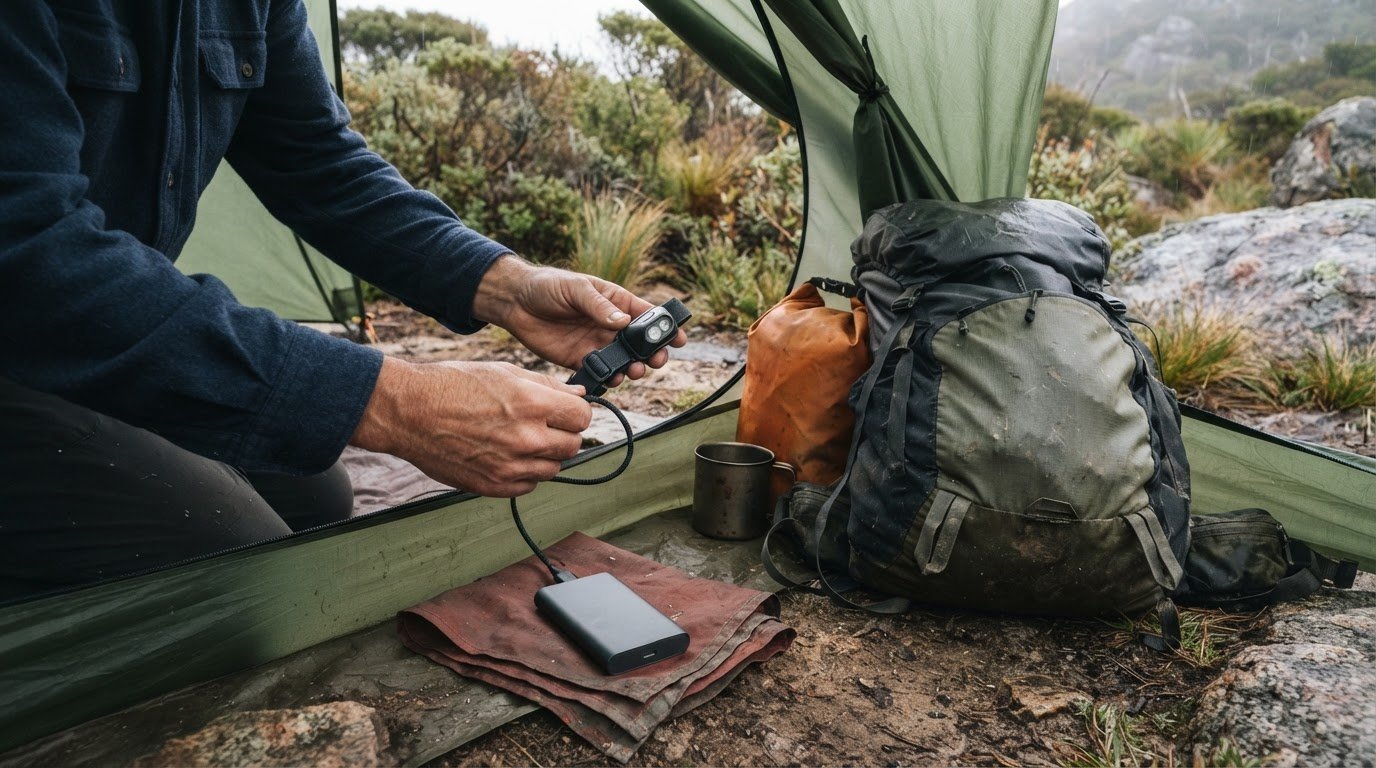
On a backpacking trip, follow a simple daily charging sequence. Charge the power bank when a reliable source is available, then prioritise devices you rely on for navigation and communication. Top up other devices after those essentials. If you carry a tablet, don’t leave it connected while your phone or headlamp still needs charge.
Conserve stored power between charging opportunities. Disconnect devices when they reach the charge level you need, and avoid repeatedly topping up a full battery. Carry only the cables your devices need, and protect the pack and connectors from dirt and moisture. Before departure, fully charge the power bank and confirm each cable connects properly. These steps help you use its capacity deliberately without adding unnecessary charging gear to your load.
Ultralight power bank recommendations by phone recharge needs
Choose a portable pack based on how many phone recharges you need, then weigh its size against your other gear. A lightweight option is useful on foot; extra features are worthwhile only if your devices need them.
For Australia in 2026, choose by trip and recharge needs rather than a single model name. A 10,000 mAh pack is recommended for at least two phone recharges on backpacking trips lasting 3-6 days.
Power Bank Weight and Dimensions
Weight and dimensions show how easily a pack fits into your load, but don’t indicate how many recharges it provides. Compare the manufacturer’s stated measurements with the space in your pack, then consider the capacity you’ll carry. A compact option may suit a phone and camera, while a larger pack can make sense when several devices need power.
For an ultralight setup, compare capacity per unit of carried weight across the options you’re considering. Include the charging cable in that comparison, as a bulky cable can undermine a compact setup.
Backpacking Power Bank Recommendations
For backpacking trips lasting 3-6 days, a 10,000 mAh battery pack is recommended for at least two phone recharges. Choose a lightweight, compact power bank to keep the charging kit manageable, then adjust the choice for other devices. A camera used for frequent photo sessions may need charging capacity beyond your phone’s needs.
For shorter outings, consider how often you’ll use your phone, camera and headlamp before reaching a charging source. For longer routes, plan capacity around all your devices, not phone recharges alone.
Before choosing a model, review its listed safety features and operating temperature range. Compare the manufacturer’s guidance for charging, storage and use, and follow it on the trail. A stated protection feature is useful only if it addresses the risk you’re managing, such as excessive heat or an electrical fault.
Temperature matters during outdoor use and storage. Keep the power bank within the operating range printed in its instructions, and don’t leave it in direct sun when a shaded pack pocket is available. If it becomes unusually hot, stop charging and follow the manufacturer’s safety guidance.
A portable LED strip light with power bank functionality can combine camp lighting and device charging in one piece of kit. Compare its light output, charging connections and power bank capacity with your needs. It may suit a campsite where both tasks matter, but a dedicated lightweight pack is simpler when phone charging is the priority.
For a practical choice, list your phone, camera and other devices, estimate their charging needs, then compare pack dimensions, weight and features. This keeps your setup focused: carry the capacity your route calls for without adding a light or extra functions you won’t use.
Power banks for camping, hiking and travel
Choose your setup based on access to power, daily device use and how far you’ll carry it. A campsite with vehicle access allows a different charging routine from a remote hiking track or an organized multi-day journey with Funny Times Travel & Tours, where access to mains electricity varies along the route.
Reasons to Carry Two Smaller Power Banks
Two smaller power banks let you split charging between essential devices and share the load across a group. For example, one person can carry a pack for the phone and another can carry one for the headlamp or camera. This can make the packs easier to organise than one larger unit.
Separate packs also let you recharge one while using the other, if your power source and the pack instructions support that setup. Label the cables or assign each pack to a person, so a flat battery doesn’t leave every device competing for the same charge.
Power Banks for Hiking and Camping
For hiking, prioritise a compact pack that fits securely in your backpack and covers the devices you’ll use on the track. A phone used for navigation has a different role from one used mainly for occasional photos. Keep the pack accessible, while protecting its ports from dust and damp gear.
At a campsite, organise charging around your evening routine. Plug in your phone first if you need it for the next day’s route, then charge a headlamp or camera. Keep batteries and cables together in a dry pouch, and avoid leaving connected devices loose under sleeping bags or other gear.
Solar Power Banks for Australian Camping and Hiking
Solar power banks can be useful for Australian camping and hiking when sunlight is available, but treat them as a supplement rather than your only charging plan. Shade, cloud and panel position affect how much energy it collects, so a wall-charged pack gives you a more controlled starting point.
At a sunny campsite, place the panel in direct light and reposition it as conditions change. Don’t assume a panel attached to a backpack will collect the same charge while you walk beneath trees or through shaded terrain. Carry enough stored power for essential devices when sunlight isn’t available.
For a vehicle-based camping trip, keep power banks in a secure, shaded place and use the vehicle’s charging outlets when available. Hiking is different, as every pack and cable adds to your load. Check the casing and ports before departure; cracks, dirt or moisture can affect the pack’s condition and connections.
Make a simple charging plan before leaving: list your phone, headlamp and camera, decide which devices are essential, then assign a pack and cable to each. For a group, agree on a shared charging spot at camp and unplug devices once they have enough charge for the next activity. This keeps the setup tidy and avoids unnecessary top-ups.
Choose an arrangement that suits the route: one compact pack for a short hike, two smaller packs for shared or separate charging, or a solar-assisted setup for a sunny campsite. Match the plan to your access to power and protect each battery from rough handling, water and loose equipment.
Water resistance and IP ratings
An IP rating helps compare a power bank’s stated resistance to dust and water. For an Australian overnight hike, consider the conditions it may face, such as rain, damp ground or dusty tracks, then match the rating to how you’ll carry it.
IP stands for Ingress Protection. The code describes protection against ingress, but limits vary by model. Read the manufacturer’s explanation for the specific model rather than assuming all power banks with an IP rating tolerate the same exposure. A rating isn’t a blanket guarantee against every kind of water contact.
Use this practical check before choosing: identify the likely exposure, read the model’s rating details, then decide whether to use a dry pouch as well. For example, a pack carried inside a waterproof compartment faces different conditions from one attached to the outside of a pack.
- Rain on a hiking track: check the maker’s stated water-resistance conditions and keep ports protected.
- Dusty travel: look for details about dust protection, then keep connectors clean and covered.
- Damp camp storage: place the pack in a dry pouch instead of leaving it on wet ground.
- Changing weather: use a separate protective layer, even when the model has an ingress rating.
Pay attention to ports and covers. A rating may depend on the product being assembled as intended, so close covers and protect exposed connections as the manufacturer directs. After carrying a power bank in rain, dry its exterior and inspect the ports. Don’t plug in a cable if the connector or socket is wet.
Choose protection based on how you’ll carry the pack. Inside a sealed dry bag, it has an extra barrier against splashes and dust. In an outer pocket, it may face more direct exposure. At camp, store it away from damp ground and keep cables together in a dry pouch. These steps support sensible use but don’t change the model’s stated limits.
Clear product details make comparing models more useful than relying on labels alone. Check the stated rating, the manufacturer’s care instructions and the design of the charging ports. If your route includes exposed sections or wet campsites, favour a setup that combines suitable stated protection with careful storage instead of depending on a single feature.
Treat water resistance as one part of the gear decision, alongside capacity, weight and charging needs. An IP rating doesn’t establish that a power bank is suitable for immersion, salt water or every wet-weather situation. Keep it dry where possible, follow the manufacturer’s instructions, and carry it in a protective pouch when conditions call for another layer.
Adventurerz
Adventurerz helps Australian outdoor travellers make informed gear choices through camping equipment and hiking equipment reviews and recommendations. If you’re weighing a power bank against the rest of your load, use the same practical approach: consider your route, conditions and devices before deciding what belongs in your kit.
Our broader gear guidance can help you plan a setup that works together, whether you’re preparing for a remote hike or a campsite stay. Explore recommendations with your trip’s demands in mind, and choose equipment that supports capable, considered travel without carrying extras you won’t use.
For guidance on your outdoor gear decisions, contact Adventurerz.
Get set for your next Australian adventure
Your power setup is one part of a kit built around the journey ahead. Before you leave, decide which devices matter most on the track or at camp, then make sure your gear choices work together. A well-chosen adventure powerbank can support a more considered setup without adding equipment you won’t use.
Adventurerz also offers reviews and recommendations for rooftop tents, 4WD awnings and camping equipment, helping you explore options for the rest of your outdoor kit. Bring your questions about choosing gear for your plans, and take the next step with clear priorities in mind.
Contact Adventurerz for power advice and keep building a setup that’s ready for the road, campsite or trail. Here’s to lighter decisions, thoughtful preparation and more time enjoying Australia’s outdoors!
Frequently Asked Questions
Which Power Bank is the Best Value?
The best value is a pack that meets your charging needs without carrying capacity or features you won’t use. Compare its listed price with capacity, weight, output, charging ports and ingress protection. For example, a compact pack may be better value for a phone-focused day hike, while a multi-device setup may justify a larger model. Consider your route and devices before weighing price alone.
What is an adventure power bank and what features should I look for?
An adventure power bank is a portable battery pack intended to recharge devices away from a wall outlet. Choose based on the gear you’ll carry: check capacity for your expected phone use, output for connected devices, input for recharging the pack, and port types for your cables. For outdoor trips, also compare weight, dimensions and the model’s stated ingress rating. These criteria help match the pack to your actual kit.
How many mAh do I need for camping, hiking, or multi-day trips?
For day trips and overnights, about 5,000 mAh is a useful starting point; longer or heavier device use calls for more. A 10,000 mAh pack is recommended for at least two phone recharges on backpacking trips lasting 3-6 days. For longer outings, account for every device, not just your phone. A headlamp, camera or GPS can change how much capacity your group needs.
Which adventure power banks are waterproof, dustproof, and shockproof?
Choose a model only when its published protection details match the conditions you expect. An IP rating describes resistance to ingress, but doesn’t establish shockproof performance or suitability for every kind of water exposure. Check the manufacturer’s explanation of the rating and any separate impact-resistance claims. If a listing simply says “rugged”, look for specific protection details before treating that description as a performance claim.
How much do adventure power banks cost in Australia?
There’s no single useful price for every Australian power bank; compare current listed prices for models with similar capacity and output. Higher capacity, multiple ports, faster charging capability and additional protection can affect the price. Also consider weight and dimensions, since a cheaper pack may not suit a lightweight hiking kit. Compare like with like and assess the listed price against the features you’ll use on your trip.
How should I safely use and store a power bank in hot Australian conditions?
Follow the manufacturer’s instructions for operating temperature, charging and storage, as these details apply to the specific model. For a hot-weather trip, plan where the pack will be carried and stored rather than leaving its care to chance. Keep its instructions accessible with your gear notes, and include the power bank’s conditions in your pre-trip equipment plan. Different models can have different stated limits.
Which USB ports and fast-charging standards are compatible with phones, GPS devices, and headlamps?
Compatibility depends on the device’s input, the power bank’s output and the cable connecting them. Match the connector first, then compare the device’s stated charging requirements with the power bank’s port details. Use the pack’s highest-rated outlet for its fastest charging speeds, provided the device and cable support that connection. Phones, GPS devices and headlamps can use different connectors, so check each device individually.
Best adventure power banks available in Australia in 2026
Choose by trip length and recharge needs rather than a single model name. A lightweight, compact 10,000 mAh pack is recommended for at least two phone recharges on backpacking trips lasting 3-6 days; for multi-day trips with several devices, consider 20,000 mAh or more.