Packing your roof top tent in a downpour isn’t a gear failure; it’s just a temporary tactical retreat that requires a specific set of rules to survive. We’ve all been there, standing in the mud while the clouds open up, wondering exactly how to pack up a wet roof top tent without turning our expensive canvas into a petri dish for mold. It’s a high-stakes moment that can make even the most seasoned Track-seeker feel a bit defeated.
We understand that deep-seated fear of mildew ruining your investment or the dread of a soggy interior at your next campsite. You’ve worked hard for your gear, and you want it to last through years of rugged Australian travel. We’re here to ensure that a little rain never stops the adventure or damages your home on wheels. It’s all about being prepared and knowing the right sequence to protect your mobile sanctuary.
This guide will show you how to master the essential techniques to keep your bedding bone-dry and your tent safe from damage. We’ll walk through the critical 48-hour drying rule, the best ways to manage internal moisture, and the driving adjustments needed for that extra water weight. Let’s dive into the sequence that ensures your gear stays as hardy as the landscapes we love to explore!
Key Takeaways
- Discover why moisture is the ultimate enemy of canvas and how microbial growth can compromise your gear in record time.
- Learn the “Shake and Wipe” phase to remove surface water while mastering how to pack up a wet roof top tent without soaking your internal bedding.
- Understand why we always follow the 48-hour rule to reopen and ventilate our gear, even if the rain hasn’t stopped back at home.
- Explore the critical maintenance rituals like annual seam sealing and checking hydrostatic head ratings that keep our community’s equipment trail-ready.
- Get expert insights on evaluating hardshell upgrades and using travel planners to stay one step ahead of unpredictable Australian weather patterns.
Why Packing Up a Wet Roof Top Tent Requires a Strategy
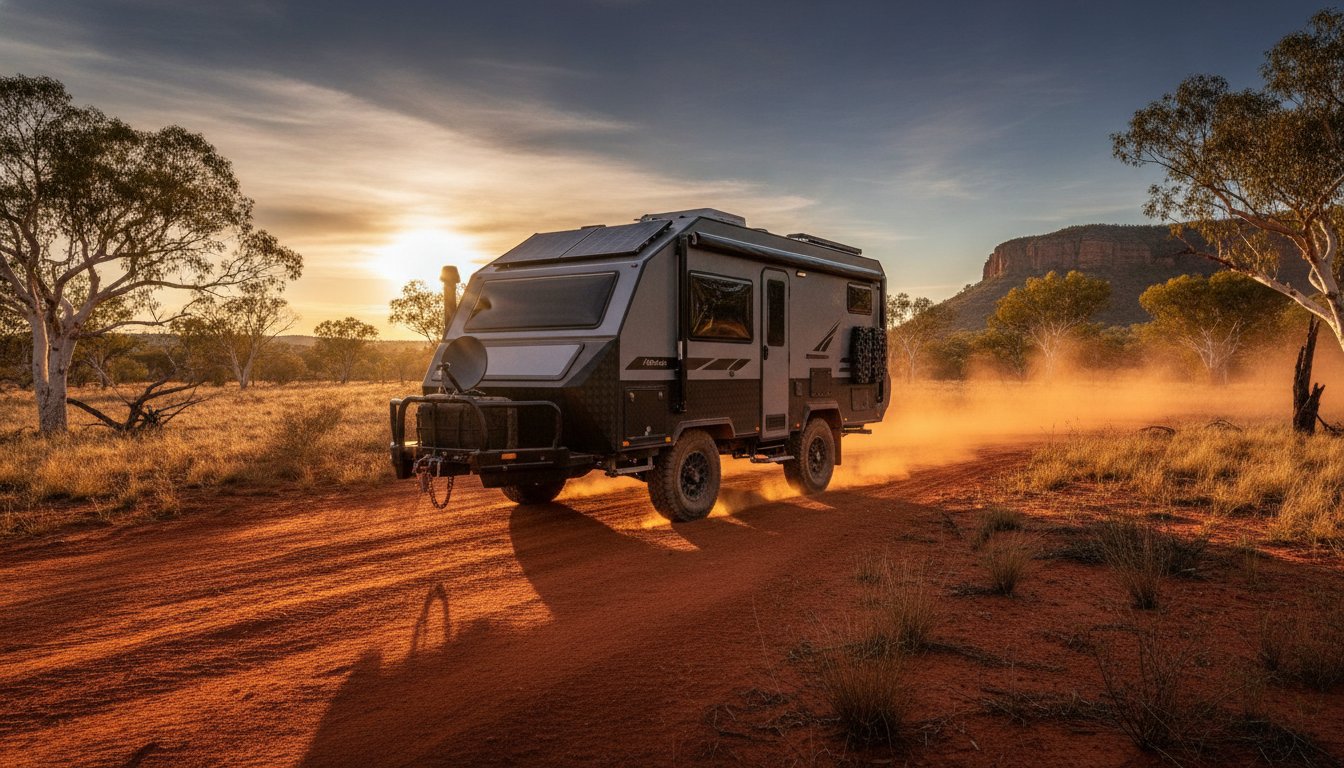
We’ve all stood there on a muddy track as the sky turns a bruised purple and the first heavy drops begin to fall. It’s a moment that tests our patience and our preparation. Learning how to pack up a wet roof top tent isn’t just about getting on the road faster; it’s a critical skill for gear survival. We view the “Wet Pack-Down” as a high-risk tactical maneuver. It’s a necessary part of the journey when the weather turns, but if we approach it without a clear plan, we risk permanent damage to our mobile homes.
The science behind it is simple yet unforgiving. Most high-quality roof top tents utilize heavy-duty poly-cotton canvas. While these fibers are incredible for breathability and durability, they’re also experts at trapping moisture deep within their weave. When we fold that wet fabric onto itself and zip it tight, we create a dark, stagnant environment. This is exactly what microbial life needs to thrive. A single poor pack-down can devalue your entire 4WD setup by inviting rot that eats away at the structural integrity of the fabric. At Adventurerz, we believe in treating our equipment with the same respect we show the rugged Australian wilderness. We don’t just “stow” gear; we protect it.
The Enemy: Mold and Mildew
We need to distinguish between surface moisture and deep fiber saturation. Rain beads on the surface are easy to manage, but once water is driven into the fibers by wind or pressure, it becomes a hidden threat. In our harsh Australian climate, a closed tent sitting in the sun becomes a greenhouse. Heat accelerates mold spore growth at an alarming rate. We always tell our community to trust their senses. If you open your tent and catch a faint, earthy whiff or see tiny grey pinpricks on the ceiling, the spores have already taken hold. Prevention is the only real cure here.
The Goal of a Tactical Pack-Down
When the rain is lashing down, our objective isn’t to get the tent dry; that’s a battle we can’t win on the trail. Instead, our goal is containment. We’re focusing on keeping the wet exterior away from the dry interior components. Protecting the internal mattress is our absolute highest priority during this phase. Everything we do in the field is a temporary measure designed to buy us time. We’re setting ourselves up for the “real” pack-down, which happens the moment we reach a dry location or get back to the driveway. We never consider the job done until the canvas is bone-dry and breathing again.
The Step-by-Step Guide to Packing Down in the Rain
When the sky opens up, speed is your friend, but precision is your ultimate protector. We don’t just collapse the structure and hope for the best. We execute a sequence designed to isolate moisture. The first step in our wet-weather drill is clearing the interior of anything that acts like a sponge. Toss your pillows, loose clothing, and non-fixed bedding into the dry sanctuary of your vehicle. These items absorb ambient humidity instantly, and keeping them inside the tent only adds to the moisture load you’ll be hauling home.
Next, we move to the “Shake and Wipe” phase. Before you even think about folding, give the tent a vigorous shake from the inside to shed standing water. Use a dedicated microfiber cloth to wipe down the exterior walls. By removing as much surface tension water as possible, you significantly reduce the amount of liquid that gets trapped between the layers. When you are figuring out how to pack up a wet roof top tent, the sequence is everything. We fold the canvas so the wet exterior never makes direct contact with the dry interior floor or the mattress. It’s a game of “canvas origami” where the goal is to keep the damp side out and the dry side in.
Keeping the Mattress Dry
The mattress is the heart of your comfort, and we treat it with total reverence. We highly recommend the “burrito” method. Roll your remaining fixed bedding into the very center of the mattress, then place a lightweight plastic sheet or a dedicated moisture barrier over the top before you fold the tent. This creates a physical shield against any drips that might escape the canvas during the transition. If you use heavy doonas, we suggest removing them entirely during a wet pack-down. They take up too much volume and can press the wet canvas directly against the mattress edges, causing “wicking” that ruins your next night’s sleep.
Managing the Rain Fly and Awnings
If your tent design allows it, disconnect the rain fly and pack it separately in a heavy-duty dry bag. This keeps the bulk of the water away from the main tent body. For those using best 4wd awnings, you have a massive advantage. We use our awnings to create a “dry zone” over the ladder and entry point, giving us a sheltered space to wipe down the tent before the final collapse. Be meticulous when tucking in the fabric; ensure no stray edges are hanging out of the travel cover, as these will act like a wick, drawing even more road spray into your gear. If you’re looking to upgrade your setup for better weather protection, check out our latest roof top tents reviews to see which models handle the rain like champions.

The 48-Hour Rule: Crucial Post-Trip Drying Protocols
The clock starts ticking the moment you zip that travel cover tight. While we’ve discussed the tactical side of how to pack up a wet roof top tent to get you home, the most critical phase of gear preservation happens in your own driveway. We live by the 48-hour rule; you must reopen your tent within two days of packing it wet, regardless of the weather outside. If you wait for a perfectly sunny weekend that’s three or four days away, you’re essentially handing a gold-plated invitation to mold and mildew to settle into your canvas fibers. By the time that sun eventually comes out, the damage might already be irreversible.
We don’t just open the tent and walk away. We treat this as a deep maintenance session. Start by using the “Sunlight Sanitizer” whenever possible. Natural UV rays are the most effective, eco-friendly way to kill lingering spores that thrive in damp, dark environments. While the canvas is airing out, take a microfiber cloth to the internal poles and zippers. Road grime, salt spray, and trapped moisture can lead to rapid corrosion on aluminum components and cause zippers to seize. A quick wipe-down ensures your gear remains as hardy as the day you bought it. We’re not just drying; we’re restoring the integrity of our mobile sanctuary.
Indoor Drying Solutions
What if the rain follows you home? We don’t let a week of drizzle stop us. If you have a garage or a high carport, open the tent as far as the ceiling height allows. We use high-velocity floor fans to create a constant vortex of airflow through the windows. A leaf blower is a fantastic tool here; it uses high-volume, cool air to blast surface water off the canvas and accelerate evaporation. Never use high-heat hair dryers. The intense, localized heat can damage the waterproof coatings and shrink the poly-cotton fibers, leading to a tent that no longer fits its own frame.
The “Bone Dry” Test
Before you consider the job done, you need to verify that moisture isn’t hiding in the shadows. We focus on the seams, the heavy fabric folds near the hinges, and the very corners of the mattress. Use the “Tissue Paper Test” for absolute certainty. Press a dry piece of tissue against the deep seams or under the mattress corners. If the paper shows even a hint of translucence or dampness, the tent stays open. We only pack it away for long-term storage when every square inch passes this test. It’s this level of methodical care that separates a seasoned Adventurerz mentor from someone who has to replace their gear every two seasons.
Preventing Mold and Mildew: Long-Term Maintenance Secrets
Mastering the immediate steps of how to pack up a wet roof top tent ensures your gear survives the trip, but long-term resilience requires a deeper commitment to maintenance. We don’t just want our gear to last a season; we want it to endure a decade of Australian adventures. This starts with choosing high-quality roof top tents that feature high hydrostatic head ratings and premium poly-cotton canvas. A higher rating means the fabric can withstand greater water pressure before leaking, giving you a wider margin of error during a tropical deluge.
We also treat seam sealing as a sacred yearly ritual. Even the best factory seals can degrade under the intense Australian sun. By reapplying a quality sealant to every stitch line, we ensure that the most vulnerable parts of our mobile homes remain impenetrable. It’s a balance between breathability and waterproofing. We want canvas that lets our breath escape while keeping the storm out. To keep things clean without harming the environments we visit, we always reach for pH-neutral, biodegradable soaps. Harsh chemicals can strip the natural oils from canvas and poison the local soil, so we stick to earth-friendly alternatives that reflect our community values.
Re-proofing Your Canvas
You’ll know your factory Durable Water Repellent (DWR) coating has failed when water stops beading and starts soaking into the fabric, turning it a darker shade instantly. We recommend a step-by-step application of water-based proofing agents every 12 to 24 months depending on your travel frequency. Focus heavily on high-stress areas like the hinges and peak seams where the fabric is under the most tension. This simple act of stewardship keeps your tent’s skin healthy and ready for the next front.
Anti-Condensation Mats
Rain isn’t the only source of wetness. Every night, our breath and sweat create moisture that settles under the mattress. Without airflow, this leads to mold growth that is often hidden until it’s too late. We consider a 3D mesh anti-condensation mat an absolute essential for any RTT in Australia. These mats create a constant layer of airflow between the base and the mattress, preventing moisture from being trapped. If you’re serious about protecting your investment, explore our latest roof top tents reviews to find models that prioritize ventilation and durability.
Leveling Up Your Wet Weather Setup
Once you’ve mastered the physical sequence of how to pack up a wet roof top tent, it’s time to look at the bigger picture of your expedition strategy. We often find that the difference between a miserable pack-down and a smooth transition lies in the gear we choose before we even leave the driveway. If you find yourself constantly battling the elements, it might be time to evaluate whether your current setup matches your travel style. Integrating your tent with a dedicated travel planner can help you map out your 2026 remote escapes while avoiding predictable storm fronts, but even the best plans can’t stop every raindrop.
We recommend building a specialized “Wet Weather Kit” to keep in your vehicle at all times. This kit should include high-absorbency microfiber towels for the “Shake and Wipe” phase, heavy-duty dry bags for a soaked rain fly, and rechargeable moisture absorbers to place inside the tent once it’s closed. These small additions make the process of how to pack up a wet roof top tent much less daunting. Additionally, utilizing best 4wd awnings or annexes can provide a critical “transition zone” where you can strip off wet gear before entering your sleeping quarters, keeping the mud and moisture exactly where they belong: outside.
Hard Shell vs. Soft Shell in the Rain
If you are frequently traveling through the tropical north or alpine regions, the type of tent you use matters immensely. Hardshell roof top tents are generally much faster for wet pack-downs because they have significantly less exposed fabric. Wedge-style hardshells offer superior drainage advantages, as their steep angles allow water to shed instantly rather than pooling on flat surfaces. While softshell tents are a classic choice, they require more manual tucking of wet canvas, which increases the risk of moisture transfer to the interior. Regardless of your choice, better technique always beats better gear, so keep practicing your fold sequence at home.
Final Tips for the Road
Never store a wet tent in a hot, enclosed space like a shipping container or a sun-baked garage without massive airflow. The combination of heat and trapped moisture is the fastest way to delaminate waterproof coatings. We always look for a “mid-trip” dry-out opportunity. If the sun peaks out during a lunch break, pop the tent open for twenty minutes. It’s amazing how much moisture a brisk breeze can pull out of the canvas in a short time. We’re all on this journey together, learning to respect the wild while protecting the gear that gets us there. If you want more expert guidance on rugged travel, join our community of Adventurerz and let’s keep the exploration alive!
Master the Elements on Your Next Expedition
Rain doesn’t have to be the end of your story. By mastering the tactical sequence of how to pack up a wet roof top tent, you transform a potential gear disaster into a routine part of the journey. We’ve seen how the 48-hour rule and meticulous folding protect your internal sanctuary while keeping the canvas healthy for years to come. It’s about more than just staying dry; it’s about treating our equipment with the same respect we show the wild Australian landscapes we love to explore.
Our community relies on gear that stands up to the most rugged conditions while supporting sustainable outdoor practices. We only recommend community-vetted equipment that has been expert-tested in the harshest regional environments. Whether you are prepping for a coastal escape or a mountain trek, having the right setup makes all the difference. Explore our top-rated Roof Top Tents for 2026 and find the perfect mobile home for your next adventure. The clouds will clear eventually, and when they do, your gear will be ready for the next sunrise. We’ll see you out on the tracks!
Frequently Asked Questions
How long can a roof top tent stay wet while packed?
You should never leave your tent packed wet for more than 48 hours. This window is the gold standard for preventing irreversible microbial growth and deep-seated rot. We always prioritize finding a dry spot or using a garage within this timeframe to let the canvas breathe. If you are traveling through high-humidity coastal regions, we suggest aiming for a 24-hour turnaround to be safe.
Can I pack my bedding inside a wet roof top tent?
We strongly recommend removing loose bedding like pillows and heavy quilts before you start the process. These items act like sponges and will absorb ambient moisture from the wet canvas almost instantly. If you must leave a thin mattress protector or fixed sheet inside, use a plastic moisture barrier to shield them. This is a key part of learning how to pack up a wet roof top tent without ruining your comfort for the next night.
Is it okay to pack up my roof top tent while it is raining?
It is perfectly fine to pack down during a storm as long as you have a plan for drying the gear later. We treat this as a tactical move to reach a safer or drier location rather than a permanent storage solution. Just ensure you follow our “Shake and Wipe” method to minimize the amount of standing water you trap inside the travel cover during the collapse.
How do I dry my roof top tent if it keeps raining for a week?
Move your vehicle into a garage, workshop, or under a large carport to get the canvas out of the direct downpour. We use high-velocity floor fans to create a constant vortex of airflow through the tent’s open windows and doors. A leaf blower is another fantastic tool for blasting standing water off the surface. We never let a week of rain be an excuse to keep the tent zipped up and rotting.
What is the best way to remove mold from a roof top tent?
Use a soft-bristled brush and a mixture of one part white vinegar to four parts water for a gentle, eco-friendly clean. We avoid bleach at all costs because it strips the waterproof coating and weakens the poly-cotton fibers. After cleaning, ensure the tent dries completely in the sun so UV rays can kill any remaining spores. This maintenance is vital after you’ve had to navigate how to pack up a wet roof top tent during a messy trip.
Does a wet pack-down void my roof top tent warranty?
A single wet pack-down won’t void your warranty, but long-term negligence certainly can. Most manufacturers exclude damage caused by mold, mildew, or improper storage from their coverage terms. We suggest keeping a simple log of your maintenance and drying rituals to prove you’ve taken reasonable care of the equipment if a structural fabric issue ever arises.
Can I use a heater to dry out my tent faster?
We advise against using space heaters or high-heat blowers inside your tent. Intense, localized heat can cause the canvas to shrink unevenly or even melt the waterproof DWR treatment on the fabric. High-volume, ambient temperature airflow from fans is much safer and more effective at pulling moisture out of the deep fibers without risking any structural damage to your home on wheels.
How often should I waterproof my roof top tent?
We recommend a full re-proofing every 12 to 24 months, depending on how often you hit the tracks. You can perform a simple “bead test” by splashing water on the canvas. If the water soaks into the fabric instead of rolling off in tight droplets, your protective layer has worn down and needs a fresh application of a quality water-based proofing agent.