Your roof top tent is likely the most expensive piece of camping gear you own, yet it’s often the most neglected once you pull back into the driveway. We’ve all felt that post-trip fatigue where the tent stays bolted to the roof for weeks, or worse, ends up precariously balanced against a garage wall. Implementing the right roof top tent storage solutions is vital to ensure your canvas stays mould-free and your internal space remains a sanctuary rather than a cluttered mess. Whether you’re navigating the tight confines of a hardshell or managing a heavy fold-out unit, organization is the key to longevity.
We understand the frustration of tripping over boots at 2 AM or the physical strain of trying to hoist a 100kg tent solo. This guide promises to transform your workflow with expert-vetted strategies for both on-trail livability and off-season protection. We will explore high-capacity pulley systems like the OBK World overhead rack, which supports up to 110kg, and internal hacks like the iKamper Shoe Rack 3.0. From one-person ceiling lifts like the Pacikwest system to specialized protective covers, you’ll learn exactly how to safeguard your investment and keep your gear ready for the next Australian adventure.
Key Takeaways
- Reclaim your mobile bedroom by utilizing often-overlooked ceiling and wall space to keep gear off the mattress and improve sleep quality.
- Compare the pros and cons of flat, upright, and suspended off-vehicle storage to find the safest and most efficient layout for your garage or shed.
- Shield your gear from “black spot” mould by mastering the deep-clean ritual and ensuring your canvas is bone-dry before long-term storage.
- Learn how specialized roof top tent storage solutions like mechanical hoists enable safe, one-person removal while protecting your vehicle’s roof.
Table of Contents
Mastering Your Roof Top Tent Storage Strategy
We’ve spent countless hours researching the best roof top tents for our rigs, focusing on setup speeds and mattress comfort. But what happens when the dust settles and the trip ends? Storage is often the most overlooked phase of the RTT lifestyle. Too many of us treat our tents like an afterthought once we’re back in the driveway, but a haphazard approach leads to degraded canvas and mechanical failure. Mastering your strategy means looking at your gear through two lenses: how you organize it while camping and how you protect it in the garage. Have you ever considered how much extra life you could squeeze out of your investment with a dedicated storage routine?
A solid strategy is about more than just finding a corner in the shed. It involves understanding the history and types of roof top tents to appreciate how their materials react to long-term pressure and environmental exposure. Whether you’re rocking a vintage soft-shell or the latest gas-strut hardshell, the way you stow your gear determines if your next trip starts with a fresh breeze or the smell of mildew. We believe in being methodical. By integrating smart roof top tent storage solutions into your lifestyle, you aren’t just tidying up; you’re ensuring self-reliance for your next remote trek.
Internal vs. Off-Vehicle Storage: Why You Need Both
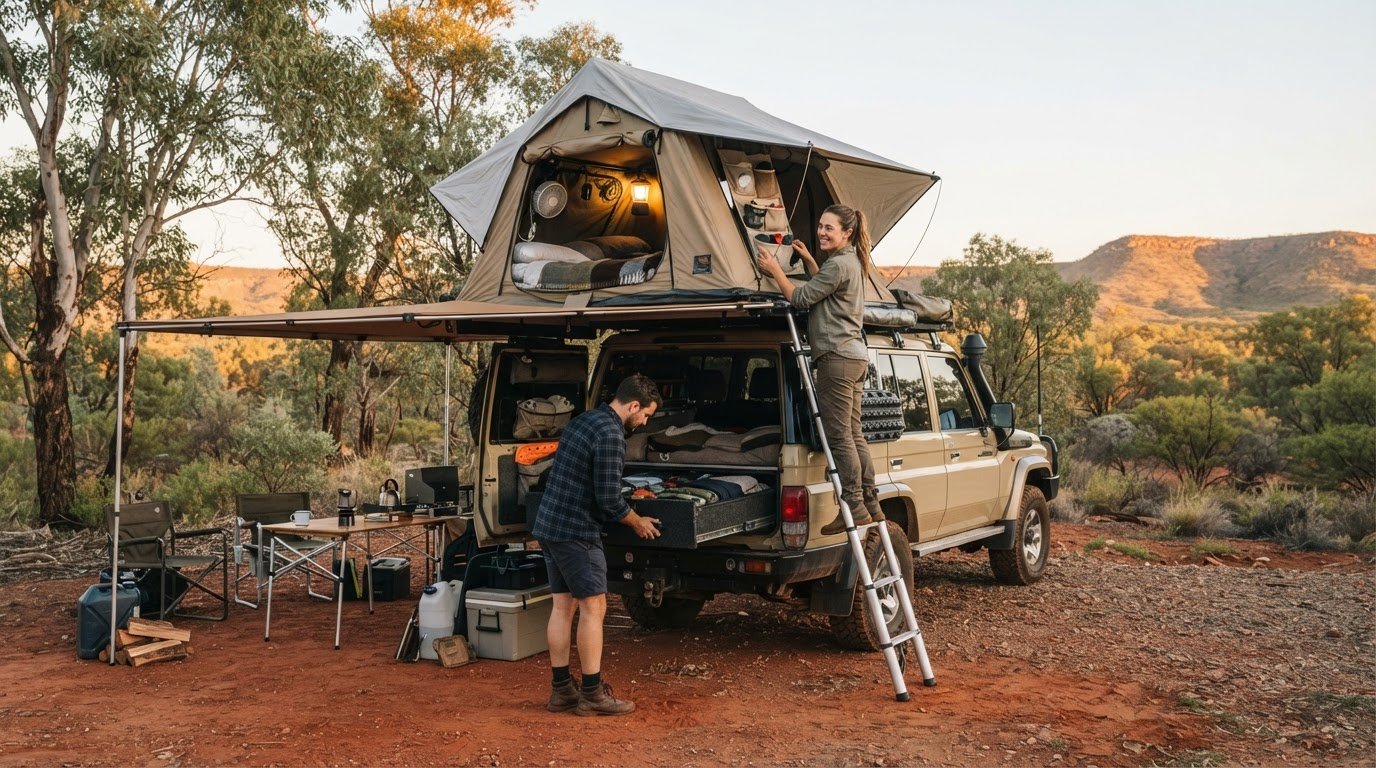
We divide roof top tent storage solutions into two distinct categories that serve different purposes. Internal storage focuses on maximizing your living footprint while you’re on the track. We use integrated ceiling nets, side pockets, and “permanent packing” systems where bedding stays inside the shell to keep the floor clear. It’s about daily efficiency. Off-vehicle storage, however, is about long-term preservation. Removing the unit between trips prevents constant suspension strain on your vehicle and protects the shell from the elements. While DIY hooks might seem like a budget-friendly fix, specialized hoist kits offer safety features that prevent a 100kg unit from becoming a garage floor disaster. Investing in the right rack or pulley system is a small price to pay for peace of mind.
Why Australian Conditions Demand Better Storage
Our environment is notoriously harsh on outdoor gear, and Australian Adventurerz face unique challenges. Consider these three factors that degrade tents faster here than anywhere else:
- UV Radiation: Our intense sun can turn a soft cover brittle or chalk a hardshell coating in a single season if left exposed on a roof.
- Red Dust: This fine, abrasive powder finds its way into zippers and seals. If it’s not cleaned out before storage, it acts like sandpaper every time you open the tent.
- Coastal Humidity: In regions like Queensland or Northern NSW, moisture management is vital. Storing a damp tent for even a few days can invite “black spot” mould, which is nearly impossible to remove without damaging the fabric’s integrity.
We’ve seen how quickly a premium setup can fail without proper care. Are you doing enough to shield your gear from the elements when it’s not in use?
Maximising Internal Space: Organising Your Mobile Bedroom
The ceiling is often your best friend when it comes to reclaiming floor space. A high-quality cargo net can hold jackets and lightweight layers, keeping them dry and accessible. For smaller essentials, velcro-backed pouches allow you to customise your layout. If you’re currently researching upgrades, look for roof top tents that feature integrated internal accessory tracks. These systems allow you to bolt in organisers or lighting rigs without piercing the canvas or compromising the tent’s weather seal.
Managing electronics is another vital step for a tidy interior. We recommend using adhesive cable clips or integrated fabric loops to route power banks and lighting cables along the internal frame. This prevents tangles and ensures that no wires get caught in the folding mechanism when you’re packing up in a hurry. For external items like muddy boots, hanging a dedicated organiser like the iKamper Shoe Rack 3.0 from your ladder is a game-changer. It prevents abrasive Australian red dust from entering your sleeping area, which protects both your bedding and the tent’s internal floor coating.
Essential Internal Storage Accessories
We love using roof nets for lightweight clothing and bulky but light items like towels. For personal items, we suggest using pouches made from 300g ripstop polyester, similar to those offered by The Bush Company, which feature zipped pockets and central pouches. These durable organisers ensure your torches and glasses are always within reach. If you’re looking for the best gear to kit out your rig, check out our latest reviews of top-rated tents to see which models include these features as standard.
The Art of the ‘Permanent Pack’
One of the biggest perks of the RTT lifestyle is the ‘permanent pack’—the ability to leave your bedding inside. However, this requires a methodical approach to avoid damaging the folding mechanism. We recommend using low-profile, compressible sleeping bags and pillows. Always check the hinge clearance before you heave the shell closed. If your internal storage bags are too thick, they can put undue stress on the hinges or prevent a flush seal, allowing moisture to creep in during transit. It’s a simple check that saves your gear from long-term structural fatigue.
Off-Vehicle Storage: Safe Systems for the Off-Season
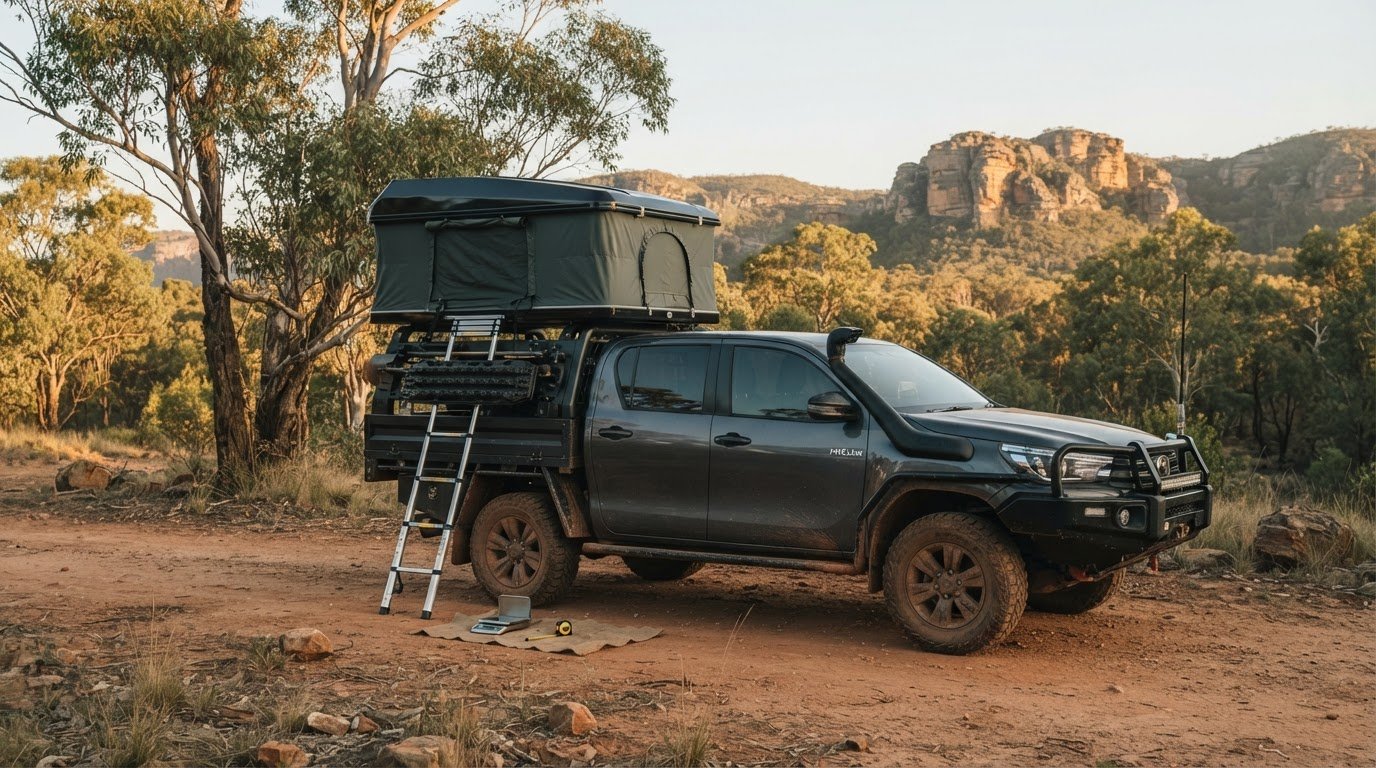
Packing up your rig after a month in the outback is bittersweet, but leaving your tent bolted to the roof year-round isn’t doing your vehicle any favours. Between the increased fuel consumption and the constant strain on your suspension, removing the unit is a smart move for the off-season. However, heaving a 100kg hardshell off a lifted 4WD is a recipe for a blown back if you don’t have a plan. We recommend integrating professional roof top tent storage solutions that allow for a safe, one-person transition from the roof to the rafters.
Before you start unbolting, we suggest checking your travel planner to see when your next escape is scheduled. If you’re heading out again in a fortnight, a simple floor-based rack might suffice. If you’re parking the gear for months, a more permanent suspension system is the way to go. We always advocate for a methodical approach to removal to protect both your paintwork and your person. To remove your unit safely, follow this sequence:
- Position the vehicle directly under your hoist points or clear of any garage door tracks.
- Loosen all mounting hardware but leave the bolts in place until the hoist straps are tensioned.
- Connect the lifting straps, ensuring they are positioned wide enough to prevent the shell from tipping.
- Apply slight tension to the hoist and then remove the hardware completely.
- Slowly raise the tent, checking for any caught cables or ladder mounts as it clears the roof.
Garage Ceiling Hoists and Pulley Systems
Ceiling-mounted hoists are the gold standard for many in our community. Systems like the OBK World overhead rack provide a heavy-duty lift capacity of up to 110kg, while the Pacikwest lift system handles loads up to approximately 113kg (250lbs). Manual hoists are reliable and budget-friendly, but electric winches offer effortless operation for those with heavier hardshell units. The real benefit here is the “Friday afternoon” strategy; you simply lower the tent directly onto your crossbars, bolt it down, and you’re gone. It’s critical to verify that your garage roof trusses are engineered to support the combined static weight of the hoist and the tent before you begin any drilling.
Vertical vs. Flat Floor Storage
If ceiling space is at a premium, you might consider floor-based roof top tent storage solutions. Storing a hardshell tent flat on a dedicated rack is the best way to maintain its structural integrity over long periods. It prevents uneven pressure on the internal gas struts and hinges. If you must store it vertically to save space, we recommend using a mobile trolley system with high-density foam blocks to cushion the shell. Always store the tent with the hinge side down to avoid putting weight on the latches. While some suggest using pool noodles for padding, we prefer specialized rubber cradles that won’t compress over time and lose their protective qualities.
Preserving Your Investment: Protection from Dust and Damp
We’ve all seen the heartbreak of a fellow explorer opening their tent for the first trip of the season only to find a thriving colony of “black spot” mould. Your rig has survived the corrugated tracks of the Kimberley and the salt spray of Fraser Island, but the quiet months in the garage are often where the most damage occurs. Effective roof top tent storage solutions require a proactive stance against the two great silent killers of outdoor gear: moisture and abrasive dust. We treat the pack-down process as a ritual of respect for the equipment that keeps us safe in remote locations.
Before you seal the shell for the long term, a “Deep Clean” is mandatory. Australian red dust is more than just a souvenir; it’s a microscopic abrasive that eats through waterproof coatings and jams high-quality zippers. We start by vacuuming every corner of the internal mattress and floor, paying close attention to the folding hinges where grit likes to hide. Use a damp cloth with a mild, pH-neutral soap to wipe down the canvas, but avoid harsh chemicals that can strip the UV inhibitors from the fabric. If you’ve been using an iKamper insulation liner or similar thermal layers, remove them entirely to ensure no moisture is trapped between the layers.
Don’t forget the mounting hardware during this phase. Road salt and grime can cause stainless steel bolts to seize over time, making your next installation a nightmare. We recommend a quick spray of a lanolin-based protectant or a light coat of anti-seize lubricant on all threads before stowing them in a labelled bag. This methodical approach ensures that when the next adventure calls, your gear is ready to perform without a trip to the hardware store for bolt cutters.
Preventing Mould and Mildew in Storage
Moisture is the primary enemy of any canvas-based system. Even if the tent feels dry to the touch, ambient humidity can condense inside a sealed hardshell during temperature swings. We place several high-capacity silica gel packs or rechargeable moisture absorbers inside the tent before closing it. It’s also vital to “air out” the unit every four to six weeks. Simply pop the latches and let it breathe for a few hours on a dry, sunny day. Never, under any circumstances, wrap your tent in non-breathable plastic stretch wrap; this creates a greenhouse effect that practically guarantees mould growth.
Dust-Proofing for Long-Term Storage
While your tent is off the vehicle, it needs a secondary line of defence. For hardshell owners, applying a dedicated UV protectant to the outer casing prevents the gel coat from chalking or cracking in the heat. We also advocate for using a breathable fabric dust cover, such as those designed by Inspired Overland, which shields the seals from garage grime while allowing air exchange. This keeps the rubber gaskets supple and ensures they provide a watertight seal when you’re back on the road. If you’re looking for the most durable gear to withstand these conditions, check out our latest roof top tent reviews for models with superior sealing technology.
Selecting the Right Solution for Your Setup
We’ve covered the technical side of preservation and the mechanics of hoisting. Now, we need to look at your specific rig to decide which roof top tent storage solutions actually fit your lifestyle. Before you pull the trigger on a new rack or hoist, audit your current setup to identify where the friction lies. Is it the physical weight of the unit that stops you from exploring? Or is it the clutter inside that makes setup feel like a chore? Identifying these bottlenecks ensures you don’t spend money on gear that doesn’t solve your specific problems.
The synergy between your tent and other accessories like best 4wd awnings is often overlooked. If your awning is permanently bolted to your roof rack, it might complicate how you attach hoist straps or where you place floor supports. We recommend a holistic approach where every piece of gear works in harmony. When your storage is streamlined, your transition from the suburban driveway to the remote track becomes effortless. This readiness is what defines a true Australian Adventurerz rig.
Comparing DIY vs. Professional Storage Kits
We see plenty of chatter in our community about “cheap” DIY alternatives. While we love a good hardware store hack, using non-rated ropes or basic pulleys for an 80kg hardshell is a massive risk. A failure doesn’t just damage your tent; it can cause serious injury or crush your vehicle’s roof. Purpose-built RTT hoists feature mechanical brakes and weight-rated hardware designed specifically for these loads. A professional storage system pays for itself by reducing the friction of getting out of the house, effectively increasing your nights under the stars. Why risk a premium investment on a five-dollar rope?
Why Quality Gear Matters for Remote Travel
Organized storage is the foundation of a stress-free expedition. When you’re thousands of kilometers from the nearest town, knowing exactly where your kit is stowed saves time and mental energy. Beyond the trail, proper off-vehicle storage maintains the resale value of your roof top tents. A unit with a pristine shell, smooth zippers, and mould-free canvas will always command a higher price if you decide to upgrade. We believe in gear that lasts a lifetime, not just a season.
Ready to level up your setup? Join our community of explorers to share your own roof top tent storage solutions, travel photos, and hard-won advice from the track. To help you finalize your garage transformation, use this quick checklist:
- Ceiling Integrity: Have you verified that your roof trusses can handle the static load?
- Ventilation: Is your storage area dry and free from extreme temperature swings?
- Accessibility: Can you move the vehicle directly under the hoist without clearing the entire garage?
- Protection: Do you have silica packs and a breathable dust cover ready for the off-season?
Ready Your Rig for the Next Great Escape
Our community of remote travel veterans is dedicated to providing expert gear reviews and sustainable camping advice tailored for our unique, rugged landscape. We believe that high-quality equipment deserves high-quality care. If you’re looking to upgrade your setup or find a unit that fits your storage needs, explore our top-rated Roof Top Tent recommendations for 2026. We’ve done the hard yards on the track so you can choose with confidence. Let’s keep our rigs ready and our impact low as we continue to explore the most isolated corners of this incredible country. See you out there on the red dirt!
Frequently Asked Questions
Can I leave my roof top tent on my car all year round?
You can leave it mounted, but we don’t recommend it for long-term preservation. Constant exposure to intense Australian UV radiation degrades hardshell coatings and makes soft covers brittle over time. Additionally, the extra weight increases your fuel consumption and puts unnecessary strain on your vehicle’s suspension. If you aren’t planning a trip within the next month, removing the unit is the best way to protect your investment.
What is the best way to store a roof top tent in a small garage?
A ceiling-mounted hoist is the ultimate space-saver for tight garages. By suspending the unit, you reclaim your floor space and keep the tent safely out of the way of daily traffic and potential bumps. Systems like the OBK World overhead rack are specifically designed for this purpose, allowing you to lift the tent directly off your roof racks with minimal physical effort.
How do I prevent my roof top tent from smelling musty after storage?
Preventing a musty smell requires total moisture control before and during the storage phase. We suggest placing high-capacity silica gel packs inside the tent and ensuring the canvas is 100% dry before you latch the shell. Opening the tent for a few hours every 4 to 6 weeks to let fresh air circulate is a vital step in your roof top tent storage solutions routine.
Is it safe to store a hardshell roof top tent on its side?
It is safe to store a hardshell on its side, provided you rest it on the hinge side rather than the latches. We recommend using high-density foam blocks or specialized cradles to prevent pressure points that could crack the shell. Never store it on the opening side, as this can warp the locking mechanism and compromise the weather seal over time.
How much weight can a garage ceiling hoist typically hold?
Most residential hoists are rated for between 100kg and 113kg. For instance, the Pacikwest Garage Ceiling Storage system has a 250lb (113kg) capacity, while the OBK World rack supports up to 110kg. These ratings cover most premium hardshell units, but you must verify your tent’s weight and your garage’s load-bearing capacity before installation to ensure total safety during operation.
Do I need to take the mattress out of the tent for long-term storage?
You don’t have to remove it, but we suggest propping it up or taking it out for extended storage periods. Mattresses can trap condensation against the internal floor, which leads to mildew growth in humid conditions. If you choose to leave it in, place a few moisture absorbers on top of the foam to keep the environment dry while the shell is closed.
What should I use to clean the canvas before storing my RTT?
Stick to a mild, pH-neutral soap and a soft-bristled brush to remove red dust and grime. We avoid harsh detergents or bleach because they strip the canvas of its waterproof coating and UV inhibitors. After scrubbing, rinse the fabric thoroughly with fresh water and let it sun-dry completely before you pack it away to prevent mould from forming.
How can I stop mice from getting into my stored tent?
The best defense against rodents is a tight seal and a clean interior. Ensure all zippers are fully closed and check that there are no food crumbs left in the internal pockets. We also find that placing peppermint oil-soaked cotton balls near the openings acts as a natural deterrent that won’t damage your gear or the local environment.