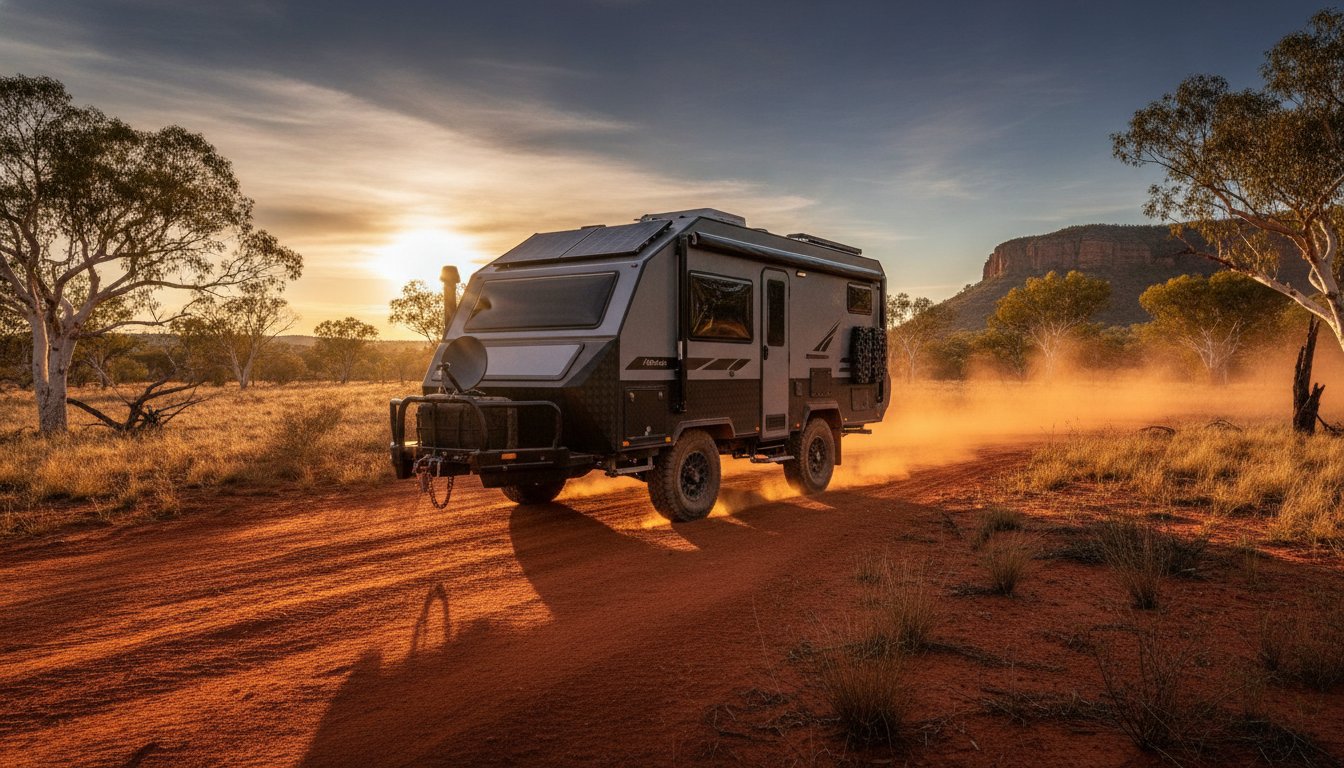
Last July, a group of Adventurerz watched a routine recovery turn into a nightmare when a rusted shackle failed at a popular crossing in the Victorian High Country. It’s a terrifying sight to see a winch line snap, especially when you consider that a loaded 10mm synthetic rope can store over 4,000kg of kinetic energy in a split second. We know that feeling of hesitation when you’re staring down a deep bog hole or a steep, muddy incline. You want to get moving, but you’re worried about confusing Working Load Limits or accidentally scarring a century-old gum tree. Learning safe winching practices for 4×4 isn’t just about owning the right gear; it’s about protecting our mates and the wild tracks we love to explore.
For those who want to see how these principles are applied by professionals in other world-class off-road destinations, taking an Arches National Park Tour offers a unique look at expert vehicle handling in challenging desert environments.
We’ve all stood there questioning if our snatch block is rigged correctly or if our anchor point is truly solid. It’s natural to feel that pressure when the sun is setting and the tide is pushing in. This guide will transform that anxiety into expert-level precision. We’ll walk you through the technical physics of a 2:1 mechanical advantage and provide a fail-safe checklist for every recovery scenario. You’ll gain the skills to protect your rig, respect the Australian bush, and ensure everyone makes it back to camp safely for a celebratory fire.
Key Takeaways
- Learn to decode gear ratings like WLL and MBS so we can manage the intense physics of a recovery without pushing our equipment past its limits.
- Discover how to conduct a thorough ‘Pre-Flight’ check of your environment and choose the right anchor points to protect both your rig and the local terrain.
- Master the essential safe winching practices for 4×4 by following our step-by-step guide to rigging, connecting, and executing a flawless pull.
- Understand how to establish a strict exclusion zone using the 1.5x length rule to keep every member of the Adventurerz tribe well clear of the danger area.
- Get the insider tips on post-recovery maintenance, including how to properly clean grit from synthetic ropes to ensure your gear lasts for years of exploration.
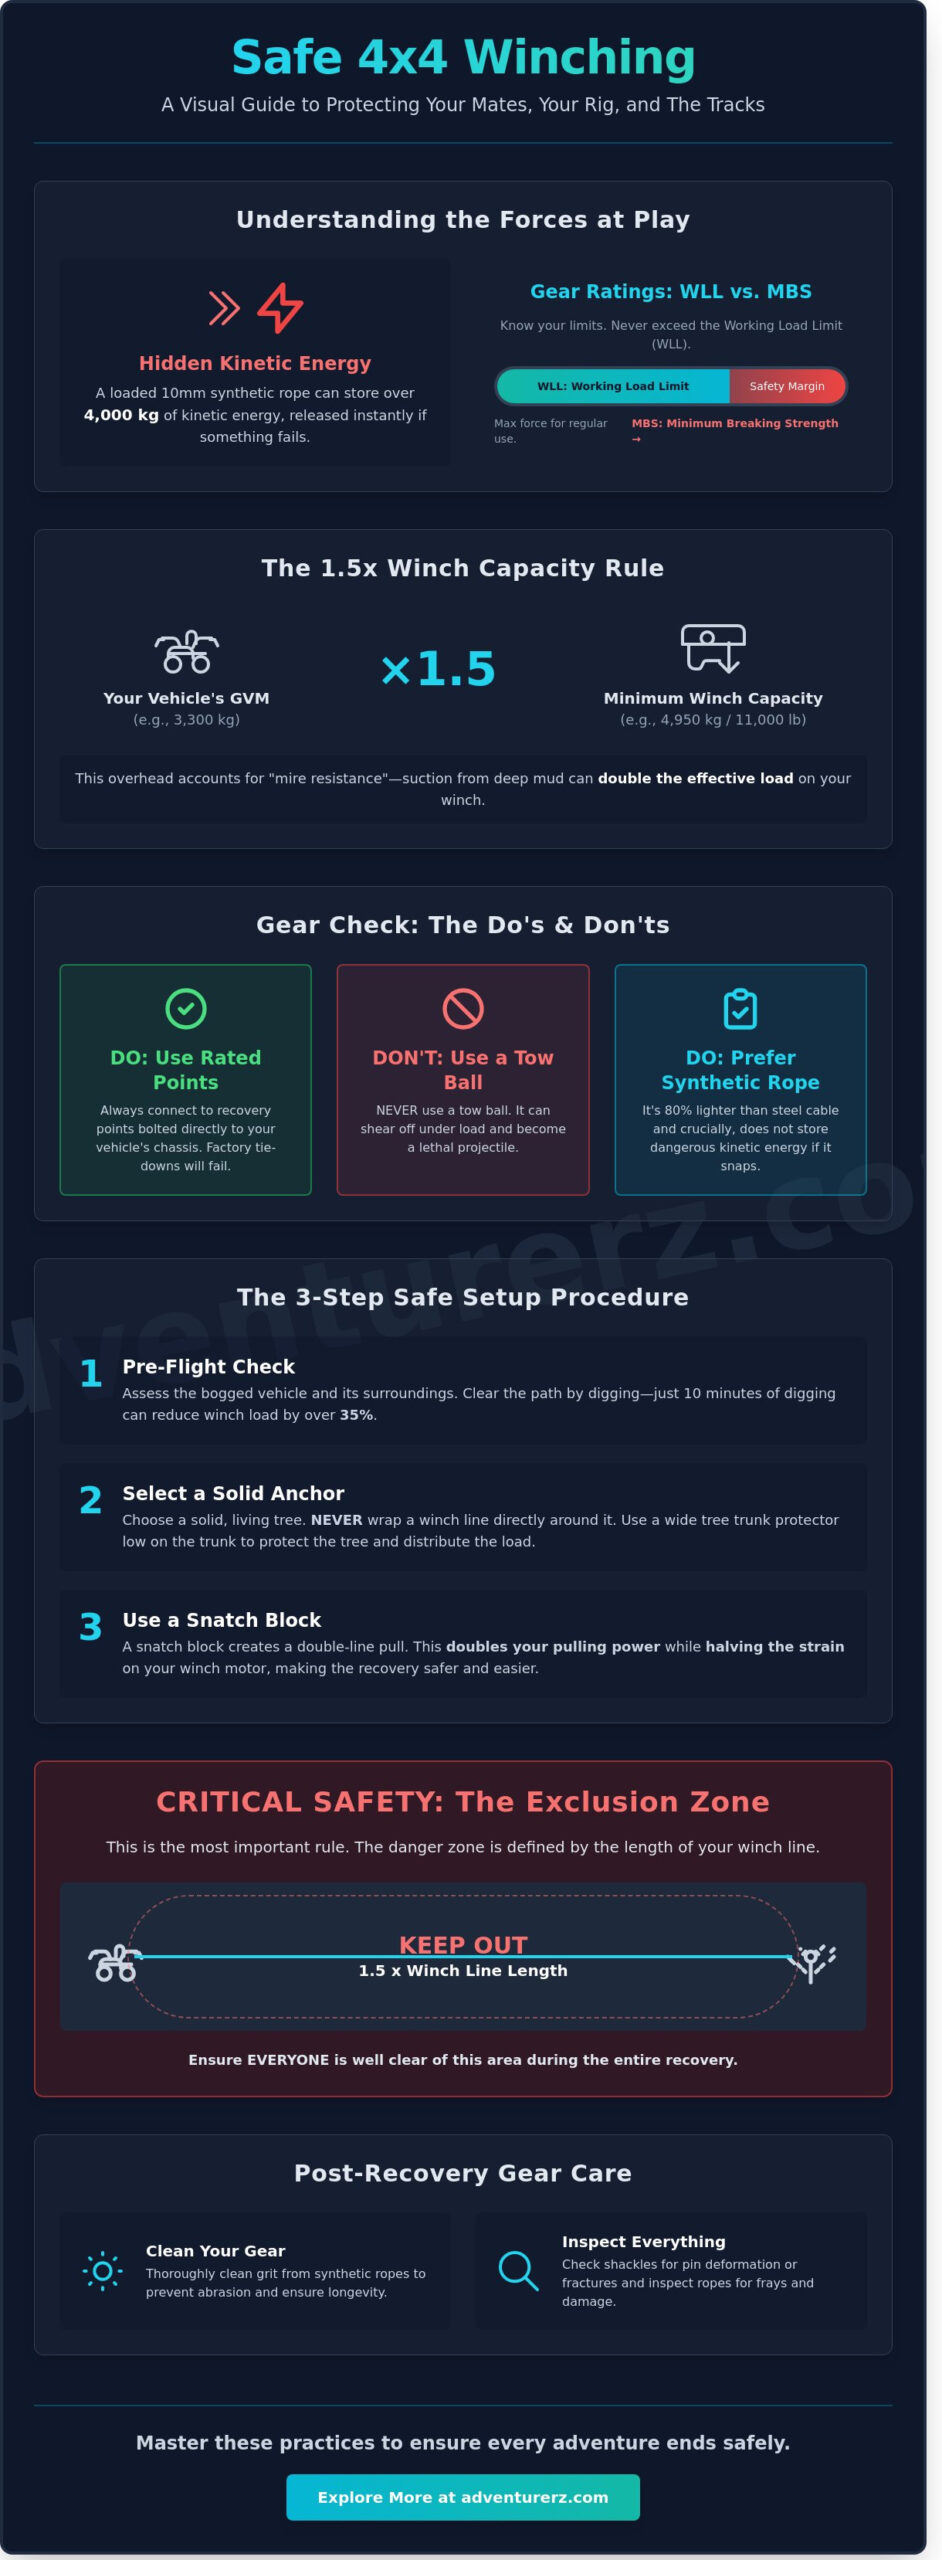
Understanding Winch Physics and Gear Ratings
Mastering safe winching practices for 4×4 begins with a deep dive into the physics of force and the gear designed to handle it. We often think of recovery as a simple tug, but the reality involves massive energy storage. To grasp the mechanics, we first need to ask What is a Winch? and how it converts electrical energy into thousands of kilograms of pulling power. In a standard recovery, we deal with static loads. This is where the tension is applied steadily and controlled. This differs from dynamic loads, like snatch strap recoveries, where kinetic energy is used. When winching, we aim for a controlled, static pull to minimize the risk of sudden gear failure.
Decoding the labels on your equipment is vital for every Adventurerz member. You’ll see two main figures: Working Load Limit (WLL) and Minimum Breaking Strength (MBS). The WLL is the maximum weight the manufacturer intends for regular use, while the MBS is the point where the component is guaranteed to fail under testing. For example, a standard 4.75-tonne bow shackle has an MBS significantly higher than its WLL to provide a safety buffer. We also choose between synthetic rope and steel cable. Synthetic rope is 80% lighter and doesn’t store dangerous kinetic energy if it snaps. This makes it the preferred choice for modern, eco-conscious explorers who prioritize safety and weight distribution.
The Role of Rated Recovery Points
We’ve seen too many newcomers mistake factory tie-down points for recovery points. Tie-down points are designed only to secure a vehicle on a trailer; they’ll likely tear off during a heavy recovery. Always use rated recovery points bolted directly to the chassis with Grade 8.8 bolts. Never, under any circumstances, use a tow ball for winching. A tow ball is made of brittle cast iron and can shear off under a 3,000kg load, turning into a lethal projectile. Before every trip, we inspect our shackles for pin deformation or hairline fractures. This ensures our safe winching practices for 4×4 remain uncompromised.
Winch Capacity and the 1.5x Rule
Your vehicle’s Gross Vehicle Mass (GVM) is just the starting point for calculations. We follow the 1.5x rule: your winch capacity should be at least 1.5 times the weight of your fully loaded rig. If your LandCruiser weighs 3,300kg, you need a winch rated for at least 4,950kg, which is roughly 11,000lb. This overhead accounts for “mire resistance.” Thick Australian mud can create a suction effect that adds 100% or more to the effective load. In remote areas like the Kimberley, having that extra pulling power isn’t just a luxury; it’s a survival necessity for the Adventurerz tribe.
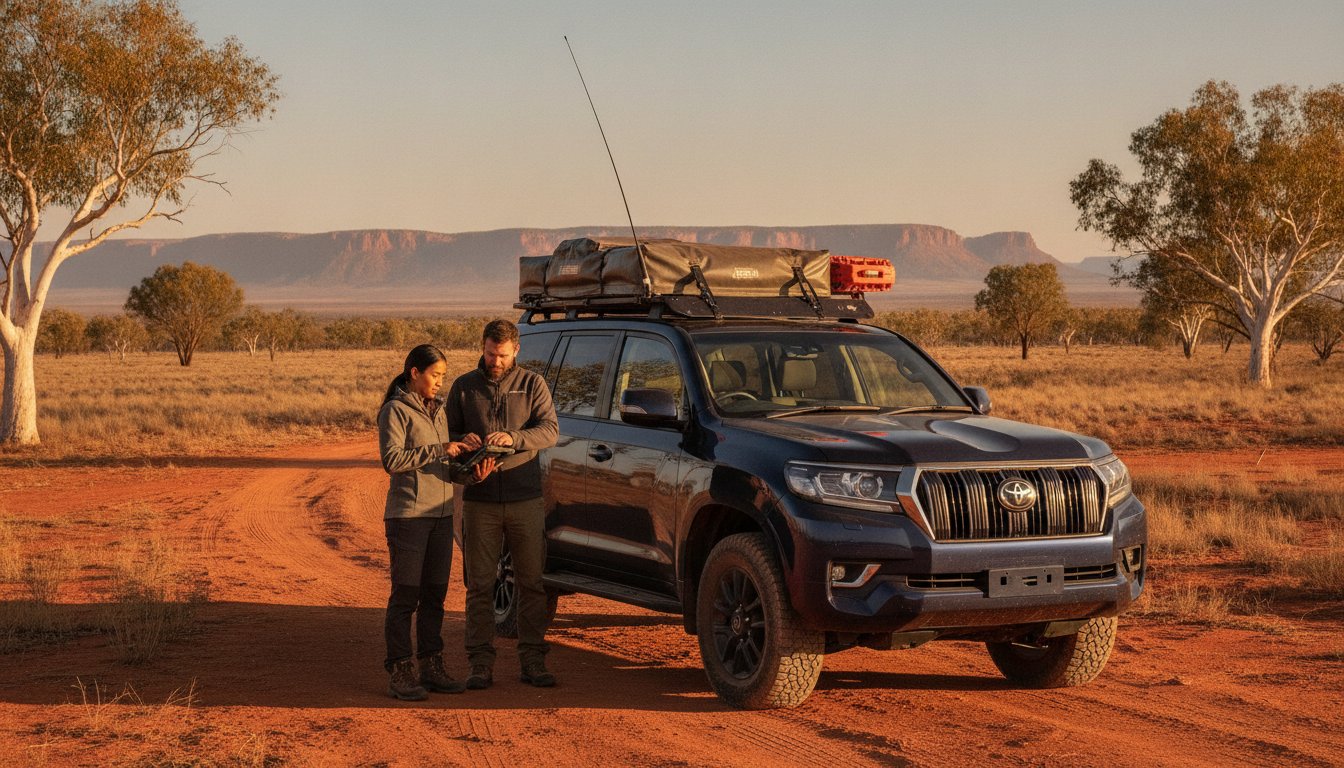
Setting Up the Recovery Site Safely
Before we spool out a single meter of cable, we need a solid plan. A “Pre-Flight” check isn’t just for pilots; it’s essential for us Adventurerz when we’re stuck in the thick of it. We start by examining the bogged vehicle’s undercarriage for snagged rocks or logs and assessing the soil density. If the 4×4 is buried to the axles, we always clear the path first. Digging for just 10 minutes can reduce the winch load by more than 35 percent. This preparation is a cornerstone of safe winching practices for 4×4 owners who value their equipment’s longevity.
Selecting the right anchor point is our next critical step. We look for natural anchors like solid, living trees or use a second vehicle if the ground is stable. A dead tree or a shallow-rooted sapling will likely fail under the 4,500kg to 6,000kg of force generated during a heavy recovery. We always ensure the anchor is as straight as possible to the vehicle to prevent the cable from bunching on one side of the winch drum. This keeps the pull predictable and prevents damage to the winch housing.
Tree Trunk Protectors and Sustainable Anchoring
We never wrap a winch line directly around a tree. This “choker” method causes deep scarring and can kill a tree through ring-barking within a single season. Instead, we use a wide, heavy-duty polyester tree trunk protector. We place it low on the trunk to minimize leverage on the root system. In high-resistance bogs, we often use multiple anchors to distribute the load. This ensures we protect the Australian landscape while keeping our recovery controlled and steady. Being a responsible Adventurerz member means leaving the bush exactly as we found it.
Mechanical Advantage with Snatch Blocks
A snatch block is a vital tool for any serious recovery kit. It allows us to double our pulling power while halving the strain on the winch motor. We set up a double-line pull by running the line through the snatch block at the anchor and back to a rated recovery point on our own vehicle. This is especially useful in the heavy “black soil” found in regional Queensland where suction is a major factor.
Using a snatch block correctly is one of the most effective safe winching practices for 4×4 recoveries involving heavy mud or steep inclines. We also use snatch blocks as redirects. This lets us change the angle of the pull to avoid obstacles like large boulders, ensuring the winch line stays clear of sharp edges. By mastering these mechanical advantages, we ensure that even the toughest bogs don’t end the adventure early.
The Step-by-Step Winching Procedure
We’ve all been there. The mud is deep, the sun is setting, and your rig isn’t budging. Mastering safe winching practices for 4×4 ensures we protect our gear, our environment, and our mates. Follow these five steps to execute a recovery that’s both effective and disciplined.
- Step 1: Inspect the line. Spool out enough cable to reach your anchor point. Look for “bird-nesting” on the drum, kinks in steel, or significant fuzzing in synthetic rope. A 10% reduction in rope diameter from abrasion can lead to a 50% loss in break strength.
- Step 2: Secure the anchor. Wrap a tree trunk protector around a solid base to prevent ring-barking and protect the wilderness. Connect your line using S-grade rated shackles. Ensure the pin is tightened then backed off a quarter turn so it doesn’t seize under the immense pressure of the pull.
- Step 3: Deploy the dampener. Place a recovery dampener over the line. This is your primary insurance policy against cable recoil. It’s a simple step that saves lives.
- Step 4: The final sweep. Take up the slack until the line is taut. Stop and perform a visual check. Ensure the cable is spooling neatly and every member of the Adventurerz community present is standing at least 1.5 times the length of the cable away.
- Step 5: Execute the pull. Use short, controlled bursts. Keep your eyes on the winch drum and the anchor point throughout the entire process.
Dampening the Line: Why it’s Non-Negotiable
A snapping winch line carries enough kinetic energy to slice through a vehicle body like butter. We use dampeners to absorb this energy and force the line safely to the dirt. The “middle third” rule is our gold standard. Position your dampener in the center third of the line length. If you’re performing a long-distance recovery, use two dampeners for extra security. Forgot your purpose-built bag? A heavy wet blanket or a rubber floor mat works in a pinch, as long as it has enough mass to kill the whip action instantly.
The Controlled Pull: Speed vs. Torque
Winching isn’t a race. We prioritize torque and temperature management over speed every single time. Most electric winches generate massive internal heat. Running one for more than 60 seconds straight can easily exceed 100 degrees Celsius and cook the motor. We recommend a 30-second pull followed by a 60-second rest. Help the winch by putting your vehicle in low range and gently crawling forward to assist the pull. This reduces the load on your battery and motor. Keep the engine running at 2,000 RPM to ensure the alternator supports the 400-amp draw often required for heavy recoveries. Following these safe winching practices for 4×4 keeps the journey going without a trip to the repair shop.
Managing the Exclusion Zone and Communication
When the recovery gear comes out, the excitement levels naturally spike. As Adventurerz, we know that adrenaline must never override safety. Managing the area around a recovery is the most critical part of safe winching practices for 4×4 operations. We must define the “Kill Zone” before the winch motor even turns. This zone is the path the winch line would take if it snapped, including the potential recoil arc. A steel cable or even a synthetic rope under tension carries enough kinetic energy to cause fatal injuries. We apply the 1.5x length rule. Every bystander must stand at least 1.5 times the distance of the exposed winch line away from the vehicles. If you have 20 meters of line out, the crowd stays 30 meters back. No exceptions.
Effective recovery requires one voice. We nominate a single Recovery Lead to coordinate the entire movement. Too many people shouting directions leads to confusion and delayed reactions. The driver should only take instructions from this one designated person. This clarity keeps the operation disciplined and predictable.
Establishing the Safe Zone
Standing directly in front of or behind a vehicle under tension is equally dangerous. Winch lines can clear a 45 degree arc in a split second if a shackle fails. Before we apply tension, we brief every person in the group. This includes managing pets and spectators in busy Australian campsites like those found on Fraser Island. If a curious onlooker wanders too close, we stop the operation immediately. We are responsible for the safety of everyone in the vicinity, not just our own crew.
Communication Protocols
Confusion causes accidents. When engine noise makes talking impossible, we use standardized hand signals. A closed fist held high means “Stop” or “Kill Power” immediately. An open palm moving toward the chest means “Winch In,” while pushing the palm away means “Winch Out.” For complex recoveries in deep scrub, we use UHF radios on a dedicated channel to ensure clear instructions. The “Stop” signal is absolute. If anyone sees a hazard, they signal “Stop,” and the entire operation freezes until the lead gives the all-clear. Following these safe winching practices for 4×4 ensures we all get home to plan the next trip.
Ready to upgrade your camp setup for the next trek? Check out our range of durable 4WD awnings to stay shaded while you prep your gear.
Post-Recovery Gear Care and Maintenance
Once the vehicle is back on solid ground, our work as responsible Adventurerz continues. We don’t just toss muddy gear into the tray and head for the nearest pub. Proper maintenance is a core pillar of safe winching practices for 4×4 owners because neglected gear is a ticking time bomb. We start by disconnecting everything carefully; we never rush this part. If a synthetic rope is caked in mud, it needs a deep clean. Grit and sand particles act like tiny saws inside the rope fibers, causing internal abrasion that can reduce breaking strength by 15% after just a few dusty trips. We wash our ropes in a bucket of fresh water, agitating them to release the silt, and then let them air dry in the shade.
Inspecting for Damage
We run our hands along the entire length of the winch rope to feel for “fuzzing” or hard, melted spots caused by heat friction. Any flat sections indicate the rope has been crushed under extreme load. We check our shackles for “pin-bind,” where the thread becomes difficult to turn, or visible stretching in the bow. Working Load Limit (WLL) defines the maximum weight a component can safely lift or pull, and for recovery gear, we insist on a safety margin of at least 6:1 relative to the vehicle’s GVM.
Spooling for Success
A loose spool is a recipe for disaster. If the rope is wound loosely, it will “dive” or bind between the lower layers under the next heavy load, which can snap the fibers instantly. We use the “neat layer” technique, guiding the rope back and forth across the drum to ensure each wrap sits snugly against the next. This requires at least 250kg of tension to pack the layers tight enough to prevent binding. While packing up the rest of the site, we ensure our roof top tents are secured before moving to the next camp.
Storage is the final step in safe winching practices for 4×4 longevity. We store our recovery kits in heavy-duty, breathable bags to prevent rot and UV damage. Synthetic fibers can lose 40% of their integrity if exposed to the harsh Australian sun for 12 months. By keeping our gear clean, dry, and organized, we ensure that when the tribe hits the tracks again, we are ready for whatever the wilderness throws at us. Maintenance isn’t just a chore; it’s a commitment to the safety of every traveler on the trail.
Master Your Recovery and Hit the Tracks with Confidence
Mastering safe winching practices for 4×4 ensures you return home safely after every bush excursion. We’ve broken down the critical 1.5 times weight-to-pull ratio required for reliable recoveries and the necessity of maintaining a clear exclusion zone. These steps represent our community-tested recovery protocols, refined through years of navigating the Simpson Desert and the Victorian High Country. Don’t forget that your gear’s performance depends on that final post-trip inspection. Australian safety standards recommend checking synthetic ropes for abrasion every 6 months to prevent unexpected failure during a heavy pull. By respecting the physics of your winch and the fragility of our tracks, we keep the Australian wilderness accessible for everyone. We’re all in this together, exploring with a commitment to sustainable “Leave No Trace” principles that protect our 8,000 plus native plant species. Let’s keep our rigs ready and our environment pristine for the next generation of Adventurerz.
Our team provides expert reviews of Australian-spec recovery gear to help you make informed decisions before you head off-the-grid. Join the Adventurerz community for more expert 4WD tips and gear reviews!
We’ll see you out on the tracks, ready for the next big challenge!
Frequently Asked Questions
Is a synthetic winch rope safer than a steel cable?
Synthetic winch rope is significantly safer than steel because it stores 70% less kinetic energy under tension. If a synthetic line breaks, it typically loses its energy and drops to the ground. Steel cables can whip back with enough force to cause severe injury. Most Adventurerz prefer synthetic because it is 80% lighter and doesn’t develop the sharp burrs that often cut hands during handling.
How do I know if my recovery point is actually ‘rated’?
A rated recovery point must have a Working Load Limit (WLL) or Minimum Breaking Strength (MBS) stamped directly into the metal. Look for a specific number like 4,750kg or 8,000kg. We never use factory tie-down points for recovery because they are only designed for securing a vehicle during shipping. If there is no visible rating or manufacturer’s part number, it’s not a safe point for recovery.
Can I use a snatch strap and a winch together in a recovery?
You should never use a kinetic snatch strap as an extension for a winch pull. Mixing these tools creates unpredictable recoil if a component fails, which violates 100% of safe winching practices for 4×4. Instead, use a non-stretch static extension strap. These are designed to handle the steady tension of a winch without the dangerous “slingshot” effect of kinetic gear.
What should I do if my winch rope snaps during a pull?
Stop the operation immediately and ensure everyone stays at least 15 meters away while you assess the damage. You can often perform a field repair on synthetic rope by using a 12-strand bury splice. This technique restores about 90% of the original breaking strength. Always carry a basic splicing kit so you don’t end up stranded in the Australian bush after a gear failure.
How much weight can a standard 9,500lb winch actually pull in mud?
A 9,500lb winch provides 4,309kg of pulling power on the first layer of the drum, but this capacity drops by 10% for every additional layer of rope. Deep mud creates a suction effect that can increase the effective weight of your 2,500kg 4WD by up to 200%. We find that a single line pull often stalls in these conditions, making a snatch block essential to double your mechanical advantage.
Do I really need a snatch block for every recovery?
You don’t need a snatch block for every situation, but you should use one whenever the pull exceeds 50% of your winch’s rated capacity. Using a block redirects the load and allows the winch motor to run cooler, which preserves your battery life. It’s an essential part of safe winching practices for 4×4 when you are performing an angled pull or recovering a heavily loaded vehicle.
How do I clean a synthetic winch rope after a muddy trip?
Clean your rope by unspooling it completely and agitating it in a bucket of fresh, lukewarm water. Do not use a pressure washer or harsh chemicals, as these can force 100% of the grit into the inner core and degrade the fibers. Once the water runs clear, hang the rope in a shaded area to dry. Sand and salt are the biggest enemies of your gear, so we recommend cleaning after every coastal or muddy trip.
Is it safe to winch if I am traveling solo?
Winching solo is safe as long as you use a wireless remote and maintain a clear line of sight to the recovery. Ensure you have a high-quality ground anchor or a tree trunk protector if you’re in a treeless environment. 40% of solo recovery accidents happen because the driver tries to steer while operating a wired remote. We always set the wheels straight and use slow, controlled pulses to move the vehicle safely.