A hole in your roof top tent doesn’t automatically mean it needs replacing. For a small hole, clean and fully dry the fabric, then apply a compatible repair patch that extends at least one inch beyond the damage on every side. Let the patch cure for at least two hours before stressing the fabric, and wait a day before packing the tent away.
A repair should hold up beyond the next night away. Knowing how to patch a hole in a roof top tent means matching supplies to the fabric, choosing between an adhesive patch and sewing, and allowing enough time for the repair to set. Repair tape can provide a temporary fix, while long rips along seams or major damage may need professional attention.
This guide explains what to gather, how to prepare the tent surface, and how to apply and cure a patch. It also covers when to reinforce a tear from both sides, helping you make a considered decision before your next Australian adventure.
Key Takeaways
- Match the repair method to the damage: adhesive patches suit small holes, while long seam rips and major damage may need an experienced repairer.
- Clean dirt and build-up from both sides of the fabric, then let it dry fully before applying a patch.
- For a tear in a high-tension area, reinforce the fabric with patches on both the inside and outside.
- Choose seam sealer to suit the tent’s silicone or polyurethane treatment, and allow repairs time to cure before packing or stressing the fabric.
- Gather the right materials for the job, including a mesh repair kit for mesh damage and suitable repair tape or fabric patches for canvas.
Table of Contents
Choosing between adhesive and sewing repairs
Choose a repair method to suit the fabric, tear location and extent of damage. For polyester or nylon fly fabric, use a compatible tent repair patch. To preserve the rainfly’s waterproofing, patch clean, dry fabric and choose seam sealer that matches its coating.
- Identify the material and inspect the tear before choosing supplies. Check the tent’s care information, then match the patch to canvas, mesh or coated fly fabric. A small hole in an intact panel is different from a rip that reaches a seam. Knowing how to patch a hole in a roof top tent starts with matching the materials, not simply grabbing the strongest adhesive.
-
Sew or Glue a Canvas Patch
Use a canvas repair kit for canvas damage, with a patch, needle, thread and fabric cement as needed. Cut the patch about 25 mm larger than the tear on every side, then sew it or bond it using the kit’s directions. Avoid treating contact adhesive as a permanent canvas repair. In a tested repair, a kit patch was held under a weight for 20 minutes while the surfaces bonded.
-
Apply Temporary Repair Tape
Use cloth repair tape as a temporary field fix if canvas tears during a trip. Apply it over the damage to hold the fabric until you can arrange a lasting repair. Don’t rely on tape permanently, especially where a seam or high-tension area keeps pulling. It can protect the tent during travel, but it won’t replace a proper repair.
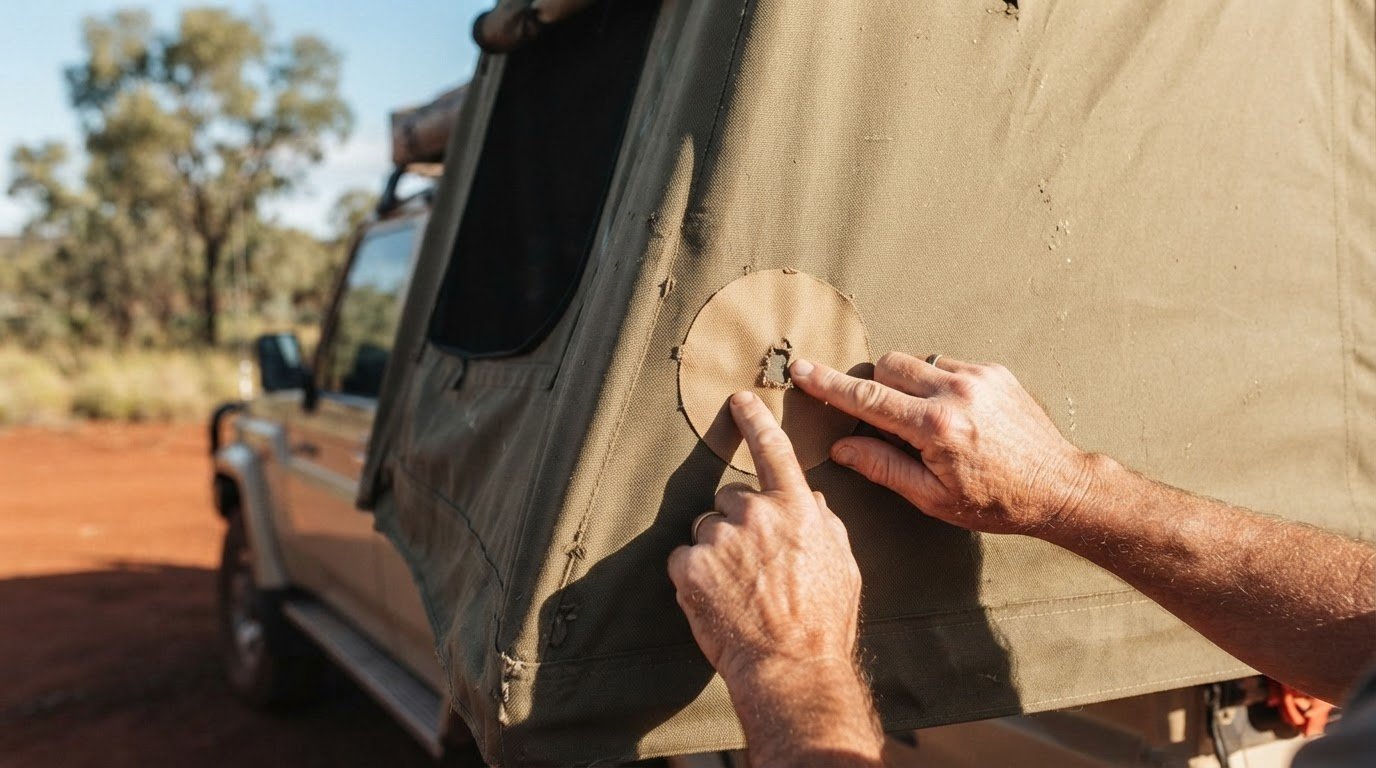
- For a small hole, cut a round repair-tape patch one inch wider in diameter than the opening. Round the corners into a circle, centre the patch over the hole and press it for approximately 30 seconds. Confirm the tape suits the fly fabric. A waterproof rainfly also needs compatible seam sealer where seam damage is present; a patch alone won’t seal a separate seam opening.
- Arrange professional repair for a long rip along a seam, a broken zip or a torn clear vinyl window. Major damage may need an experienced technician with an industrial-grade sewing machine. If the fabric is fraying around the hole, a simple adhesive patch may not hold the edges together. Arrange repair before further stretching or folding worsens the tear.
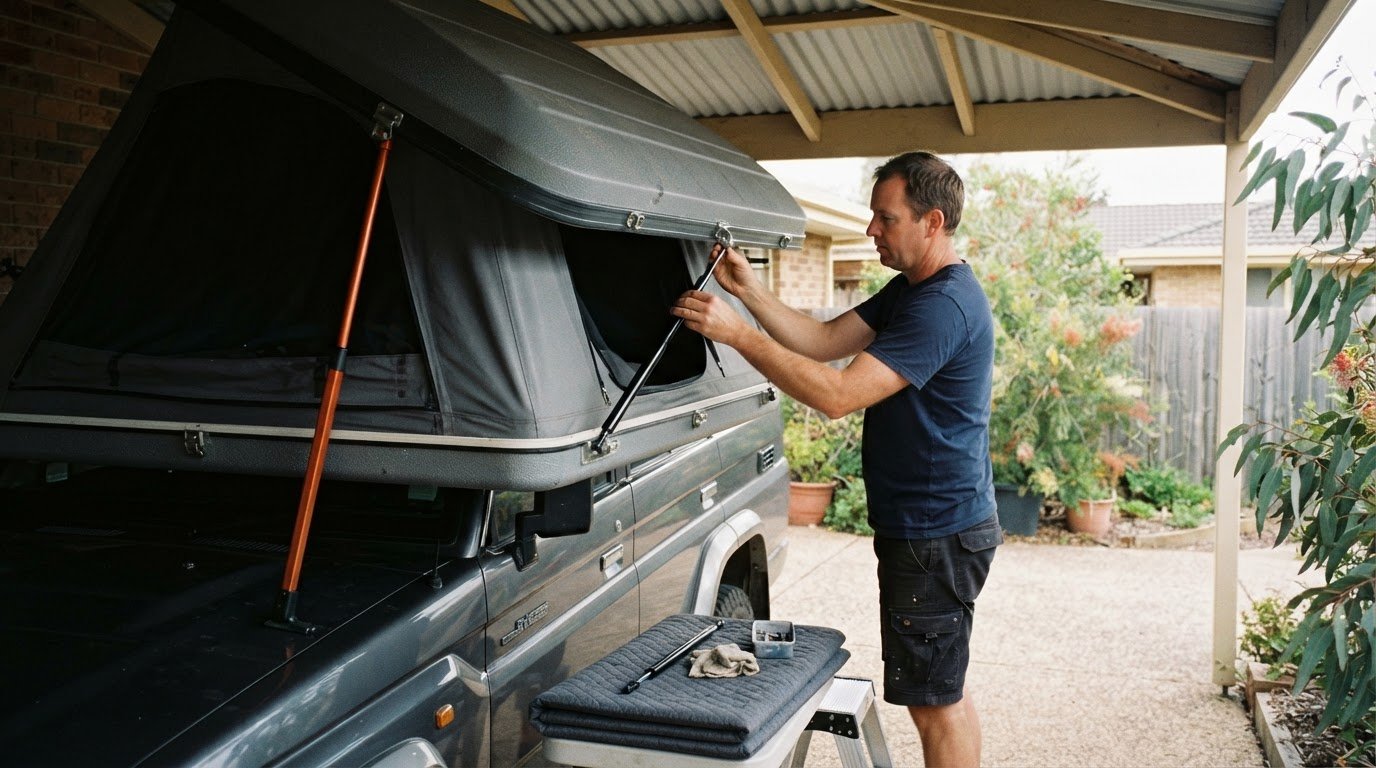
- Work safely around a vehicle-mounted tent. Park on stable, level ground, secure the vehicle and avoid climbing onto an unstable roof or working beside traffic. Keep adhesives away from flames and follow their handling instructions. If reaching the roof requires unsafe access, lower the tent or leave the repair to a technician. A careful plan for how to patch a hole in a roof top tent includes safe access as well as suitable materials.
Allowing the patch to cure
Give every repair time to bond before loading, folding or storing the tent. Let a patch cure for at least two hours before stressing the fabric, and wait a day before packing the tent away.
- Start the cure period once the patch is fully applied and smoothed into place. Note the application time so you can track the two-hour minimum accurately. During this period, don’t pull the fabric taut, fold it or test the patch, as movement can disturb the bond before it sets.
- Keep the repaired panel relaxed for at least two hours before putting it under tension. This is the minimum curing time before stressing the fabric, not a signal that it’s ready to pack. If the patch is on a fly stretched across its frame, leave the repaired area undisturbed while the adhesive cures.
- Wait a day before packing a patched tent away. Even after the two-hour cure period, folding the fabric can press the repair against itself or crease its edges. Leave the tent open with the repaired section accessible until the full waiting period has passed.
- Give mesh repair stickers the same pause before storage: wait at least a day before packing the tent away. Keep the mesh flat rather than stretching the opening to inspect the sticker. Once the waiting period has passed, handle the panel gently as you fold it.
- For seam sealer, leave the tent set up to dry for at least a day. An open, assembled tent keeps the treated seam accessible and prevents damp sealer from being folded into the fabric. This drying period is separate from the two-hour minimum for a repair patch.
- When a repair involves more than one method, plan around the longest relevant waiting period. For example, if you patch a hole and seal a seam, keep the tent set up for at least a day before storing it. This allows for the stated drying period for seam sealer and the wait before packing a patched tent.
- After the waiting period, inspect the repair without pulling hard on the fabric. Look for lifted edges or areas that haven’t bonded. If the patch has shifted, don’t fold the tent away as though the repair has succeeded. Address the problem before your next trip.
Cleaning the fabric before patching
Prepare the damaged panel before applying adhesive or a fabric patch. Dirt, residue and moisture around the opening can interfere with the repair, so clean both sides and allow the fabric to dry fully.
- Set up the tent so you can reach both sides of the damaged panel. Open the fly or release fabric tension where possible, then place the area on a clean, stable surface. This lets you clean without dragging the hole across grit or rough ground.
- Inspect the fabric around the hole before wiping it. Look for dust, mud, oily marks or loose fibres that could end up beneath the patch. Check both sides, since grime on either face can become trapped when you seal the repair.
- Use a clean cloth to gently wipe the fabric around the tear. Work gently from the clean outer area towards the damage instead of pushing dirt into the opening. Clean only the patch area and avoid soaking the surrounding panel.
- Clean the inside as well as the outside. A patch applied from either direction needs a clean surface, and a two-sided repair needs both faces prepared. For example, wipe around the interior edge first, then use a clean part of the cloth on the outer face.
- Remove visible dirt and build-up without pulling at the hole’s edges. On mesh, use light pressure to keep the strands aligned; on canvas, wipe rather than scraping the weave. If residue remains, repeat the gentle wipe instead of patching over it.
- Let the cleaned fabric dry fully before patching. Check by sight and touch, including the inside face and the edges of the tear. Dampness can compromise the repair surface, so allow more time if the cloth or fabric still feels wet.
- Keep the clean panel clear while it dries. Don’t let it touch dusty ground, a muddy boot or the vehicle’s roof, where fresh dirt could undo your preparation. If the fabric brushes against a dirty surface, clean the spot again and let it dry.
- Check the prepared area before opening the patch backing or applying adhesive. Look for grit, loose fibres and moisture on both sides. Cleaning first also makes the full shape of the tear easier to see, so you can position the patch without missing hidden damage.
- Once the fabric is clean and dry, keep the patch area flat and undisturbed while preparing the repair material. Avoid touching the cleaned surface with dirty fingers, especially around the edges where the adhesive must bond with the tent fabric.
Adding an interior patch for high-tension tears
For a tear near a pole or another high-tension area, patch both sides. Keep the fabric relaxed during application to limit further tearing. After curing, check for leaks with a gentle water spray and inspect the inside for moisture.
- Locate the tear in relation to poles, seams and attachment points. These areas can put extra strain on the fabric, so a single exterior patch may not provide enough reinforcement. If the rip runs along a seam or the surrounding fabric is badly frayed, arrange an experienced repair rather than stretching the damage further.
- Prepare a fabric patch that extends at least one inch beyond the hole on every side. This gives the patch enough contact with intact fabric around the opening. Choose a smooth shape without sharp corners that could catch as the tent fabric moves.
- Position the first patch over the hole on the inside of the tent. Centre it carefully, then smooth it with the back of a spoon, pressing from edge to edge. Work outwards so the patch lies flat against the fabric without folds across the tear.
- Reinforce the first patch on both sides before adding the second patch. Press along the patch edges and check that the fabric remains flat around the hole. This step matters near a pole, where tension can pull at the repair from more than one direction.
- Apply the second patch to the outside, centred over the same opening. Align its edges with the interior patch and smooth it from the middle towards the perimeter. Don’t pull the panel tight while positioning either patch, as tension can shift the repair or distort the hole.
- Leave the repaired area relaxed while the adhesive bonds. Don’t fold the panel, tension the fly or tug at the patch edges during curing. If the tear is beside a pole sleeve, keep the pole from pressing against the repair until the patch has set.
- Inspect the completed repair for lifted edges, exposed parts of the tear or wrinkles that could channel water. Once the patch has cured, gently spray water over the outside and check inside for dampness. Avoid forceful spraying, which may stress the repair rather than reveal an ordinary leak.
- Reduce strain during the next setup by easing the tent fabric into position instead of pulling hard on the patched panel. Check the repair after packing and unpacking, especially near poles or attachment points. If an edge lifts or moisture appears inside, stop stressing the area and have the damage assessed before relying on the tent in wet conditions.
Supplies for patching a tent hole
Match repair materials to the damaged fabric and the job. A canvas kit, mesh kit, adhesive patch and seam sealer each address different problems.
- Identify whether the damaged panel is canvas, mesh or coated fly fabric before gathering supplies. Canvas needs a suitable fabric patch and may call for a needle, thread or fabric cement. Mesh needs a mesh repair kit. A patch that doesn’t suit the material may not bond securely.
- For canvas, gather a canvas repair kit with patches, a needle, thread and fabric cement. These components allow you to sew a patch or bond it with fabric cement. Cut the patch about 25 mm larger than the tear on all sides, leaving repair material around the damaged area.
- For small holes, keep tent repair tape that’s compatible with the fly fabric. Cut a round piece one inch wider in diameter than the hole, then round its corners. The extra coverage helps the patch extend beyond the opening, while rounded edges reduce the chance of corners catching.
- Pack a mesh repair kit for mesh panels rather than relying on canvas supplies. Centre a mesh patch over the hole before pressing it into place. A solid patch can cover a mesh hole if a mesh patch isn’t available, but it won’t look as neat.
- Choose seam sealer to match the tent’s silicone or polyurethane treatment. Each treatment needs a compatible sealer, so match the product to the fabric rather than choosing at random. Use seam sealer on seams, not as a substitute for a patch over a hole.
- Include basic cleaning and application supplies in your repair kit: a clean cloth, rubbing alcohol, scissors and something to press the patch. Clean the area with rubbing alcohol and let it dry fully before applying adhesive. Scissors help shape tape, and firm, even pressure helps the patch make contact.
- Keep repair materials together in a dry, organised pouch, with each patch type easy to identify. Separate mesh patches from canvas patches and keep fabric cement with its kit. Before a trip, make sure the supplies suit your tent panels, not just an unrelated groundsheet.
- For a broader gear decision after sorting your repair kit, explore roof top tent recommendations alongside your existing setup. A repair pouch is most useful when its contents match the tent’s actual fabric and likely damage points.
Adventurerz: Roof top tents reviews and recommendations
Adventurerz offers roof top tent reviews and recommendations to help you assess your setup and plan future trips. After repairing a hole, use these gear insights to consider whether your current tent suits your travel needs or whether you’re weighing a different configuration.
Adventurerz also covers 4WD awnings, camping equipment and hiking equipment, connecting tent choices with the rest of your kit. For Australian adventures, that broader perspective can help you think through shelter, camp setup and equipment needs together, rather than choosing each item in isolation.
For roof top tent and outdoor gear guidance, explore Adventurerz’s reviews and recommendations.
Get Your Setup Ready for the Next Trip
A repaired tent is a good opportunity to consider how your shelter fits the way you travel. Think about the terrain, weather exposure and camp routine you expect on your next Australian trip. These factors can shape what you prioritise in a roof top tent and the rest of your setup.
Knowing how to patch a hole in a roof top tent can help you make a more informed call when damage appears. For future gear decisions, Adventurerz offers roof top tent reviews and recommendations, alongside coverage of camping equipment and 4WD awnings. Use those insights to plan thoughtfully and keep your outdoor kit suited to the journeys ahead.
If you’d like to discuss roof top tent recommendations, contact Adventurerz. Keep exploring, care for your gear, and enjoy the next stretch of track!
Frequently Asked Questions
Camping Tents 101: Patch the Hole or Buy a New One?
Patch an isolated hole if the surrounding fabric is sound; consider replacement if the tent shows widespread wear. Severe fading or fraying around seams, grommets, air vents or the ground sheet may indicate damage beyond one repairable spot. A small puncture in otherwise intact canvas, for example, is different from fabric breaking down at several stress points.
How do you identify the material of a rooftop tent and choose the right repair method?
Check the tent’s care label or manufacturer information for the fabric and coating, then match the repair material to them. Canvas, mesh and coated fly fabrics need different patching approaches. If the label is missing, compare the damaged panel with an undamaged section and avoid applying an unfamiliar adhesive to a visible area. A small test on a hidden spot can reveal unwanted effects.
How do you patch a hole in a canvas rooftop tent step by step?
For canvas, check first that the tear has clean, stable edges and the surrounding weave isn’t extensively frayed. Cut a patch from a canvas repair kit with coverage beyond the damage, then sew it or bond it with fabric cement intended for the kit. Keep the fabric flat so the patch doesn’t bridge a fold. Near a pole, reinforce both sides rather than relying on one patch.
Which tent repair tapes, adhesives, and sealants are compatible with rooftop tent fabrics?
Use a patch or adhesive labelled for the tent’s fabric, and match seam sealer to its silicone or polyurethane treatment. These products aren’t interchangeable just because they’re all used for tent repairs. A sealer for a polyurethane-treated seam, for instance, may not suit silicone-treated fabric. Check product directions and the tent’s care information before applying anything to a visible panel.
How large a hole can be repaired with a DIY patch, and when is professional repair needed?
There’s no universal hole-size cutoff for a DIY repair: fabric condition, tear shape and location matter too. A small, isolated puncture in intact fabric is a better candidate for patching than a rip that reaches a seam or keeps spreading. Seek an experienced tent repairer for long seam damage, broken zips or torn clear vinyl windows, which may need specialised sewing equipment.
How long should rooftop tent patches and adhesives cure before packing or camping?
Let a repair patch cure for at least two hours before stressing the fabric, and wait a day before packing the tent away. Seam sealer needs the tent to remain set up while it dries for at least a day. Product instructions may give additional directions, so follow the longest applicable waiting period. Don’t take the tent camping while an adhesive or sealer is still curing.
How much does rooftop tent fabric repair cost in Australia, and where can you get it repaired?
Repair costs depend on the damage, fabric and work required, so a small patch and a torn seam aren’t equivalent jobs. For substantial damage, use an experienced tent repair technician; broken zips and torn clear vinyl windows may need industrial-grade sewing. Adventurerz provides roof top tent reviews and recommendations to support gear research, rather than carrying out tent repairs.